
環境構築
1. Laravelの構築
筆者は、MacoBookを使用しております。
Dockerは使用せずに進めています。
1. Laravelの構築
今回は、2025年2月リリースされたLaravel12 を使用します。
Laravelのドキュメントなどは以下のサイトに記載されています。
Laravelの公式サイトへ
1-1. Laravel と PHP のバージョンの互換性
Laravelのバージョンによって使用できるPHPのバージョンも決まっています。
本サイトは、Laravel12 はPHPのバージョンは 8.2〜8.4で動作しますので、既にPHPがインストールされ8.2以前の場合は更新してください。
1-2. PHPをインストール
PHPのインストールは、コマンドをたたき行います。
コマンドは以下のようにLaravelの公式サイトに記載されています。
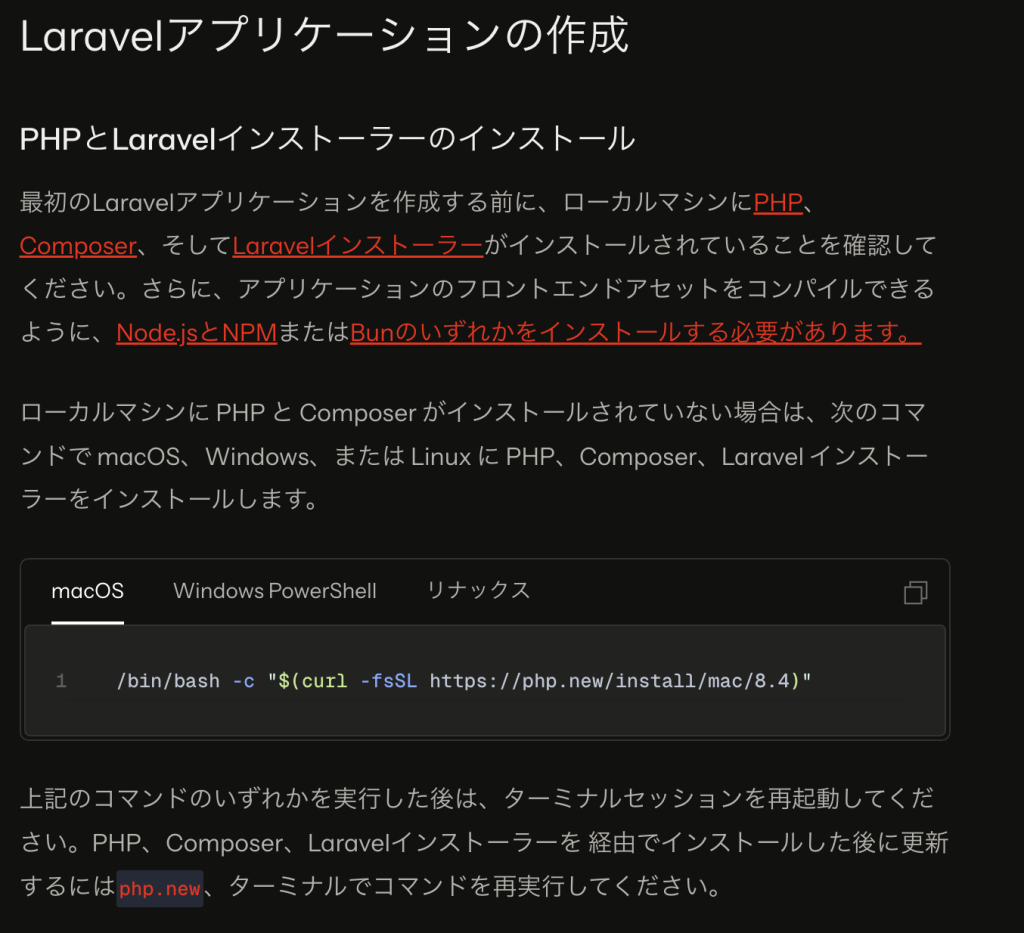
コマンド(MacBook)
/bin/bash -c "$(curl -fsSL https://php.new/install/mac/8.4)"※使用されているPC端末の管理者権限で行う必要があります。
インストールが完了したら、以下のコマンドでPHPのバージョンを確認することができます。
php -v1-3. Composerをインストール
Composerは、PHPのパッケージ管理プログラムであり、Laravelが利用できるようになります。

macOSの場合で既にPHPが以下のコマンドでインストールできます。
上記画像の「Download」を押下すると以下の画面に遷移し、コマンドが表示されますので、こちらを実行します。
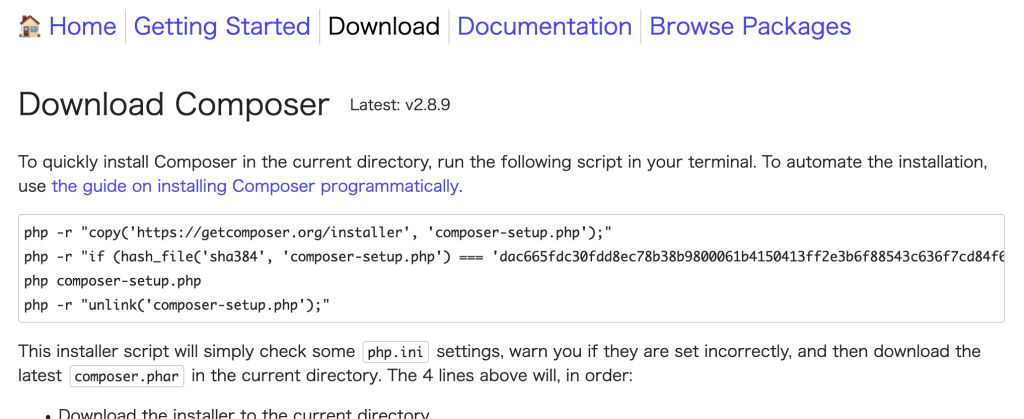
php -r "copy('https://getcomposer.org/installer', 'composer-setup.php');"
php -r "if (hash_file('sha384', 'composer-setup.php') === 'dac665fdc30fdd8ec78b38b9800061b4150413ff2e3b6f88543c636f7cd84f6db9189d43a81e5503cda447da73c7e5b6') { echo 'Installer verified'.PHP_EOL; } else { echo 'Installer corrupt'.PHP_EOL; unlink('composer-setup.php'); exit(1); }"
php composer-setup.php
php -r "unlink('composer-setup.php');"
インストールが完了したら、以下のコマンドでPHPのバージョンを確認することができます。
composer --version1-4. Laravelをインストール
Laravelのインストールを行うコマンドは以下です。
composer global require laravel/installer※時間がかかります。
Laravelの作成
1. プロジェクトの作成
2. Laravelの構成
3. 必要なプログラムの作成
4. サーバーで実行
5. デプロイ
1. プロジェクトの作成
プロジェクトとは、アプリケーションで必要となるファイルやフォルダ一式をまとめたものです。
1-1. プロジェクトの作成(コマンド編)
プロジェクトを作成するには、まずフォルダを作成する必要があります。
今回は、デスクトップにプロジェクトを作成します。
① VSCodeのターミナルを開き、まずcdコマンドでデスクトップに移動します。
cd desktop② 以下のコマンドで、プロジェクトを作成します。
ここでは、demo-laravelapp という名前で作成します。
laravel new demo-laravelapp③ スターターキットと呼ばれるものを選択します。
今回はデフォルトの None を選択します。

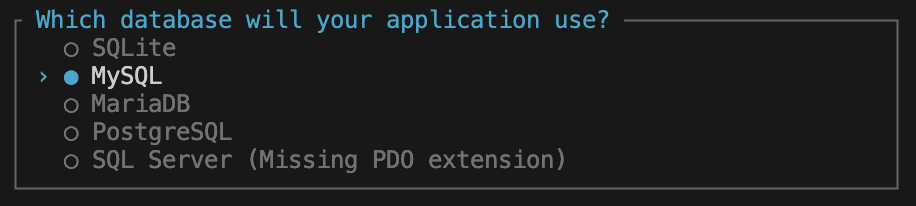
④ 使用するDBを選択します。
今回は、SQLite を選択します。
⑤ JavaScriptのパッケージマネージャのnpmをインストールとビルド作業に関するものでYesを選択します。

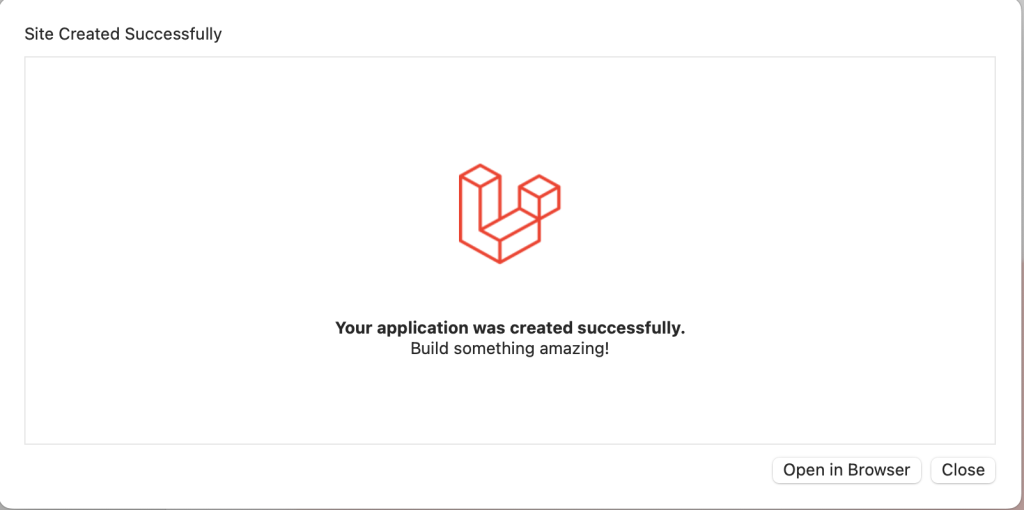
⑥ 以下のように表示されたら、完了です。

上記の画像で2つコマンドが表示されています。
cdコマンドで、プロジェクトのフォルダ内に移動します。
cd demo-laravelapp開発サーバーでアプリケーションを実行することができます。
composer run dev
以下のURLをブラウザのアドレスバーに入力すると、Laravelにアクセスすることができます。
http://localhost:5173/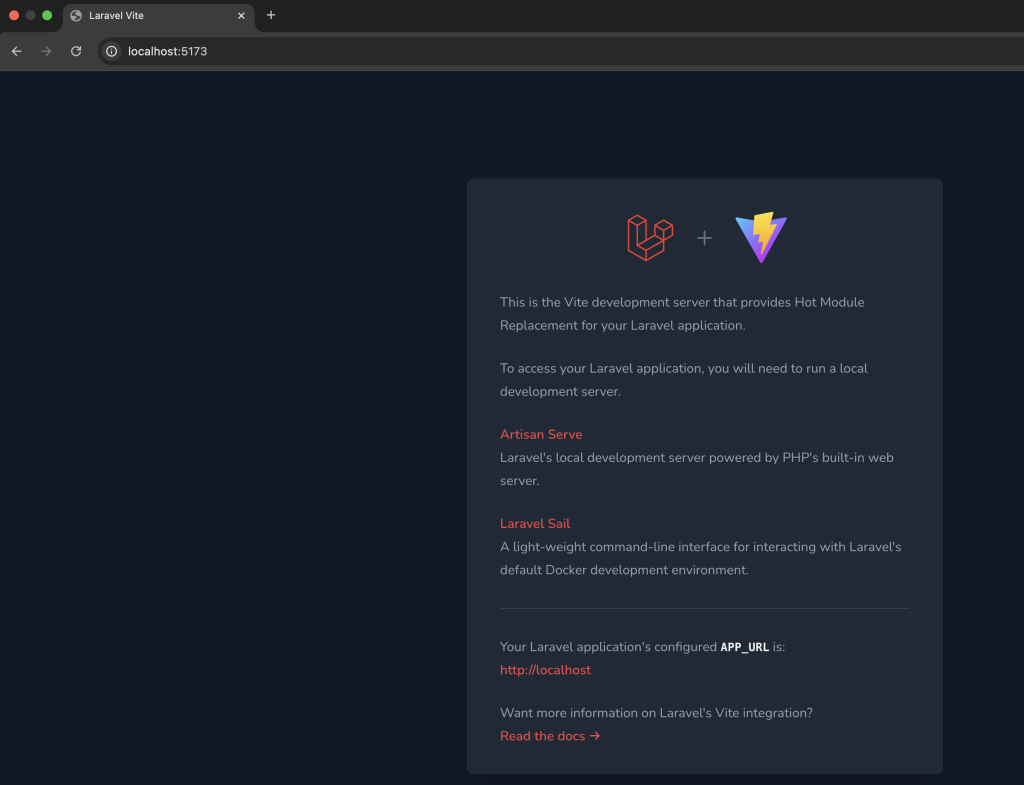
なお、サーバーを停止するには、「control」+「c」を押下します。
1-2. プロジェクトの作成(Herd編)
Laravelはコマンドを使用することなくプロジェクトを作成することができます。
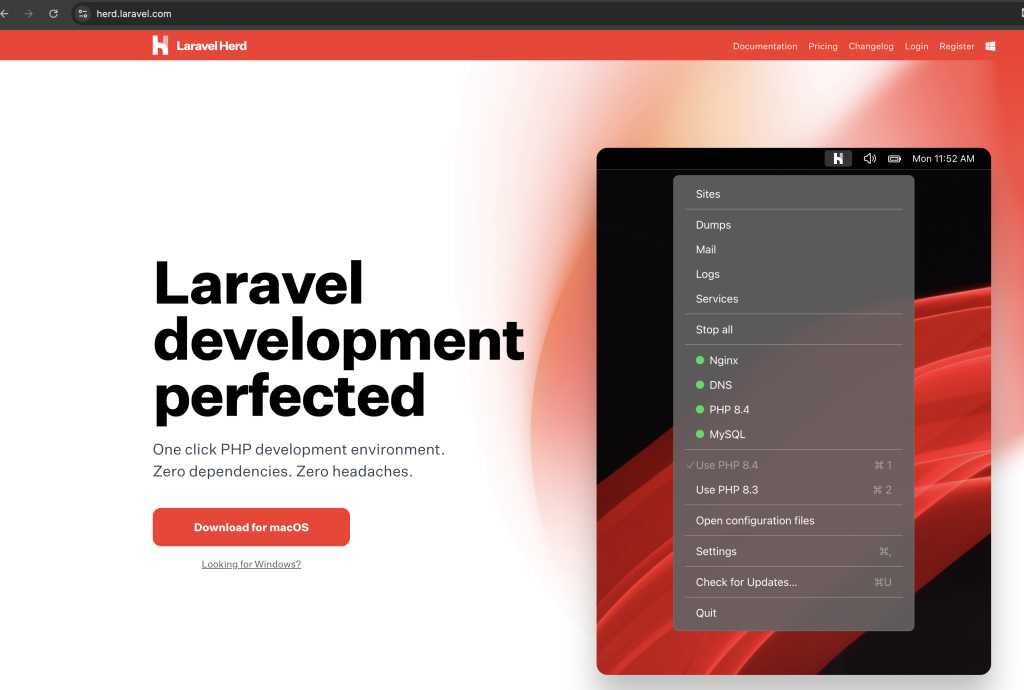
「Herd」は、LaravelおよびPHPの開発環境を管理するツールであり、これをインストールするだけで、PHP、開発用サーバー(nginx)、サーバープログラム開発のフレームワーク(Node.js)など一式が用意されており、プロジェクトの作成や管理も行うことができます。
① Herd は以下のURLで配布されています。
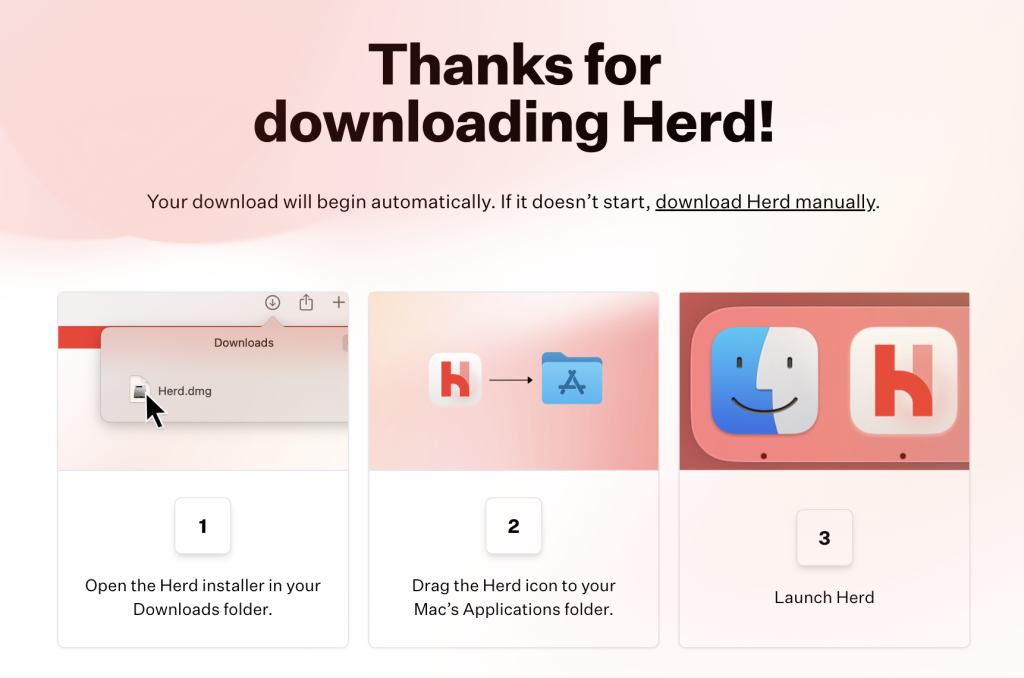
https://herd.laravel.com/「Download for macOS」のボタンを押下するとインストーラーをダウンロードできます。
② ダウンロードしたインストーラーを起動します。
③ 完了したら、Herdを起動します。
④ 「Continue」を押下するとパスワードを求められるので、入力します。
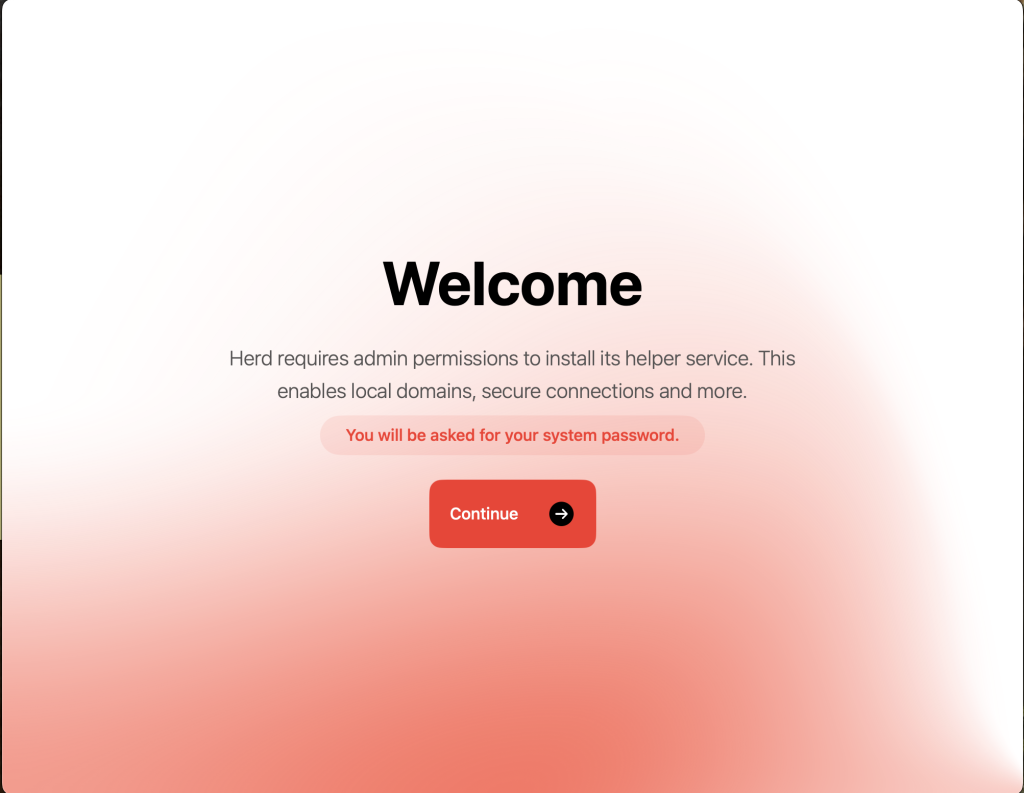
入力が完了すると、PHPのインストールされます。
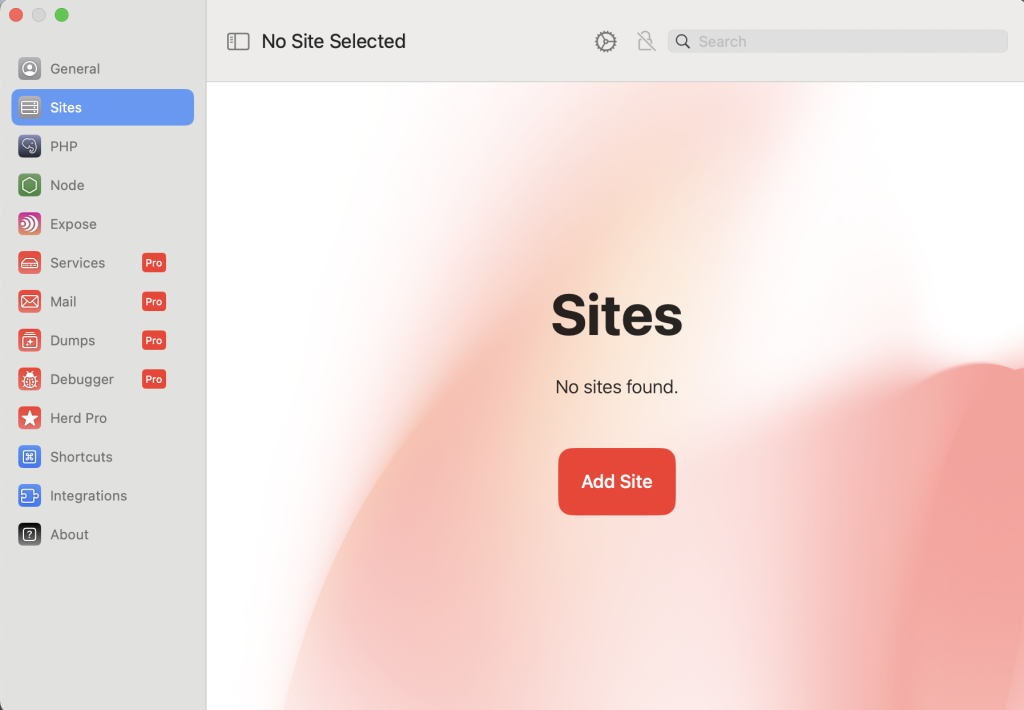
⑤ Herdの起動画面が表示され、完了です。
「Add Site」を押下するとプロジェクトを作成できます。
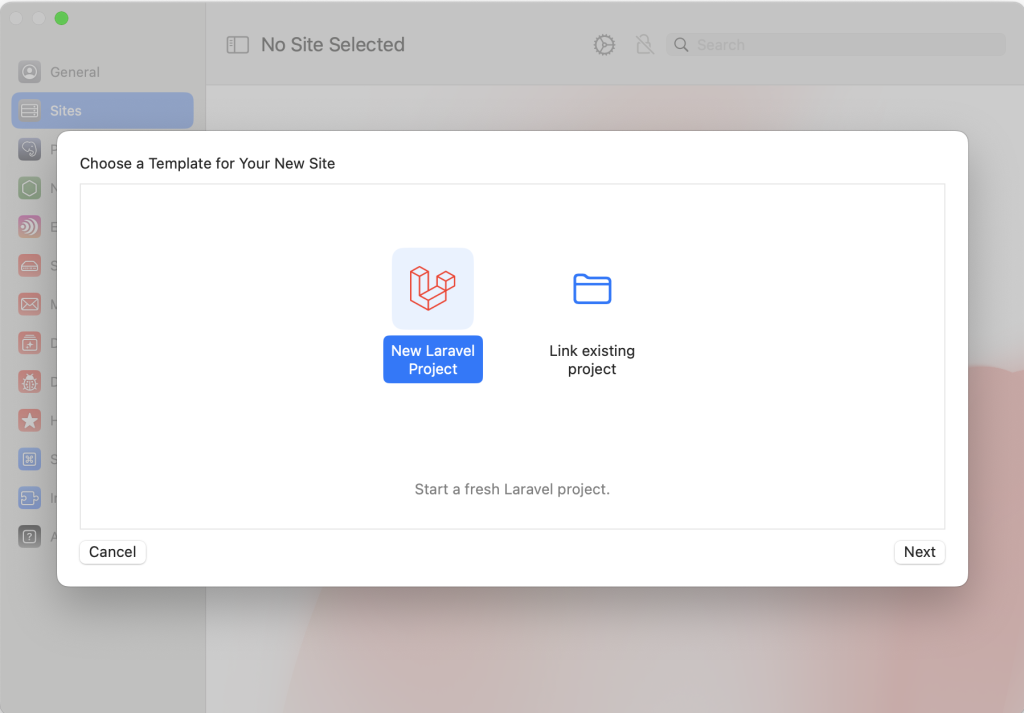
⑥ 以下のように表示されます。今回は新規作成なので、「New Laravel Project」を選択し「Next」を押下します。
| New Laravel Project | 新規プロジェクトを作成 |
| Link existing project | 既にあるプロジェクトをリンク |
⑦ フロントエンドのフレームワークのスターターキットを選択し「Next」を押下します。
ここでは、No Starter Kit を選択します。

⑧ Project Name と Project Path を入力します。
Project Nameは、今回は demo-laravelapp とします。

プロジェクトの作成が開始され、時間を要します。
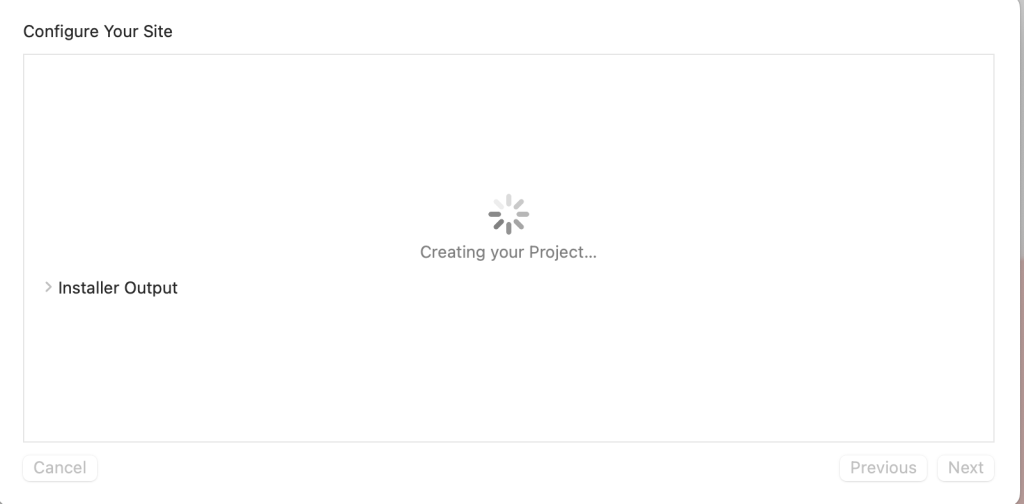
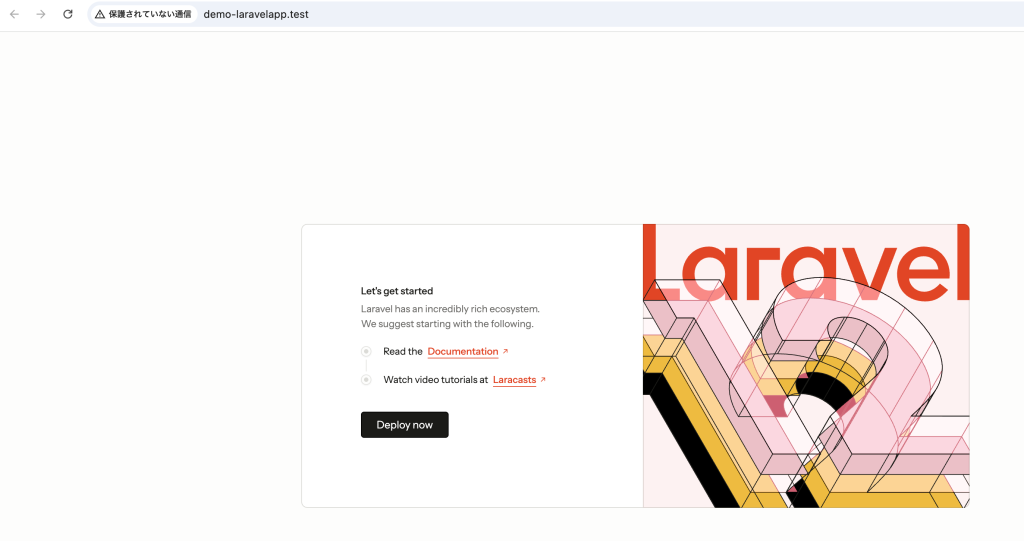
完了すると、以下のようになります。Closeを押下します。
⑨ 作成されたプロジェクトが確認できます。

URLを押下すると、ブラウザで確認することができます。
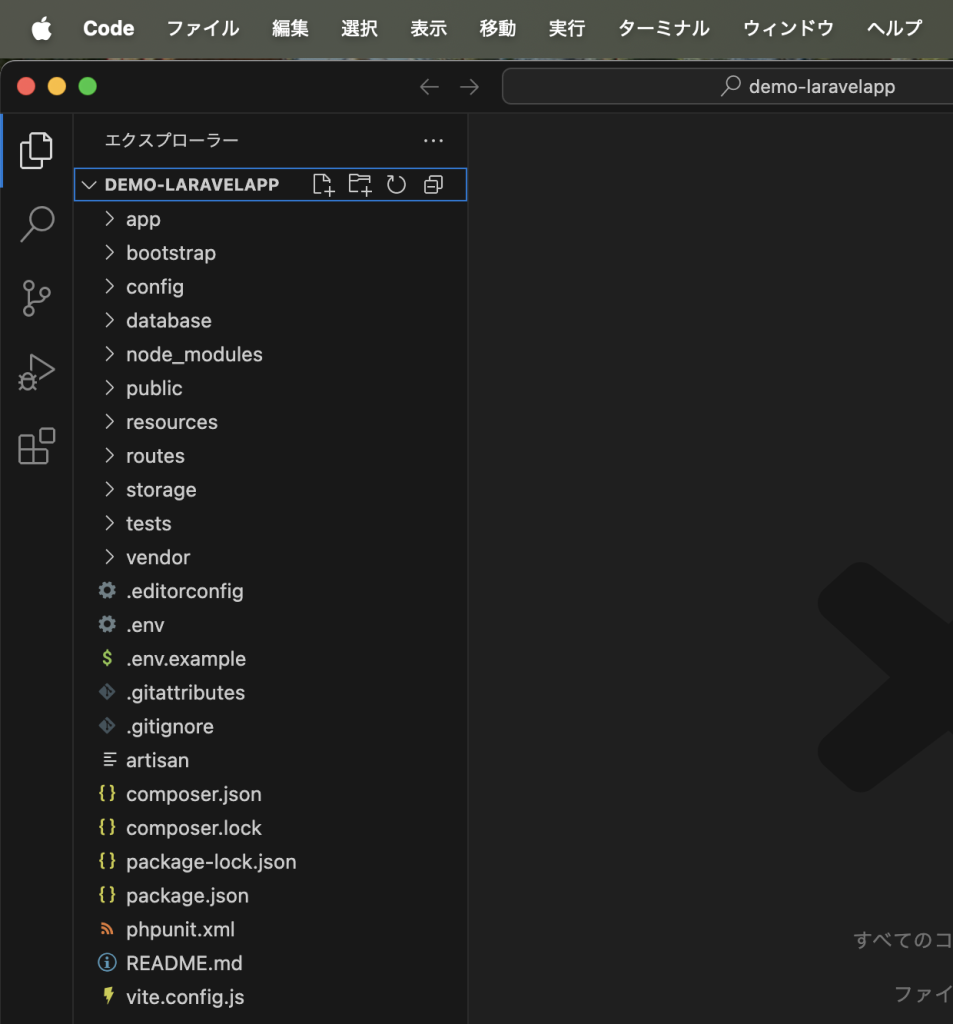
⑩ VSCodeで作成したプロジェクトを開きます。
ユーザ名/Herd/demo-laravelapp
以降、Herdで作成したプロジェクトを使用していきます。
2. Laravelの構成
2-1. Laravelのファイルについて
Laravelでプロジェクトを作成すると、以下のファイルが自動生成されます。
これらは、プロジェクトやパッケージを管理するツール、composer関係のファイルなどがあります。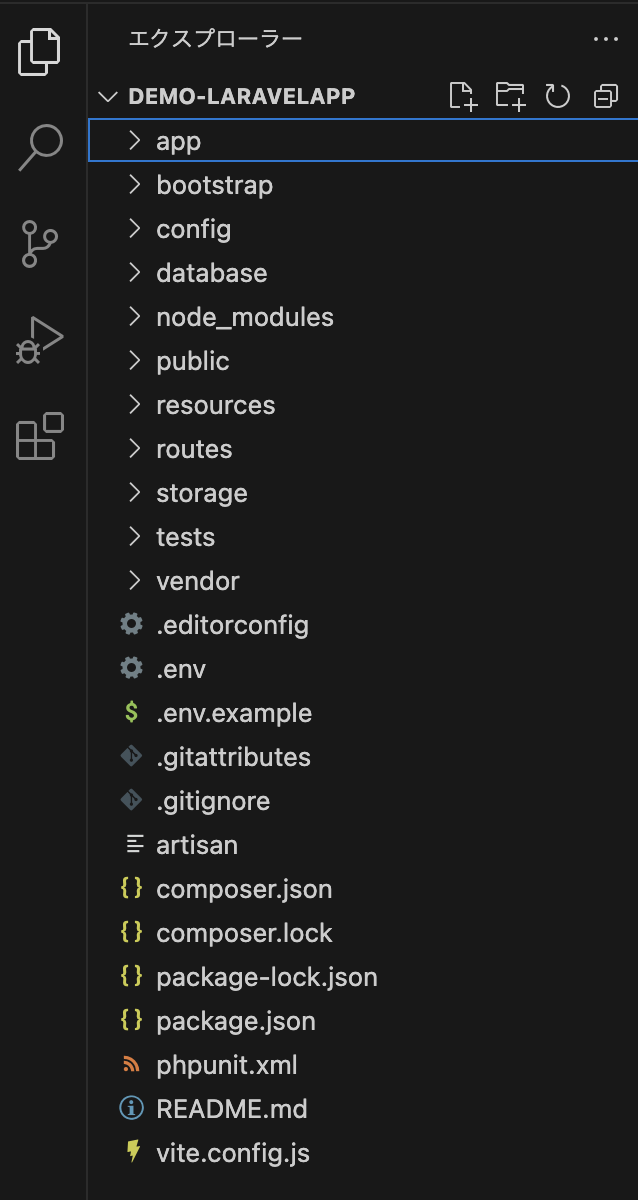
| env, env.example | 動作環境に関する設定情報 |
| .gitatttriveutes, .gitgnore | git利用に関する情報 |
| .rnd | OpenSSLで使用されるファイル(Httpsのみ) |
| artisan | artisanコマンド |
| composer.json, composer.lock | composer利用に関するもの |
| package.json | パッケージ管理ツール「npm」の設定 |
| phpunit.json | ユニットテスト「PHPUnit」の設定 |
| readme.md | READMEファイル |
| vite.config.json | ビルドツール「Vite」の設定 |
2-2. Laravelのフォルダについて
フォルダはそれぞれの役割が決まっており、フォルダの中に必要なファイル類が収められています。
| app | アプリケーションのプログラム部分がまとめられている アプリケーション開発時には、ここに必要なスクリプトファイルを追加していく |
| bootstrap | アプリケーション実行時に最初に行われる処理がまとめられている |
| config | 設定関係のファイルがまとめられている |
| database | データベース関連のファイルがまとめられている |
| public | JavaScriptやスタイルシートなど、外部にそのまま公開されるファイルがまとめられている |
| resources | リソース関係の配置場所 プログラムが利用するリソースファイルが用意されている プログラムのテンプレートファイルなどがある |
| routes | ルート情報の保存場所 アクセスするアドレスに割り当てられるプログラムの情報などが記されている |
| storage | ファイルの保存場所 アプリケーションのプログラムが保存するファイルなどが置かれる(ログファイルなど) |
| tests | ユニットテスト関係のファイルが用意される |
| vendor | フレームワーク本体のプログラムがまとめられている |
2-2-1. app フォルダ
Laravelのプログラムファイルを作成していく中で、appフォルダにプログラムファイルを格納していきます。
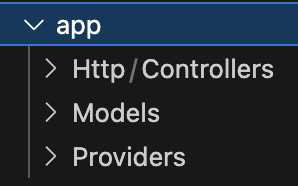
| Http | Webアプリケーションにアクセスした時の処理をまとめておくところ アプリケーションの基本的なプログラムはここに作成する |
| Models | データベース関係のプログラムを配置するところ |
| Providers | プロバイダープログラムを配置するところ |
2-2-2. routes フォルダ
Laravelフレームワークを使用せず、XAMMPで開発を行なっていた場合、例えば「webapp」フォルダ内に「index.php」にアクセスするには「http://ホスト名/webapp/index.php」でアクセスすると自動的にそのindex.phpが読み込まれていました。
しかし、Laravelは特定のアドレスにアクセスすると、Laravelのプログラムが実行され、それにより指定のアドレスに割り当てられているような処理や表示などが行われるようになっています。これが「ルーティング」という機能です。
ルート と Controller
1. ルーティング
2. Controller
3. リクエストとレスポンス
4. MVCモデルの概念
1. ルーティング
Laravelアプリケーションにアクセスし何らかの処理を行うには、アドレスと処理を関連つけるルーティングが必要です。
ルーティングは、アクセスを設定している情報を管理する機能です。
※特定のアドレスにアクセスすると、それに対応する処理が呼び出される。(関連付け)
デフォルトでルートの設定を行うためのスクリプトファイルが用意されています。

| console.php | コンソールプログラムのためのルート設定 |
| web.php | 一般的なWebページとしてアクセスするためのルート設定 Webページとして公開するものは全てこのファイルにルート情報を記述する |
1-1. web.phpのルート情報
web.phpにデフォルトで記述されている内容は以下のとおりです。
これは、トップページにアクセスする処理です。
<?php
use Illuminate\Support\Facades\Route;

Route::get('/', function () {
    return view('welcome');
});
Route というクラスをuseで使用できるようにしており、Illuminate\Support\Facades という名前空間にあります。
use Illuminate\Support\Facades\Route;GETアクセスのルート情報は、Route クラスの「get」という静的メソッドを使って設定しています。
第1引数に割り当てるアドレス、第2引数には第1引数によって呼び出される処理を指定します。
Route::get( アドレス , 関数やHTMLなど);web.phpにデフォルトで記述されている以下の部分を紐解くとこうなります。
Route::get('/', function () {
    return view('welcome');
});
① 第1引数にトップページを表す「/」を指定
② 第2引数にfunction ()を指定しています。これは引数なしの無名関数であり、return で戻り値を指定しています。
このreturn で返される値が、そのアドレスにアクセスした際に表示される内容となります。
③ view関数を使って戻り値を指定しています。指定したテンプレートファイルをロードし、レンダリングして返します。(ブラウザに表示)
view(テンプレート名)なので、引数のwelcome は、resources/views/welcome.blade.php というテンプレートファイルをレンダリングして表示します。
view('welcome');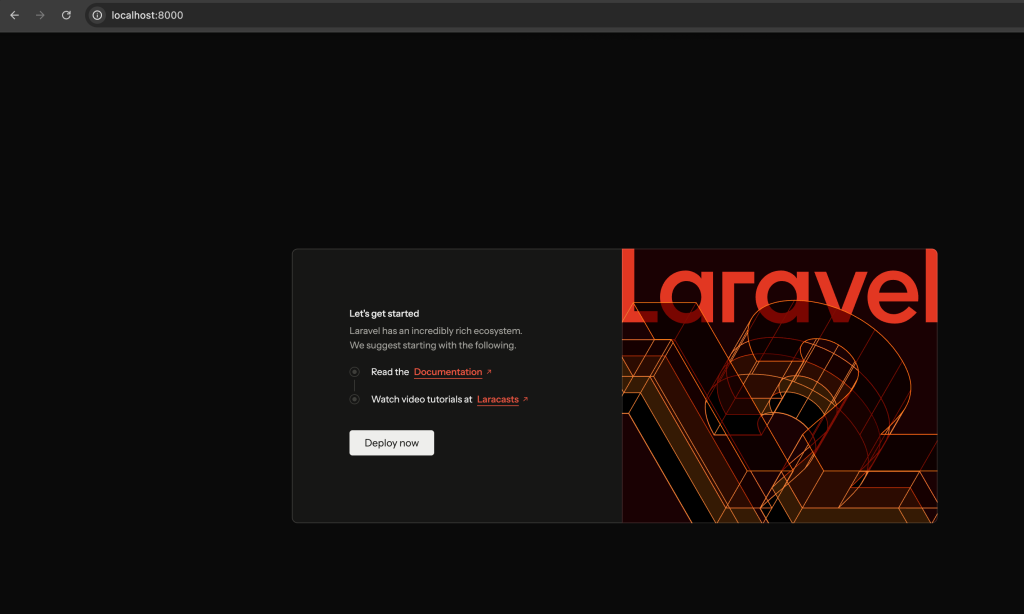
1-2. welcome.blade.phpの内容
welcome.blade.php内のコードを確認すると、@で始まる文があります。
これは「blade」というLaravelに組み込まれているテンプレートエンジンを使って書かれたソースコードです。

1-3. ルート情報を追加
Webページのルートの追加は、web.php に記述していきます。
1-3-1. HTMLでルート情報を追加
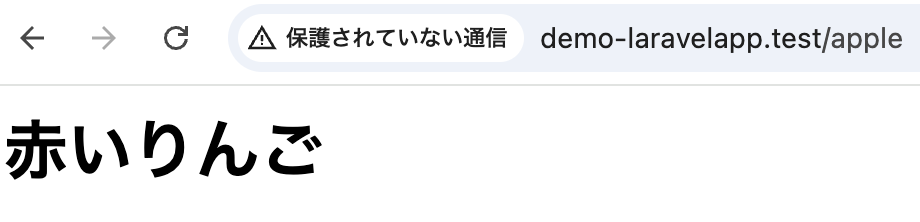
ここでは、「apple」というアドレスで、ブラウザに「赤いりんご」と表示されるようにしてみます。
web.phpの一番下部に以下のコードを追記します。
<?php
use Illuminate\Support\Facades\Route;
Route::get('/', function () {
return view('welcome');
});
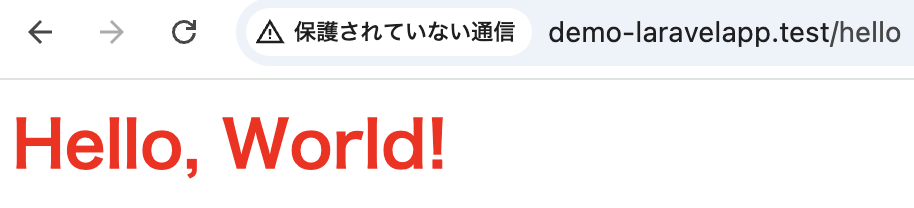
Route::get('/apple', function () {
return '<html><body><h1>赤いりんご</h1></body></html>';
});では、Laravelを起動後にブラウザのアドレスバーに「http://demo-laravelapp.test/apple」を入力します。
1-3-2. ヒアドキュメント
<<<演算子を使用し、リスト内に直接記述されたテキストをまとめて変数などに代入できます。
例文
<?php

use Illuminate\Support\Facades\Route;

Route::get('/', function () {
    return view('welcome');
});

$html = <<<EOF
<html>
<head>
    <title>Hello,World</title>
    <style>
        h1 {
            color: #ff0000;
        }
    </style>
</head>
<body>
    <h1>Hello, World!</h1>
</body>
</html>
EOF;
Route::get('/hello', function () use ($html) {
    return $html;
});
1-3-3. ルートパラメータ
1-3-3-1. 必須パラメータ
Route::get では、パラメータを設定し、値を渡すことができます。
なお、パラメータと関数の引数は複数用意することができます。
Route::get('/○○/{パラメータ}', function($受け取る引数) {
       処理
});
① 第1引数のアドレス部分に{パラメータ}が指定されます。
これは、{ }の部分に指定されたテキスト部分がパラメータとして取り出されるようになります。
② 第2引数の関数では、パラメータの値を受け取る変数を引数として用意します。
※パラメータ名と変数名は同じ名前である必要はありません。
例文
<?php
use Illuminate\Support\Facades\Route;
Route::get('/', function () {
return view('welcome');
});
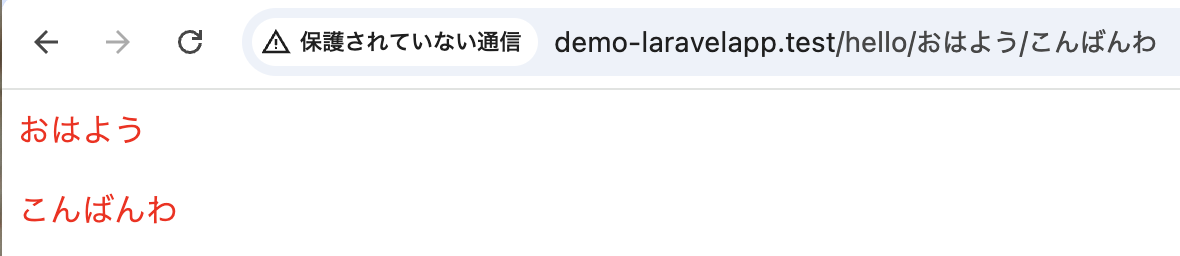
Route::get('/hello/{frontMsg}/{backMsg}', function ($first, $second) {
$html = <<<EOF
<html>
<head>
<title>Hello,World</title>
<style>
p {
color: #ff0000;
}
</style>
</head>
<body>
<p>{$first}</p>
<p>{$second}</p>
</body>
</html>
EOF;
return $html;
});以下の画像のようにアドレスバーに入力しアクセスします。
1-3-3-2. 任意パラメータ
Route::get では、任意パラメータを設定し、パラメータを付けなくてもアクセスすることができます。
なお、任意パラメータと関数の引数は複数用意することができます。
Route::get('/○○/{パラメータ?}', function($受け取る引数='デフォルト値') {
       処理
});
例文
<?php
use Illuminate\Support\Facades\Route;
Route::get('/', function () {
return view('welcome');
});
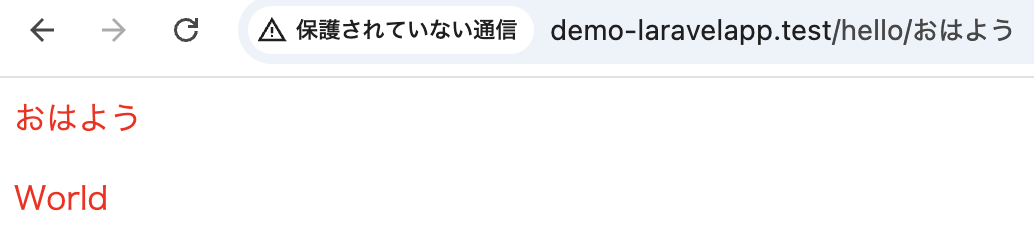
Route::get('/hello/{frontMsg?}/{backMsg?}', function ($first='Hello', $second='World') {
$html = <<<EOF
<html>
<head>
<title>Hello,World</title>
<style>
p {
color: #ff0000;
}
</style>
</head>
<body>
<p>{$first}</p>
<p>{$second}</p>
</body>
</html>
EOF;
return $html;
});
2. Controller
ルーティングにおいて、Route::get を用いてWebページを表示してみました。しかし、実際には「具体的に実行すべき処理は別に用意されていて、それを特定アドレスに割り振って呼び出す」ことを行います。この呼び出される「具体的に実行すべき処理」のことをコントローラーといいます。
2-1. コントローラーの作成
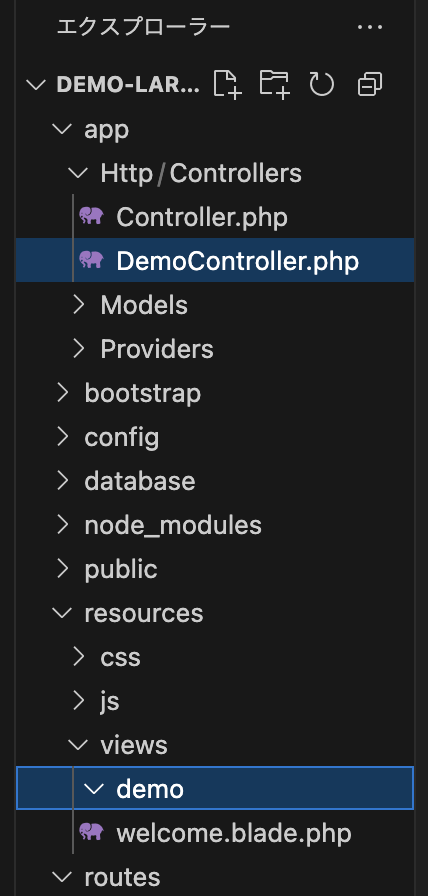
① VSCodeを開き、app/Http/Controllersの直下に「HelloController.php」を作成します。
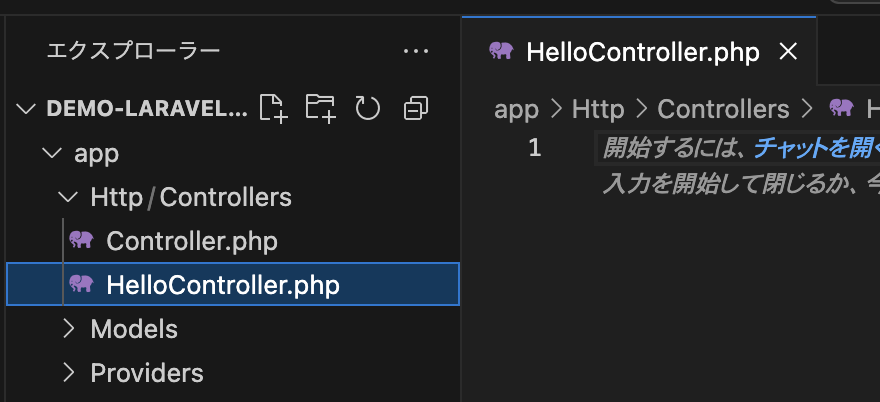
② HelloController.php に以下のコードを記述します。
コントローラーの基本ソースコードとなります。
<?php
namespace App\Http\Controllers;
use Illuminate\Http\Request;

class HelloController extends Controller
{
}
コントローラーは、クラスとして作成されます。
このクラスは、App\Http\Controllers という名前空間に配置されます。
名前空間とは、クラスを階層的に整理するための仕組みです。
namespace App\Http\Controllers;use文により、Illuminate\Httpパッケージ内に用意されている「Request」を使用できるようにしています。
use Illuminate\Http\Request;クラスの定義を行っています。コントローラークラスは、Controllerを継承して作成します。
ここに具体的な処理をメソッドとして定義していきます。
class HelloController extends Controller
{
}
2-2. アクションの追加
コントローラーに定義されるメソッドのことをアクションといい、複数定義することができます。
DemoController にアクションを追加します。
<?php
namespace App\Http\Controllers;
use Illuminate\Http\Request;

class DemoController extends Controller
{

    public function hello()
    {
        return <<<EOF
        <html>
        <head>
            <title>Hello World</title>
        </head>
        <body>
            <h1>Hello World</h1>
            <p>コントローラーからのメッセージです。</p>
        </body>
        </html>
        EOF;
    }

}
このアクションメソッドでは、returnでHTMLのソースコードを返しており、アクセスしたWebブラウザへ返され、それが表示されます。
2-3. ルート情報を設定
コントローラーに追加されたアクションを表示できるようにルート情報を設定します。
web.phpに以下のルート情報を設定します。
<?php

use Illuminate\Support\Facades\Route;
use App\Http\Controllers\DemoController;

Route::get('/', function () {
    return view('welcome');
});

Route::get('/hello', [DemoController::class, 'hello']);
① コントローラーを使用できるようにuseを使用しています。
② Route::getの第1引数のアドレスにアクセスされると、第2引数に指定されたコントローラーのアクションが実行されるようになります。
③ コントローラーを利用するには、Route::getの第2引数に呼び出すコントローラーとアクションを指定します。
[コントローラークラス::class, 'アクション']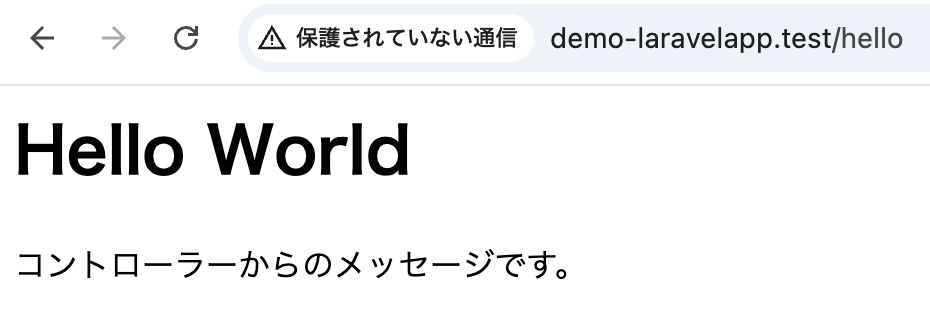
2-4. ルートパラメータ
コントローラーにおいてもルートパラメータを設定できます。
DemoController.php
<?php
namespace App\Http\Controllers;
use Illuminate\Http\Request;

class DemoController extends Controller
{

    public function hello($first='hello', $second='world'){

    return <<<EOF
        <html>
            <head>
                <title>Hello,World</title>
                <style>
                    p {
                        color: #ff0000;
                    }
                </style>
            </head>
            <body>
                <h1>コントローラーのルートパラメータ</h1>
                <p>{$first}</p>
                <p>{$second}</p>
            </body>
        </html>
    EOF;
    }

}
web.php
<?php

use Illuminate\Support\Facades\Route;
use App\Http\Controllers\DemoController;

Route::get('/', function () {
    return view('welcome');
});

Route::get('/hello/{first?}/{second?}', [DemoController::class, 'hello']);
アドレスバーに任意の値を入力し、アクセスします。

2-5. 複数アクションの定義
1つのコントローラークラスに複数のアクションを追加できます。
DemoController.php
<?php
namespace App\Http\Controllers;
use Illuminate\Http\Request;
class DemoController extends Controller
{
public function hello(){
return <<<EOF
<html>
<head>
<title>Hello</title>
</head>
<body>
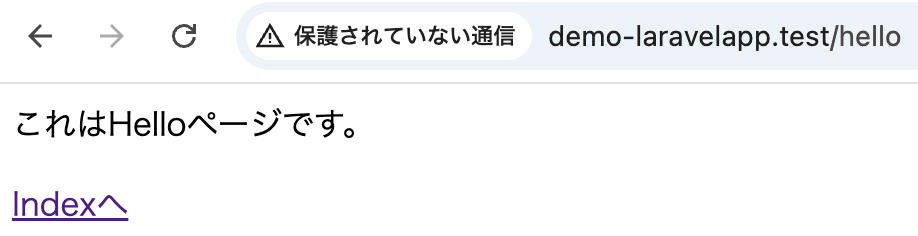
<p>これはHelloページです。</p>
<a href="/hello/index">Indexへ</a>
</body>
</html>
EOF;
}
public function index(){
return <<<EOF
<html>
<head>
<title>index</title>
</head>
<body>
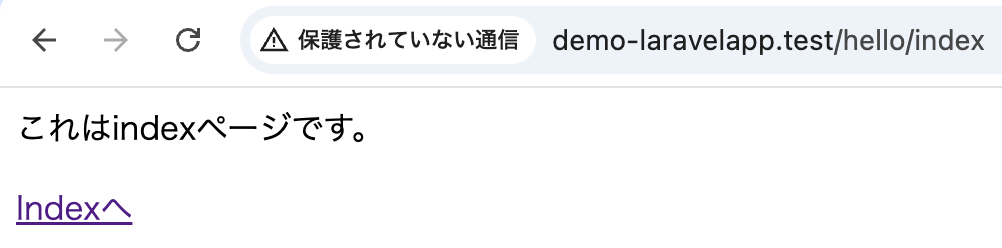
<p>これはindexページです。</p>
<a href="/hello">Indexへ</a>
</body>
</html>
EOF;
}
}web.php
<?php

use Illuminate\Support\Facades\Route;
use App\Http\Controllers\DemoController;

Route::get('/', function () {
    return view('welcome');
});

Route::get('/hello', [DemoController::class, 'hello']);
Route::get('/hello/index', [DemoController::class, 'index']);
http://localhost:8000/hello
http://localhost:8000/hello/index
2-6. シングルアクションコントローラー
シングルアクションコントローラーとは、コントローラークラスに1つしかアクションを持たないものをいいます。
一般的なアクションメソッドの代わりに、「__invoke()」というメソッドで処理を実装します。
__invoke()メソッドは、LaravelではなくPHPに用意されているマジックメソッドで、インスタンスをそのまま関数のように実行させたい場合に利用します。
public function __invoke() {
}
シングルアクションコントローラーとして定義されたコントローラーは、ルート情報の設定は以下とおりです。
Route::get('アドレス', コントローラークラス)例文
DemoController.php
<?php
namespace App\Http\Controllers;
use Illuminate\Http\Request;

class DemoController extends Controller
{

    public function __invoke(){
    return <<<EOF
        <html>
            <head>
                <title>シングル</title>
            </head>
            <body>
                <p>これはシングルコントローラー</p>
            </body>
        </html>
    EOF;
    }

}
web.php
<?php

use Illuminate\Support\Facades\Route;
use App\Http\Controllers\DemoController;

Route::get('/', function () {
    return view('welcome');
});

Route::get('/index', DemoController::class);
3. リクエストとレスポンス
3-1. リクエストとレスポンスとは
クライアントとサーバー間のやり取りは、「リクエスト」と「レスポンス」で行われます。
| リクエスト | クライアントからサーバーへアクセスする際に送られる情報 |
| レスポンス | サーバーからクライアントへ返送される情報 |
「リクエスト」と「レスポンス」は、Illuminate\Http 名前空間に用意されているRequest や Response のクラスが用意されており、これを利用していきます。
例文
DemoController.php
<?php
namespace App\Http\Controllers;

use Illuminate\Http\Request;
use Illuminate\Http\Response;

class DemoController extends Controller
{

    public function index(Request $request, Response $response) {
    $html = <<<EOF
        <html>
            <head>
                <title>Index</title>
            </head>
            <body>
                <p>リクエスト</p>
                <pre>{$request}</pre>
                <p>レスポンス</p>
                <pre>{$response}</pre>
            </body>
        </html>
    EOF;
    $response->setContent($html);
    return $response;
    }

}
web.php
<?php

use Illuminate\Support\Facades\Route;
use App\Http\Controllers\DemoController;

Route::get('/', function () {
    return view('welcome');
});

Route::get('/index', [DemoController::class, 'index']);
リクエスト、レスポンス情報が確認できます。

3-2. Requestの主なメソッド
3-2-1. アクセスしたURLを返す
アクセスしたURLを返しますが、クエリ文字列(?以降の文字列)は省略されます。
$request->url();3-2-2. アクセスした完全なURLを返す
アクセスしたURLを、クエリ文字列などの完全なURLで返します。
$request->fullUrl();3-3-3. ドメイン下のパス部分を返す
ドメイン下のパス部分を返します。
$request->path();3-3. Responseの主なメソッド
3-3-1. アクセスに関するステータス情報を取得
クライアントへ返送する際のステータス情報を取得できます。
$this->status();3-3-2. コンテンツの取得や設定
コンテンツの取得を行います。
$this->content();コンテンツの設定を行います。
$this->setContent(値);4. MVCモデルの概念
今まで、コントローラーについて学んできました。
これはMVCモデルという概念に基づいてアプリケーションの処理を構築していくことです。
MVCとは「Model-View-Controller」の略で、これら3つの要素を組み合わせていきます。
| Model | データ処理全般の処理を行う データベースの接続に関する処理全般 |
| View | 画面表示の処理を行う |
| Controller | 全体の処理制御を行う |
ModelやViewは、データや表示など特定の機能に特化したものです。
PHP言語において、Controllerは、複雑な処理をまとめて管理しています。
ModelやView間は直接処理のやり取りは行わず、必ずControllerの制御処理を介しています。
View(ビュー)
1. レンダリング
2. Blade
3. レイアウト
ビューは、HTMLをそのまま記述してブラウザに表示されるようにした仕組みで、そこで用意されているのは「テンプレート」です。
テンプレートは、画面表示のベースとなるもので、あるアドレスにアクセスすると、コントローラーはそのアドレスで使われるテンプレートを読み込んで表示します。ただし読み込まれたHTMLのコードがそのまま表示される訳ではありません。
1. レンダリング
テンプレートには、あらかじめ変数や処理などが記述されており、Laravelではテンプレートを読み込んだ後、その中に必要な情報などをはめ込むなどして実際の表示を生成することができます。この一連の流れを レンダリング といいます。
レンダリング作業によりコントローラーで用意しておいた値や変数などを組み込んだHTMLソースコードが生成されます。
テンプレートエンジンによりレンダリングが行われます。Laravelでは大別して「PHPのソースコードをそのままテンプレートとして使用する」と「Bladeを使用する」があります。
1-1. PHPのソースコードをそのままテンプレートとして使用する
1-1-1. Controllerを使用しないレンダリング
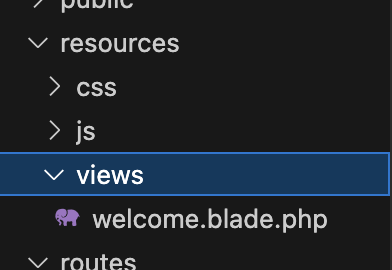
PHPテンプレートファイルは、resources/views フォルダ内に配置します。
① このviewsフォルダにdemoフォルダを作成します。
このようにテンプレートは、各コントローラーごとにフォルダを用意し、その中にそのコントローラーで使うテンプレートをまとめておくのが一般的です。
② demoフォルダにindex.phpを作成し、以下のように記述します。
<html>
    <head>
        <title>Index</title>
    </head>
    <body>
        <h1>Index</h1>
    </body>
</html>
③ ルート設定を行い、テンプレートをレンダリング表示します。
web.phpに以下のように記述します。
<?php

use Illuminate\Support\Facades\Route;
// コントローラーを使用しないのでコメントアウト
// use App\Http\Controllers\DemoController;

Route::get('/', function () {
    return view('welcome');
});

Route::get('/index', function(){
    return view('demo.index');
});
viewメソッドの引数の詳細は以下のような感じです。
view('フォルダ名.ファイル名');ここで、フォルダ名の記述を忘れてしまうと、エラーが生じます。
なので、どのフォルダ内のどのファイルかを指定する必要があります。

1-1-2. Controllerを使用するレンダリング
次はコントローラーでテンプレートを使用していきます。
DemoController.phpに以下のように記述します。
<?php
namespace App\Http\Controllers;

class DemoController extends Controller
{

    public function index() {
        return view('demo.index');
    }

}
web.phpも修正します。
行っていることは、1-1-1. Controllerを使用しないレンダリング と同じで、Route::getでviewするか、Route:getで呼び出されたアクションメソッド内でviewするかの違いです。
<?php

use Illuminate\Support\Facades\Route;
use App\Http\Controllers\DemoController;

Route::get('/', function () {
    return view('welcome');
});

Route::get('/index', [DemoController::class, 'index']);
1-1-3. 値をテンプレートに渡す
今までのように、HTMLを表示するだけではわざわざテンプレートを使用する必要がありません。テンプレートでは値を渡して表示したり、必要な処理を実行し結果を表示することでテンプレートを使用する意味があります。
例文
DemoController.php
<?php
namespace App\Http\Controllers;

class DemoController extends Controller
{

    public function index() {
        $contValue = ['msg'=>'これはコントローラーから渡されたメッセージです。'];
        return view('demo.index', $contValue);
    }

}
index.php
<!DOCTYPE html>
<html>
    <head>
        <title>Index</title>
        <meta charset="utf-8">
    </head>
    <body>
        <h1>テンプレートで値の受け渡し</h1>
        <p><?= $msg ?></p>
        <p>これはviewのメッセージです。</p>
    </body>
</html>
viewメソッドで必要な値をテンプレート側(index.blade.php)に渡しています。
view(テンプレート, 連想配列)この連想配列に用意した値がそのままテンプレート側の変数名をキーとして指定しており表示しています。
<?= 変数 ?>2. Blade
今までは、<?= ?>や、<?php ?>で単に値を表示しているだけですが、複雑な処理となるとテンプレートが複雑化しバグのリスクが高まります。
そこで、Laravelにデフォルトで用意されているBlade(ブレード)を使用することで解消できます。
2-1. Bladeを体験してみる
まずテンプレートを作成します。
resources/views/demo内にindex.blade.phpのファイルを作成します。
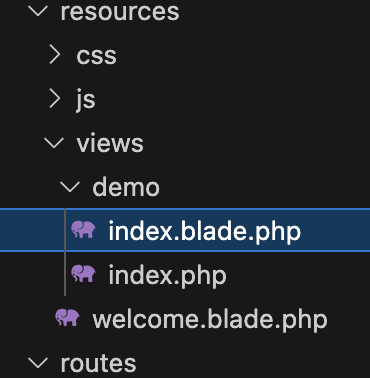
この.blade.phpとすることで、Bladeのテンプレートを作成できます。
なお、.phpファイルと.blade.phpファイルで同じ名前のファイルがある場合、.blade.phpファイルが優先して呼び出されます。
例文
DemoController.php
<?php
namespace App\Http\Controllers;

class DemoController extends Controller
{

    public function index() {
        $contValue = ['msg'=>'これはBaldeを利用しています。'];
        return view('demo.index', $contValue);
    }

}
index.blade.php
<!DOCTYPE html>
<html>
    <head>
        <title>Index</title>
        <meta charset="utf-8">
    </head>
    <body>
        <h1>Blade</h1>
        <p>{{$msg}}</p>
    </body>
</html>
Bladeは、変数をテンプレート内に埋め込むことができ、これにより値を表示できます。
しかし、これは基本的にHTMLエスケープ処理されます。
HTMLタグなどをテキストとして設定した場合も全てエスケープ処理されるため、タグはテキストとして表示され、HTMLタグとしては機能しません。
{{ 値・変数・式・関数など }}エスケープ処理されたくない場合、以下のようにします。
{!! 値・変数・式・関数など !!}2-2. フォーム送信
ユーザーからの入力情報を処理するフォームを利用してみます。
例文
DemoController.php(アクションの追加)
<?php
namespace App\Http\Controllers;

use Illuminate\Http\Request;

class DemoController extends Controller
{

    public function index() {
        $contValue = ['msg'=>'これはフォームの初期画面です。名前は?',];
        return view('demo.index', $contValue);
    }

    public function post(Request $request) {
        $msg =$request->msg;
        $contValue = ['msg'=>'Hello, '.$msg.' さん',];
        return view('demo.index', $contValue);
    }

}
index.blade.php(フォームの用意)
<!DOCTYPE html>
<html>
    <head>
        <title>Index</title>
        <meta charset="utf-8">
    </head>
    <body>
        <h1>Blade</h1>
        <p>{{$msg}}</p>
        <form method="POST" action="/index">
            @csrf
            <input type="text" name="msg" >
            <button type="submit">送信</button>
        </form>
    </body>
</html>
フォームを利用するにはCSRFトークンというフィールドを含める必要があります。
非表示のフィールドでLaravelに用意されているミドルウェアがリクエストを検証できるようにトークンの値を設定します。@csrfはこのトークンを保管したフィールドを生成しています。
web.php(ルート設定)
<?php

use Illuminate\Support\Facades\Route;
use App\Http\Controllers\DemoController;

Route::get('/', function () {
    return view('welcome');
});

Route::get('/index', [DemoController::class, 'index']);

Route::post('/index', [DemoController::class, 'post']);
2-3. ディレクティブ
ディレクティブとは、Laravelに用意されている機能です。@csrf もディレクティブで、他にも複数あります。
@ディレクティブ(引数)2-3-1. if
条件分岐のif文のディレクティブ
@if (条件式)
    処理
@elseif (条件式)
    処理
@else
    処理
@endif
2-3-2. unless
条件が非成立の時に処理される
@unless (条件式)
    処理
@endunless
2-3-3. empty
変数が空の時に処理される
@empty (変数)
    処理
@endempty
2-3-4. isset
変数が定義済みの場合に処理される
@isset (変数)
    処理
@endisset
2-3-5. for
for文のディレクティブ
@for (初期化; 条件式; 更新式)
    処理
@endfor
2-3-6. foreach
foreach文のディレクティブ
@foreach (配列 as 変数)
    処理
@endforeach
2-3-7. forelse
配列から順に取り出し、値を全て取り出し終えたら@emptyにある処理が実行され、繰り返しを終える
@forelse (配列 as 変数)
    処理
@empty
    処理
@endforelse
2-3-8.while
while文のディレクティブ
@while (条件式)
    処理
@while
2-3-9. break
これが呼び出されると繰り返し処理を終了する
@break2-3-10. continue
これが呼び出されると繰り返し処理の中でスキップする
@continue2-3-11. php
今までのifやforにはPHPスクリプトを記述することができない。
そのためPHPスクリプトを記述できるようにphpディレクティブを使用すると変数の初期化等ができる。
@php
    PHPスクリプト
@endphp
2-3-12. ループ変数
繰り返しディレクティブには、$loop という変数が用意されています。これはループ変数と呼ばれ、繰り返しに関する情報を得ることができます。
$loop はオブジェクトとなっており、以下のようなプロパティがあります。
| $loop->index | 0から開始 |
| $loop->iteration | 1から開始 |
| $loop->remaining | あと何回繰り返すかを指定 |
| $loop->count | 繰り返しで使っている配列の要素数 |
| $loop->first | 最初の繰り返しかどうか(最初ならtrue) |
| $loop->last | 最後の繰り返しかどうか(最後ならtrue) |
| $loop->depth | 繰り返しのネスト数 |
| $loop->parent | ネストしている場合、親の繰り返しのループ変数を示す |
例文
DemoController.php
<?php
namespace App\Http\Controllers;

use Illuminate\Http\Request;

class DemoController extends Controller
{

    public function index() {
        $contValue = ['A','B','C','D','E',];
        return view('demo.index', ['contValue' => $contValue]);
    }

}
index.blade.php
<!DOCTYPE html>
<html>
    <head>
        <title>Index</title>
        <meta charset="utf-8">
    </head>
    <body>
        @foreach ($contValue as $value)
            @if($loop->first)
                <p>データ一覧の開始</p>
            @endif
            {{$loop->iteration}}: {{$value}}<br>
            @if($loop->last)
                <p>データ一覧の終了</p>
            @endif
        @endforeach

    </body>
</html>
web.php
<?php

use Illuminate\Support\Facades\Route;
use App\Http\Controllers\DemoController;

Route::get('/', function () {
    return view('welcome');
});

Route::get('/index', [DemoController::class, 'index']);
3. レイアウト
今までは、1つのテンプレートでページを表示してきました。
しかし、多数のページを持ったWebサイトが基本であり、全体的な統一感を持たせるため、共通したデザインが表示されるように製造するのが基本です。
そこで、Bladeの「継承」と「セクション」という機能を使用していきます。
3-1. 継承
既にあるテンプレートのレイアウトを継承して新しいテンプレートを作成することです。
継承元のテンプレートに用意されている表示は、全て新たに継承して作られたテンプレートでそのまま表示されます。
そのため、新しいテンプレートでは、継承元にない要素だけを定義すれば良くなります。
3-2. セクション
セクションは、レイアウト内に用意されている区画で、レイアウト用テンプレートではページ内にセクションの区画を用意しておき、ベースとなるレイアウトから同じレイアウトのページをいくつも作成ができます。
3-2-1. @section
レイアウトで区画を定義するときに使用します。
指定した名前でセクションが用意されます。
@section(名前)
    表示内容
@endsection
継承しページで@sectionにより上書きすることもできます。
3-2-2. @yield
@yieldは配置場所を示す時に使用し。@sectionで用意されたセクションを@yieldによりはめ込まれ表示されます。
@yield(名前)3-3. レイアウトを作成する
3-3-1. ベースレイアウトの作成
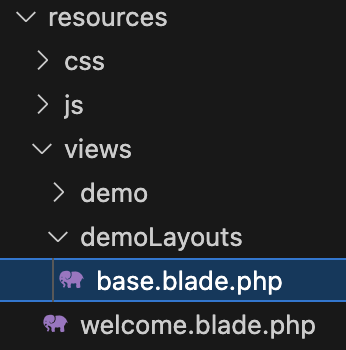
resources/views内にdemoLayoutsフォルダを作成します。
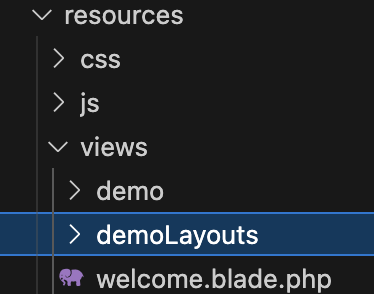
このフォルダ内に、base.blade.phpを作成し、以下のコードを記述します。
<html>
<head>
    <title>@yield('title')</title>
</head>
<body>
    <h1>@yield('title')</h1>
    @section('header')
    <div>
        <p>@show</p>
    </div>
    <div>
        @yield('content')
    </div>
        <div>
        @yield('footer')
    </div>
</body>
</html>
3-3-2. 継承レイアウトの作成
resources/views/demo/index.blade.php
@extends('demoLayouts.base')

@section('title', 'タイトルネーム')

@section('header')
    @parent
    <h2>ヘッダー部分</h2>
@endsection

@section('content')
    <p>コンテンツ部分</p>
@endsection

@section('footer')
    <p>フッター部分</p>
@endsection
レイアウトの継承を行います。
@extends('demoLayouts.base')タイトルの表示には’title’の名前で@yieldを定義しています。
<title>@yield('title')</title>
<h1>@yield('title')</h1>
第1引数のセクション名に’title’、第2引数に’タイトルネーム’のテキストを渡しています。
@section('title', 'タイトルネーム')@sectionから@endsectionまでがセクションの内容となります。
親れアウトには該当する@yieldはなく、@sectionがありこれは@sectionを上書きしています。
@showを使用しています。これは定義したセクションを即座に表示します。
@parentは、親レイアウトのセクションを示し、親の@sectionにこの@sectionを指定する場合、親の@section部分を子のセクションが上書きします。
@section('header')
<div>
    <p>@show</p>
</div>
@section('header')
@parent
<h2>ヘッダー部分</h2>
@endsectionそれぞれセクション名を@yieldにそれぞれはめ込まれます。
<div>
@yield('content')
</div>
<div>
@yield('footer')
</div>@section('content')
<p>コンテンツ部分</p>
@endsection
@section('footer')
<p>フッター部分</p>
@endsection3-3-3. サブビューの作成
サブビューとは、ビューから別のビューを読み込んではめ込んだものをいいます。そのため、サブビューの中に別の表示を組み込んだりすることはできません。
コントローラーからテンプレートに渡された変数などは、そのままサブビューのテンプレート内でも使用でき、またサブビューを読み込む際に変数を渡すこともできます。
以下のように読み込みます。第1引数に読み込むテンプレートファイルを指定し、第2引数に受け渡す値を連想配列にまとめたものを指定します。
@include(テンプレート名, [値の設定])例文
resources/views/demoフォルダ内にsubView.blade.phpを作成し、以下のコードを記述します。
<div>
<p>{{$msg_title}}</p>
<p>{{$msg_content}}</p>
</div>resources/views/demo/index.blade.phpに以下の部分を修正します。
@extends('demoLayouts.base')
@section('title', 'タイトルネーム')
@section('header')
    @parent
    <h2>ヘッダー部分</h2>
@endsection
@section('content')
<p>コンテンツ部分</p>
@include('demo.subView', ['msg_title' => 'サブビューのタイトル', 'msg_content' => 'サブビューの内容'])
@endsection
@section('footer')
<p>フッター部分</p>
@endsection
3-3-4. コレクションビュー
データの繰り返しビューを行うには、@eachを使用します。
@eachは配列やコレクションから順に値を取り出し、指定のテンプレートにはめ込んで出力を行います。
第1引数に表示を行うテンプレート名を指定、第2引数に表示するデータをまとめた配列やコレクションを指定、第3引数に配列から取り出したデータを代入する変数を指定します。
@each(テンプレート名, 配列, 変数名)例文
index.blade.php
@extends('demoLayouts.base')

@section('title', 'タイトルネーム')

@section('header')
    @parent
    <h2>ヘッダー部分</h2>
@endsection

@section('content')
    <p>コンテンツ部分</p>
    @each('demo.each', $data, 'item')
@endsection

@section('footer')
    <p>フッター部分</p>

@endsection
DemoController.php
<?php
namespace App\Http\Controllers;

use Illuminate\Http\Request;

class DemoController extends Controller
{

    public function index() {
        $data = [
            ['id' => 1, 'name' => 'アイテムA'],
            ['id' => 2, 'name' => 'アイテムB'],
            ['id' => 3, 'name' => 'アイテムC'],
            ['id' => 4, 'name' => 'アイテムD'],
            ['id' => 5, 'name' => 'アイテムE'],
        ];
        return view('demo.index', ['data' => $data]);
    }

}
resources/views/demoフォルダ内にeach.blade.phpを作成し、以下のコードを記述します。
<li>[{{$item['id']}}] {{$item['name']}} </li>サービスプロバイダー
1. Serviceの役割
2. サービスプロバイダークラスの生成
3. サービスプロバイダークラスの実装
1. Serviceの役割
LaravelのBladeではPHPスクリプトを埋め込む事ができ、これによりビュー独自の処理をテンプレート側にコーディングすることができました。
しかし、ビューにビジネスロジックを含めることはMVCモデルの概念に反しています。そこで、ビューコンポーザーというServiceを用意し、そこにビジネスロジックを定義すると良いです。
ビューコンポーザーは、ビューをレンダリングする際に自動的に実行される処理を用意するための部品で、これは関数やクラスとして定義できます。
2. サービスプロバイダークラスの生成
サービスプロバイダークラスは、自分で作成することも可能ですが、以下のコマンドにより簡単に生成できます。
php artisan make:provider サービスプロバイダー名例として以下のコマンドを叩きます。
php artisan make:provider DemoServiceProviderapp/Providersフォルダ内に DemoServiceProvider.php が生成されました。
<?php

namespace App\Providers;

use Illuminate\Support\ServiceProvider;

class DemoServiceProvider extends ServiceProvider
{
    /**
     * Register services.
     */
    public function register(): void
    {
        //
    }

    /**
     * Bootstrap services.
     */
    public function boot(): void
    {
        //
    }
}
サービスプロバイダーは、ServiceProviderクラスを継承して作成され、このクラスには、registerメソッドやbootメソッドが用意されています。
| registerメソッド | サービスプロバイダーの登録処理を行う |
| bootメソッド | アプリケーションサービスへのブートストラップ処理(アプリケーションが起動する際に割り込んで実行される処理) 設定したビューをレンダリングする際に自動的にコンポーザーが呼び出される |
3. サービスプロバイダークラスの実装
ビューコンポーザーの実装方法は2パターンあります。
| bootメソッドで設定 | ビューコンポーザーのクラスを定義し、それをbootで設定する |
| bootメソッド内に処理を定義 | boot内に無名クラスでビューコンポーザーの処理を組み込む |
3-2. bootメソッド内に処理を定義
resources/views/demoフォルダ内の index.blade.php に「service composer message」という値を設定する処理を作成します。
app/Providers/DemoServiceProvider.php
<?php

namespace App\Providers;

use Illuminate\Support\Facades\View;
use Illuminate\Support\ServiceProvider;

class DemoServiceProvider extends ServiceProvider
{

    public function boot(): void
    {
        View::composer('demo.index', function ($view) {
            $view->with('view_message', 'service composer message');
        });
    }
}
ビューコンポーザーを設定するため、View::composerメソッドを使用します。
第1引数には、ビューコンポーザーを割り当てるビューを指定し、第2引数に実行する処理となるクロージャかビューコンポーザーのクラスを指定します。
View::composer(ビューの指定, 関数またはクラス);引数の$viewは、Illuminate\Support\Facades名前空間にあるViewクラスのインスタンスで、ビューを管理するオブジェクトです。このオブジェクトのメソッドを利用してビューを操作します。
View::composer('demo.index', function ($view) {
        $view->with('view_message', 'service composer message');
});
withメソッドは、ビューに変数などを追加し、テキストを値として設定できます。
$view->with(変数名, 値)view_messageという名前で、service composer messageというテキストを設定します。
View::composer('demo.index', function ($view) {
        $view->with('view_message', 'service composer message');
});
調整中(144〜192)
データーベースの利用
1. Model
2. データベースとテーブルの用意
3. DBクラス
4. Eloquent ORM
1. Model
MVCモデルのうち、データベース処理を扱うのが Model です。
Laravelでデータベース処理を行う機能は2つ用意されています。
| DBクラス | データベースアクセスをまとめるクラスを定義し、クエリビルダーというメソッドでデータベースにアクセスを行う |
| Eloquent ORM | Laravelに搭載されており、データベースのデータとプログラミング言語のオブジェクトの間を取り持つことで、データベースの操作を行う |
2. データベースとテーブルの用意
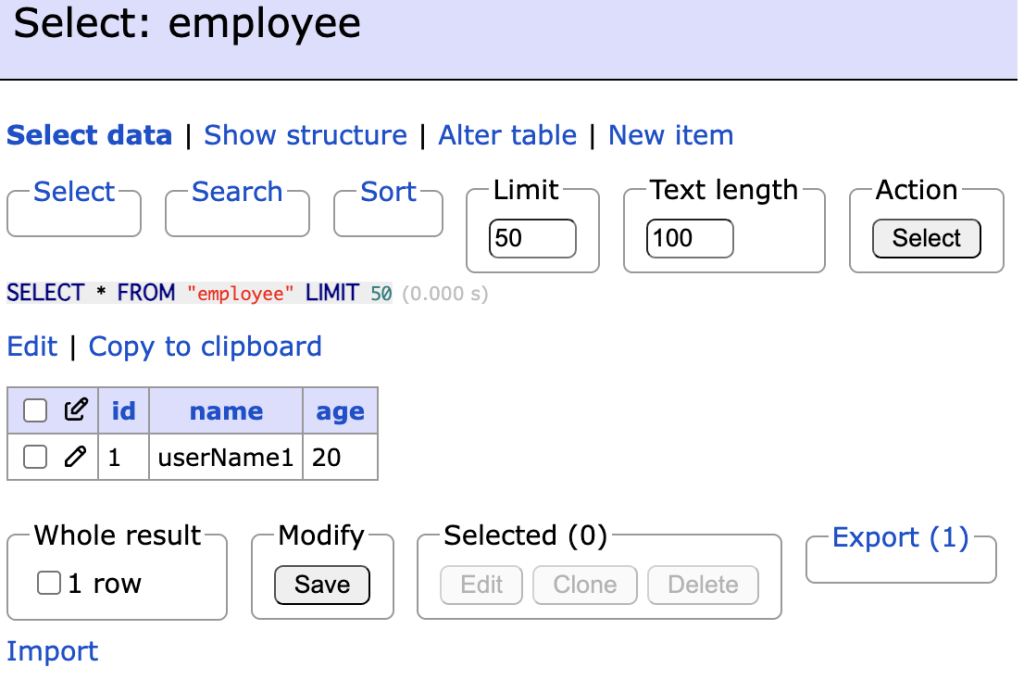
2-1. Adminer
HerdにはSQLを操作できるツールがあります。
以下のように、「Actions」を押下するとSelectBoxのリストが出てきますので、「Open in Adminer」を選択します。

ブラウザに移行されます。
使用するデータベースをSystem で選択します。その他はデフォルトのままで大丈夫です。「Login」を押下します。
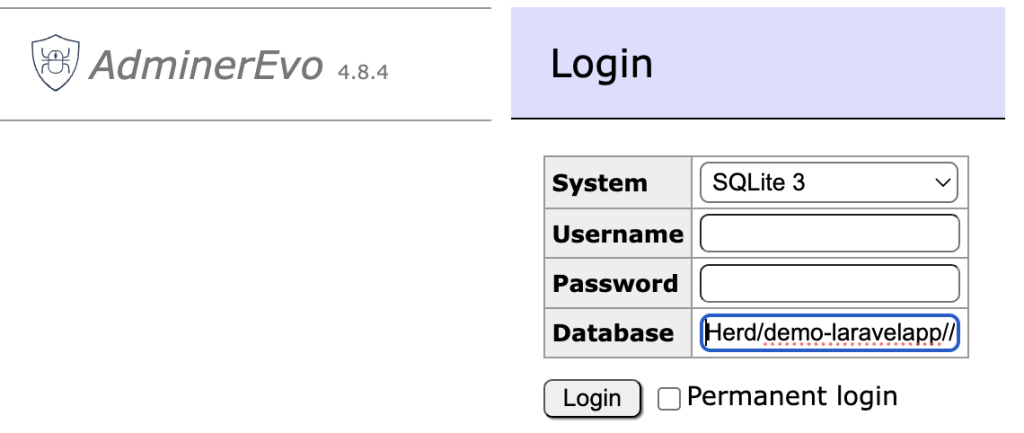
このような画面になります。
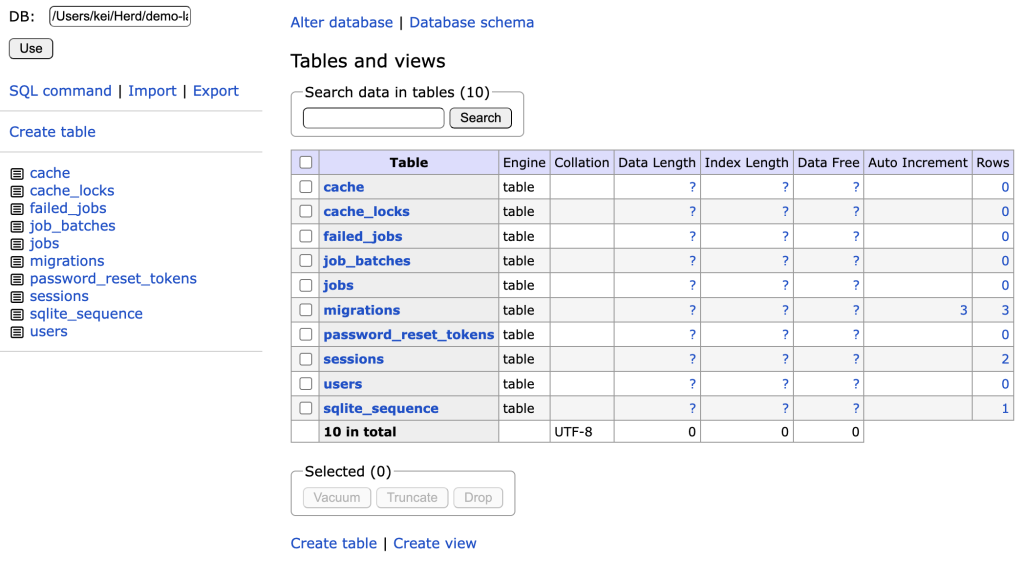
2-1-1. テーブルの作成
簡易的なテーブル設計書ですが、以下のような社員管理を行うテーブルを作成します。
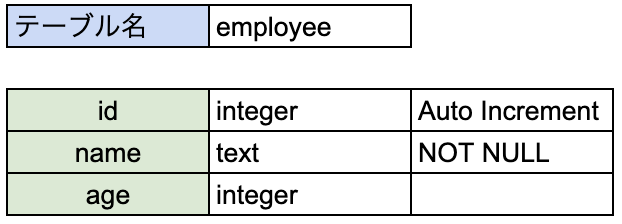
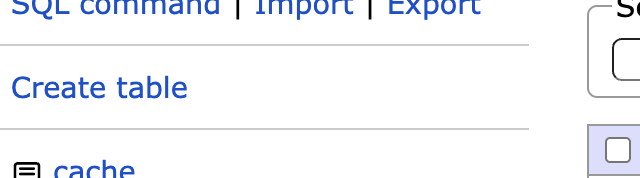
① テーブルを作成するため、Create table を押下します。
② 各カラムは以下のように設定し、「Save」を押下します。
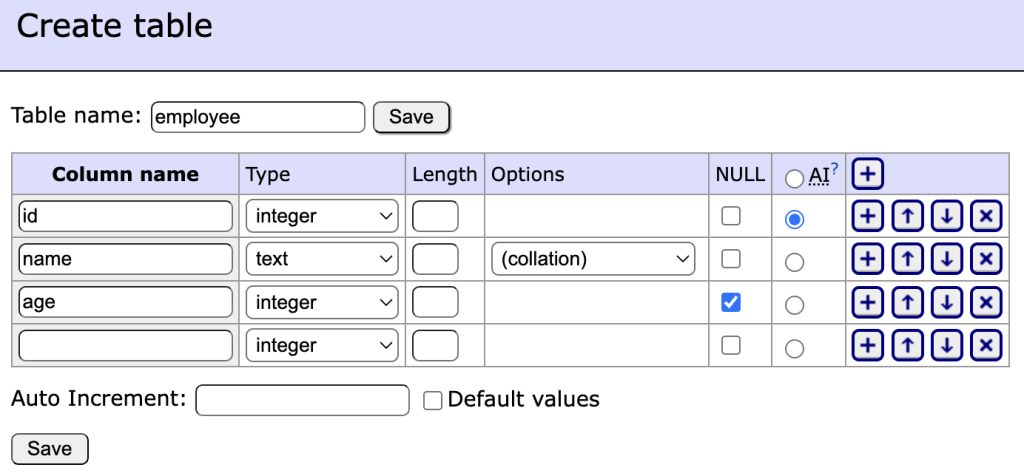
テーブルが作成できました。
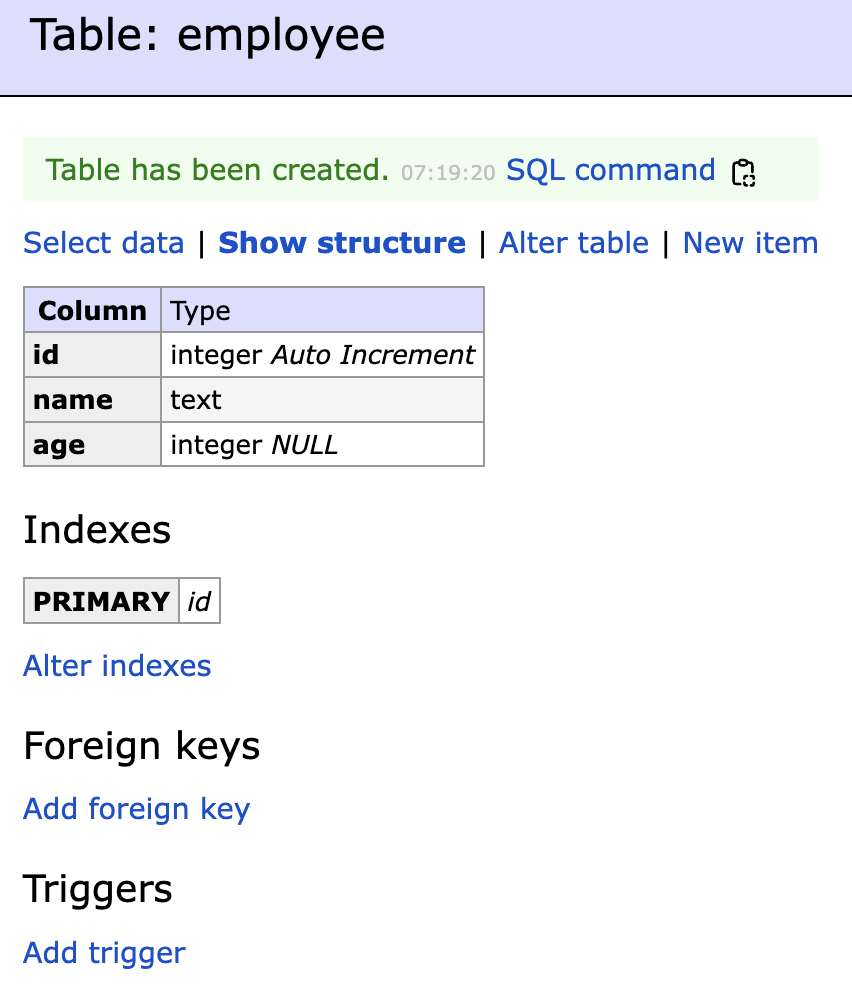
| SQL command | SQLのよるDML操作が可能 |
| Select data | レコードの情報を確認 |
| Show structure | テーブルの構造を確認 |
| Alter table | テーブルの構造を変更 |
| New item | レコードを追加 |
2-2. データベースを利用するための修正
Laravelでのデータベース情報は、config/database.php に記載されています。
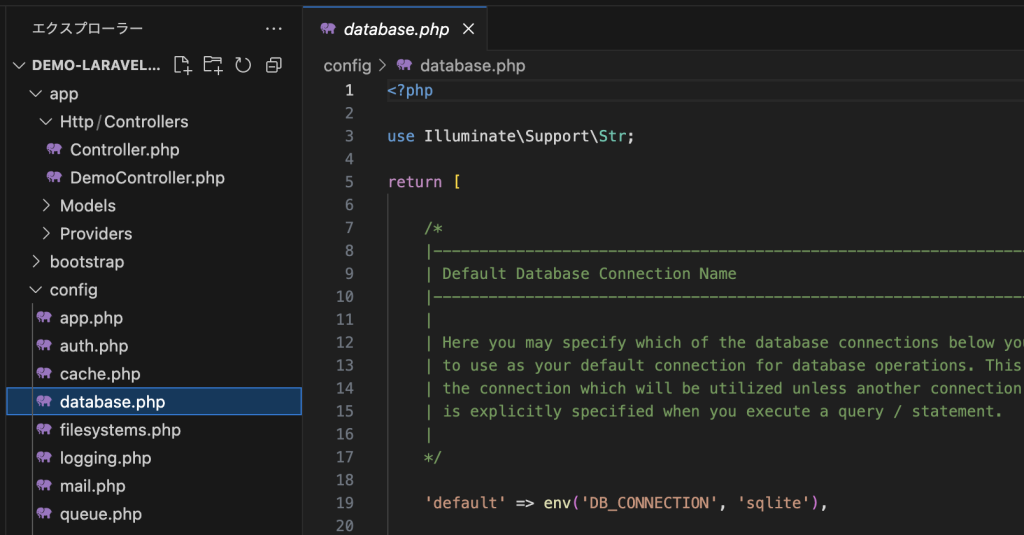
基本的な動作環境に関する環境変数は、.envに記載されています。
SQLiteはDB_HOST以降は使用しないため、コメントアウトされています。
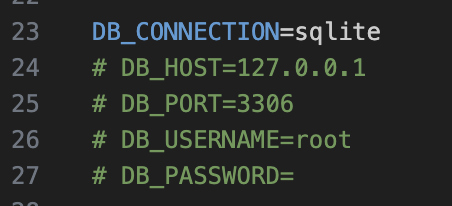
SQLite以外のデータベースを利用する場合は、上記2つのファイルを修正する必要があります。
3. DBクラス
「2-1-1. テーブルの作成」で作成したテーブルにアクセスし、CRUDの実装を行っていきます。
まず、employeeテーブルに「New item」でテストデータを追加してください。
3-1. DBを操作するメソッド
3-1-1. DB::selectメソッド
DB::selectメソッドは、データベースからレコードのデータを取得するためのメソッドです。
戻り値を変数に格納する必要があります。
変数 = DB::select(実行するSELECT文)パラメータ配列も含めることができます。
これは、2-3. DB::updateメソッド で使用しています。
変数 = DB::select(実行するSELECT文, パラメータ配列)例文
コントローラークラスである、DemoControllerを修正します。
<?php
namespace App\Http\Controllers;

use Illuminate\Support\Facades\DB;
use Illuminate\Http\Request;

class DemoController extends Controller
{

    /**
     * 一覧画面
     */
    public function index(Request $request) {
        $users = DB::select('SELECT * FROM employee');
        return view('demo.index', ['users' => $users]);
    }

}
resources/views/demo/index.blade.php
<!DOCTYPE html>
<html>
<head>
    <title>ユーザー一覧</title>
</head>
<body>
    <h1>ユーザー一覧</h1>
    <table>
        <tr>
            <th>id</th>
            <th>名前</th>
            <th>年齢</th>
        </tr>
        @foreach ($users as $user)
            <tr>
                <td>{{ $user->id }}</td>
                <td>{{ $user->name }}</td>
                <td>{{ $user->age }}</td>
            </tr>
        @endforeach
    </table>

</body>
</html>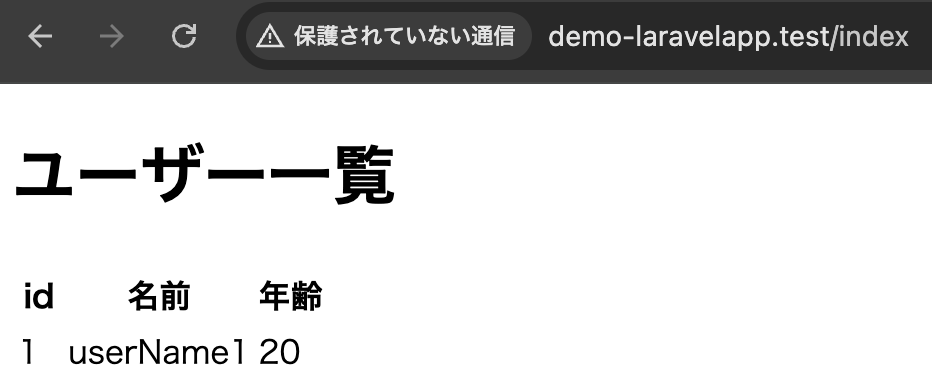
3-1-2. DB::insertメソッド
DB::insertメソッドは、データベースにレコードを登録するためのメソッドです。
DB::insert(実行するINSERT文, パラメータ配列)例文
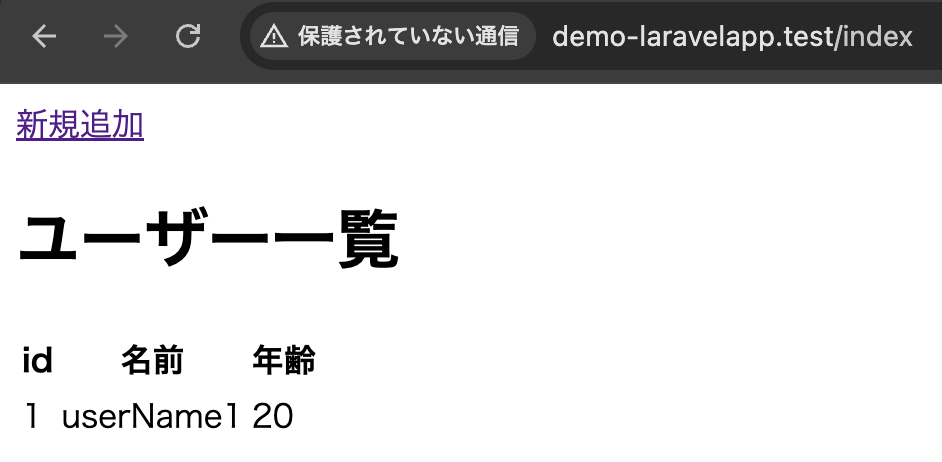
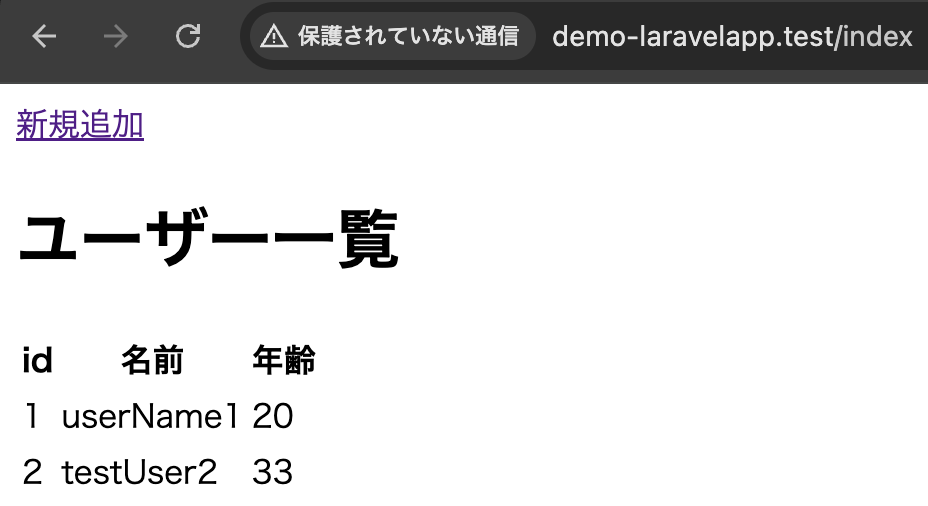
index.blade.php(一覧画面)
<!DOCTYPE html>
<html>
<head>
    <title>ユーザー一覧</title>
</head>
<body>
     <a href="{{ route('demo.add') }}">新規追加</a>
    <h1>ユーザー一覧</h1>
    <table>
        <tr>
            <th>id</th>
            <th>名前</th>
            <th>年齢</th>
        </tr>
        @foreach ($users as $user)
            <tr>
                <td>{{ $user->id }}</td>
                <td>{{ $user->name }}</td>
                <td>{{ $user->age }}</td>
            </tr>
        @endforeach
    </table>

</body>
</html>
登録画面へ遷移できるようにaタグを追記します。
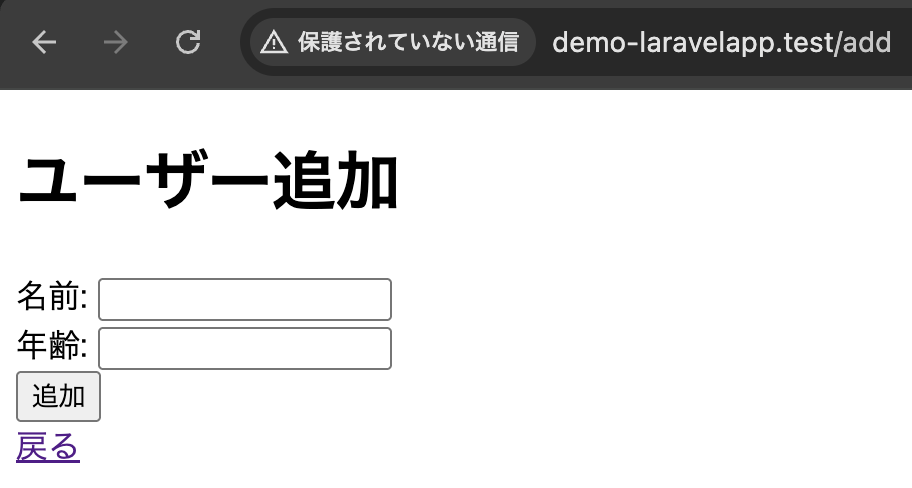
レコード登録の情報をユーザが入力できるように、登録ページを作成します。
そのため、add.blade.phpをresources/views/demo に作成し、記述します。
add.blade.php(登録画面)
<!DOCTYPE html>
<html>
<head>
    <title>ユーザー追加</title>
</head>
<body>
    <h1>ユーザー追加</h1>
    <form action="{{ route('create') }}" method="POST">
        @csrf
        <label for="name">名前:</label>
        <input type="text" id="name" name="name" required>
        <br>
        <label for="age">年齢:</label>
        <input type="number" id="age" name="age" required>
        <br>
        <button type="submit">追加</button>
    </form>
    <a href="{{ route('demo.index') }}">戻る</a>
</body>
</html>
formタグで入力された情報を、DemoControllerのcreateメソッドへPOSTリクエストで飛ばすようにしています。
なお、後に紹介するweb.phpでルート設定されています。
DemoController.php
<?php
namespace App\Http\Controllers;

use Illuminate\Support\Facades\DB;
use Illuminate\Http\Request;

class DemoController extends Controller
{

    /**
     * 一覧画面
     */
    public function index(Request $request) {
        $users = DB::select('SELECT * FROM employee');
        return view('demo.index', ['users' => $users]);
    }

    /**
     * 登録画面への遷移
     */
    public function add() {
        return view('demo.add');
    }

    /**
     * 登録処理
     */
    public function create(Request $request) {
        $param = [
            'name' => $request->name,
            'age' => $request->age,
        ];
        DB::insert('INSERT INTO employee (name, age) VALUES (:name, :age)', $param);
        return redirect('/index');
    }
}
add.blade.php(登録画面)から受け取ったPOSTリクエストの情報を、DB::insert()メソッドにより登録処理を行います。
登録後、redirect()メソッドにより、一覧画面へ遷移します。
web.php(ルート情報)
<?php

use Illuminate\Support\Facades\Route;
use App\Http\Controllers\DemoController;

Route::get('/', function () {
    return view('welcome');
});

Route::get('/index', [DemoController::class, 'index'])->name('demo.index');

Route::get('/add', [DemoController::class, 'add'])->name('demo.add');

Route::post('/add', [DemoController::class, 'create'])->name('create');
一覧画面
登録画面
登録後、一覧画面へリダイレクト
3-1-3. DB::updateメソッド
DB::updateメソッドは、データベースのレコードを更新するためのメソッドです。
DB::update(実行するUPDATE文, パラメータ配列)例文
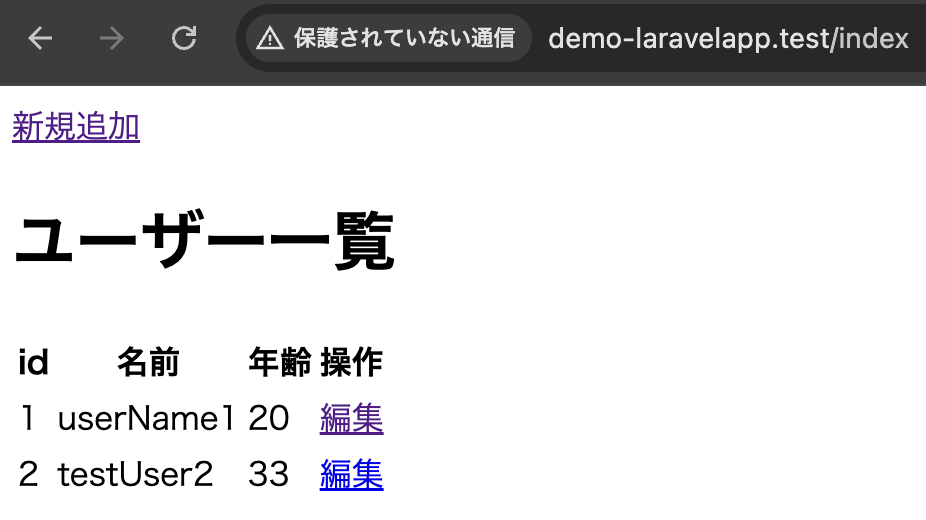
index.blade.php(一覧画面)
<!DOCTYPE html>
<html>
<head>
    <title>ユーザー一覧</title>
</head>
<body>
     <a href="{{ route('demo.add') }}">新規追加</a>
    <h1>ユーザー一覧</h1>
    <table>
        <tr>
            <th>id</th>
            <th>名前</th>
            <th>年齢</th>
            <th>操作</th>
        </tr>
        @foreach ($users as $user)
            <tr>
                <td>{{ $user->id }}</td>
                <td>{{ $user->name }}</td>
                <td>{{ $user->age }}</td>
                <td>
                    <a href="{{ route('demo.edit', ['id' => $user->id]) }}">編集</a>
                </td>
            </tr>
        @endforeach
    </table>

</body>
</html>
編集画面へ遷移できるように、aタグを追記します。
また、PRIMARY KEYのidでレコード毎の情報を取得できるように渡しています。
レコードの更新情報をユーザが入力できるように、編集ページを作成します。
そのため、edit.blade.phpをresources/views/demo に作成し、記述します。
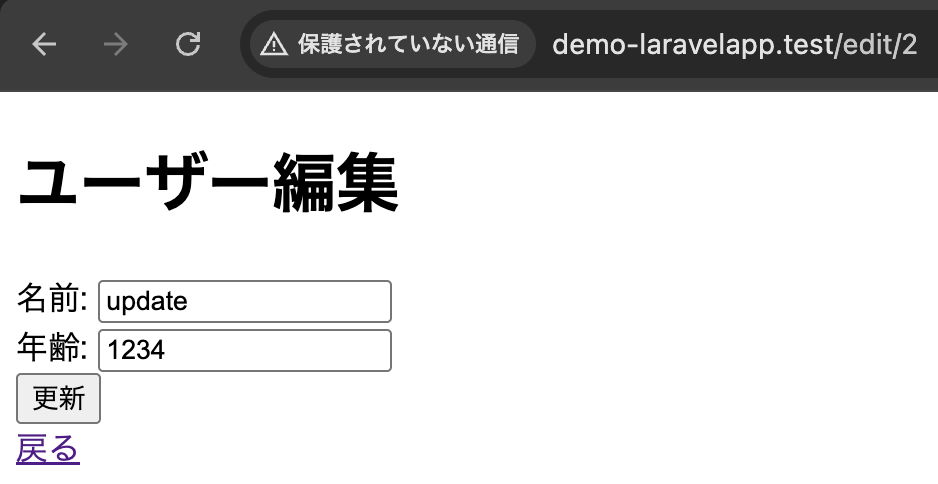
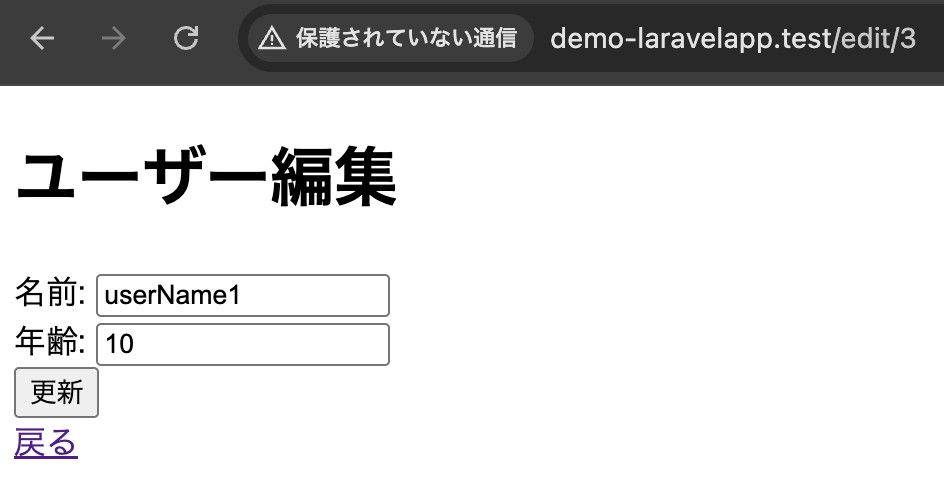
edit.blade.php(編集画面)
<!DOCTYPE html>
<html>
<head>
    <title>ユーザー編集</title>
</head>
<body>
    <h1>ユーザー編集</h1>
    <form method="post" action="{{ route('update', ['id' => $user->id]) }}">
        @csrf
        <div>
            <label for="name">名前:</label>
            <input type="text" name="name" id="name" value="{{ $user->name }}">
        </div>
        <div>
            <label for="age">年齢:</label>
            <input type="number" name="age" id="age" value="{{ $user->age }}">
        </div>
        <button type="submit">更新</button>
    </form>
    <a href="{{ route('demo.index') }}">戻る</a>
</body>
</html>
formタグで入力された情報を、DemoControllerのupdateメソッドへPOSTリクエストで飛ばすようにしています。
なお、後に紹介するweb.phpでルート設定されています。
DemoController.php
<?php
namespace App\Http\Controllers;
use Illuminate\Support\Facades\DB;
use Illuminate\Http\Request;
class DemoController extends Controller
{
/**
* 一覧画面
*/
public function index(Request $request) {
$users = DB::select('SELECT * FROM employee');
return view('demo.index', ['users' => $users]);
}
/**
* 登録画面への遷移
*/
public function add() {
return view('demo.add');
}
/**
* 登録処理
*/
public function create(Request $request) {
$param = [
'name' => $request->name,
'age' => $request->age,
];
DB::insert('INSERT INTO employee (name, age) VALUES (:name, :age)', $param);
return redirect('/index');
}
/**
* 編集画面への遷移
*/
public function edit($id) {
$user = DB::select('SELECT * FROM employee WHERE id = :id', [$id]);
return view('demo.edit', ['user' => $user[0]]);
}
/**
* 更新処理
*/
public function update(Request $request, $id) {
$param = [
'id' => $id,
'name' => $request->name,
'age' => $request->age,
];
DB::update('UPDATE employee SET name = :name, age = :age WHERE id = :id', $param);
return redirect('/index');
}
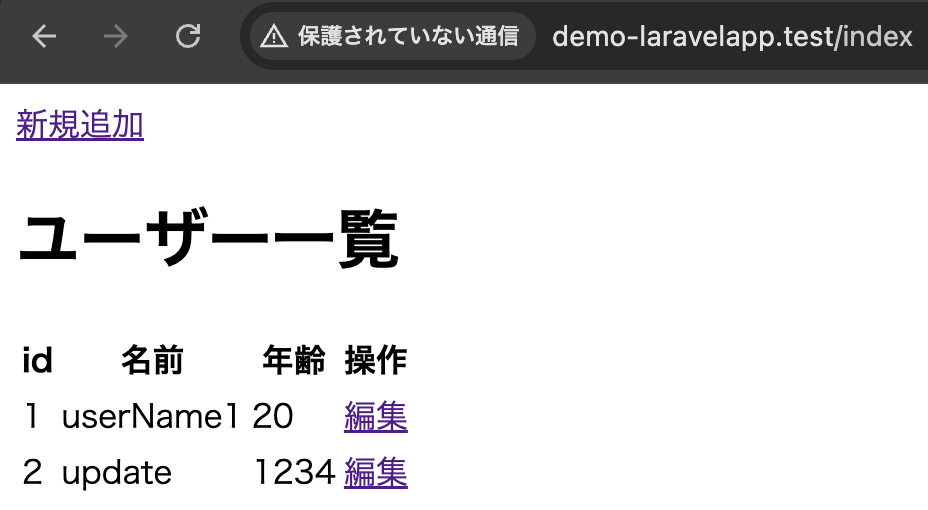
}edit.blade.php(編集画面)から受け取ったPOSTリクエストの情報を、DB::update()メソッドにより更新処理を行います。
更新後、redirect()メソッドにより、一覧画面へ遷移します。
web.php(ルート情報)
<?php

use Illuminate\Support\Facades\Route;
use App\Http\Controllers\DemoController;

Route::get('/', function () {
    return view('welcome');
});

Route::get('/index', [DemoController::class, 'index'])->name('demo.index');

Route::get('/add', [DemoController::class, 'add'])->name('demo.add');

Route::post('/add', [DemoController::class, 'create'])->name('create');

Route::get('/edit/{id}', [DemoController::class, 'edit'])->name('demo.edit');

Route::post('/edit/{id}', [DemoController::class, 'update'])->name('update');
一覧画面
編集画面

更新後、一覧画面へリダイレクト
3-1-4. DB::daleteメソッド
DB::daleteメソッドは、データベースにレコードを登録するためのメソッドです。
DB::delete(実行するDELETE文, パラメータ配列)例文
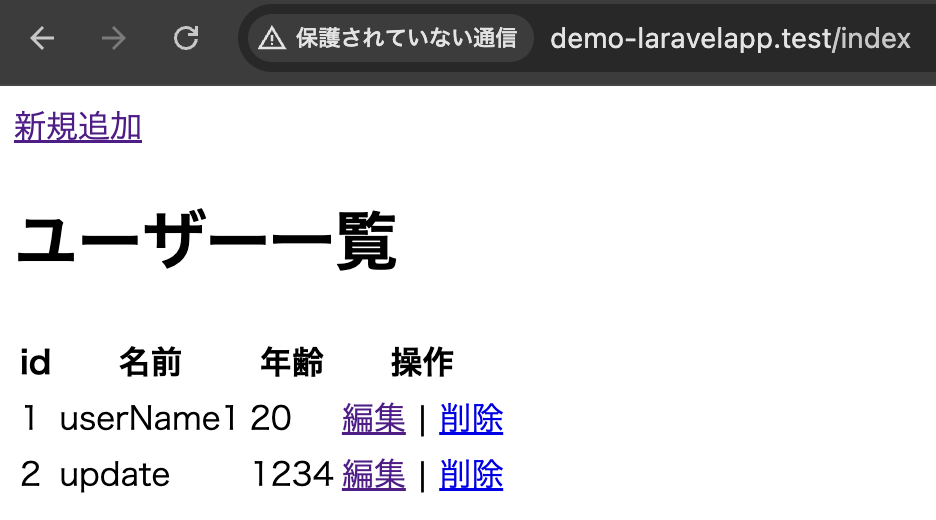
index.blade.php(一覧画面)
<!DOCTYPE html>
<html>
<head>
<title>ユーザー一覧</title>
</head>
<body>
<a href="{{ route('demo.add') }}">新規追加</a>
<h1>ユーザー一覧</h1>
<table>
<tr>
<th>id</th>
<th>名前</th>
<th>年齢</th>
<th>操作</th>
</tr>
@foreach ($users as $user)
<tr>
<td>{{ $user->id }}</td>
<td>{{ $user->name }}</td>
<td>{{ $user->age }}</td>
<td>
<a href="{{ route('demo.edit', ['id' => $user->id]) }}">編集</a>
|
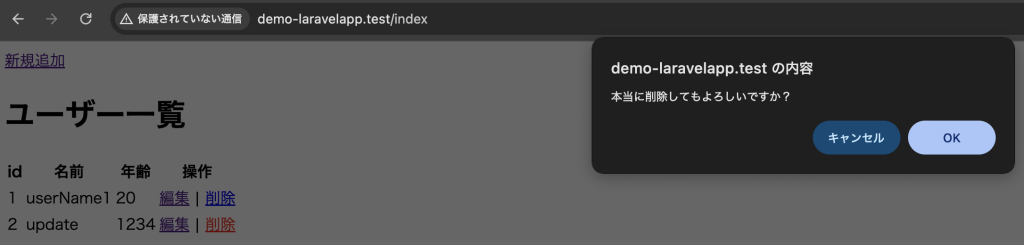
<a href="{{ route('delete', ['id' => $user->id]) }}" onclick="return confirm('本当に削除してもよろしいですか?')">
削除
</a>
</td>
</tr>
@endforeach
</table>
</body>
</html>
idのパラメーターをweb.phpのルート情報が設定されたDemoController.phpのdeleteアクションに渡されます。
DemoController.php
<?php
namespace App\Http\Controllers;
use Illuminate\Support\Facades\DB;
use Illuminate\Http\Request;
class DemoController extends Controller
{
/**
* 一覧画面
*/
public function index(Request $request) {
$users = DB::select('SELECT * FROM employee');
return view('demo.index', ['users' => $users]);
}
/**
* 登録画面への遷移
*/
public function add() {
return view('demo.add');
}
/**
* 登録処理
*/
public function create(Request $request) {
$param = [
'name' => $request->name,
'age' => $request->age,
];
DB::insert('INSERT INTO employee (name, age) VALUES (:name, :age)', $param);
return redirect('/index');
}
/**
* 編集画面への遷移
*/
public function edit($id) {
$user = DB::select('SELECT * FROM employee WHERE id = :id', [$id]);
return view('demo.edit', ['user' => $user[0]]);
}
/**
* 更新処理
*/
public function update(Request $request, $id) {
$param = [
'id' => $id,
'name' => $request->name,
'age' => $request->age,
];
DB::update('UPDATE employee SET name = :name, age = :age WHERE id = :id', $param);
return redirect('/index');
}
/**
* 削除処理
*/
public function delete($id) {
DB::delete('DELETE FROM employee WHERE id = :id', ['id' => $id]);
return redirect('/index');
}
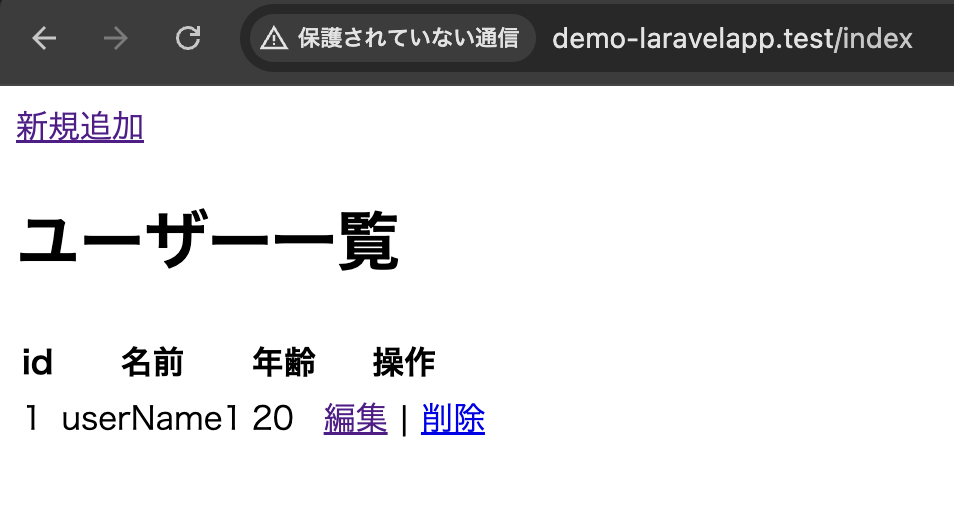
}DB::delete()メソッドによりidに該当するレコードの削除処理を行います。
web.php
<?php

use Illuminate\Support\Facades\Route;
use App\Http\Controllers\DemoController;

Route::get('/', function () {
    return view('welcome');
});

Route::get('/index', [DemoController::class, 'index'])->name('demo.index');

Route::get('/add', [DemoController::class, 'add'])->name('demo.add');

Route::post('/add', [DemoController::class, 'create'])->name('create');

Route::get('/edit/{id}', [DemoController::class, 'edit'])->name('demo.edit');

Route::post('/edit/{id}', [DemoController::class, 'update'])->name('update');

Route::get('/delete/{id}', [DemoController::class, 'delete'])->name('delete');
一覧画面
削除ボタンを押下後、ダイアログを表示
削除後、一覧画面
3-2. クエリビルダー
「3-1. DBを操作するメソッド」では、PHPコードの中にSQL文が混在していました。これは、SQL文にパラメータ配列の値を組み込んで文を生成するため、バグが発見しにくいです。
そこで、クエリビルダーというSQLのクエリ文を生成するメソッドを使用します。さまざまな要素を表すメソッドをメソッドチェーンとして連続して呼び出しSQLクエリ文を内部で生成し実行させることができます。
3-2-1. SELECT
3-2-1-1. 全レコードを取得
DB::table()メソッドは、全レコードを表示する処理を行います。
変数 = DB::table(テーブル名)getメソッドはSELECT文に相当し、テーブルにあるレコードを取得するものです。
変数 = DB::table(テーブル名)->get();例文
DemoController.php
<?php
namespace App\Http\Controllers;

use Illuminate\Support\Facades\DB;
use Illuminate\Http\Request;

class DemoController extends Controller
{

    /**
     * 一覧画面
     */
    public function index(Request $request) {
//     $users = DB::select('SELECT * FROM employee');
        $users = DB::table('employee')->get();
        return view('demo.index', ['users' => $users]);
    }

    /**
     * 登録画面への遷移
     */
    public function add() {
        return view('demo.add');
    }

    /**
     * 登録処理
     */
    public function create(Request $request) {
        $param = [
            'name' => $request->name,
            'age' => $request->age,
        ];
        DB::insert('INSERT INTO employee (name, age) VALUES (:name, :age)', $param);
        return redirect('/index');
    }

    /**
     * 編集画面への遷移
     */
    public function edit($id) {
        $user = DB::select('SELECT * FROM employee WHERE id = :id', [$id]);
        return view('demo.edit', ['user' => $user[0]]);
    }

    /**
     * 更新処理
     */
    public function update(Request $request, $id) {
        $param = [
            'id' => $id,
            'name' => $request->name,
            'age' => $request->age,
        ];
        DB::update('UPDATE employee SET name = :name, age = :age WHERE id = :id', $param);
        return redirect('/index');
    }

    /**
     * 削除処理
     */
    public function delete($id) {
        DB::delete('DELETE FROM employee WHERE id = :id', ['id' => $id]);
        return redirect('/index');
    }
}
わかりやすいように、テストデータを登録してそれを取得しています。
3-2-1-2. 絞り込み取得 – whereメソッド
where()メソッドは、SQLのWHERE句に相当し、絞り込みのレコードを取得します。
以下は、指定した値と一致するものしか検索できません。
where(フィールド名, 値)firstメソッドは最初のレコードだけを返すメソッドです。
getメソッドは全てのレコードを返しますが、firstメソッドは最初のレコードだけを返します。
DemoController.php
<?php
namespace App\Http\Controllers;

use Illuminate\Support\Facades\DB;
use Illuminate\Http\Request;

class DemoController extends Controller
{

    /**
     * 一覧画面
     */
    public function index(Request $request) {
        $users = DB::table('employee')->get();
        return view('demo.index', ['users' => $users]);
    }

    /**
     * 登録画面への遷移
     */
    public function add() {
        return view('demo.add');
    }

    /**
     * 登録処理
     */
    public function create(Request $request) {
        $param = [
            'name' => $request->name,
            'age' => $request->age,
        ];
        DB::insert('INSERT INTO employee (name, age) VALUES (:name, :age)', $param);
        return redirect('/index');
    }

    /**
     * 編集画面への遷移
     */
    // public function edit($id) {
    //     $user = DB::select('SELECT * FROM employee WHERE id = :id', [$id]);
    //     return view('demo.edit', ['user' => $user[0]]);
    // }
    public function edit(Request $request) {
        $id = $request->id;
        $user = DB::table('employee')->where('id', $id)->first();
        return view('demo.edit', ['user' => $user]);
    }

    /**
     * 更新処理
     */
    public function update(Request $request, $id) {
        $param = [
            'id' => $id,
            'name' => $request->name,
            'age' => $request->age,
        ];
        DB::update('UPDATE employee SET name = :name, age = :age WHERE id = :id', $param);
        return redirect('/index');
    }

    /**
     * 削除処理
     */
    public function delete($id) {
        DB::delete('DELETE FROM employee WHERE id = :id', ['id' => $id]);
        return redirect('/index');
    }

}
whereメソッドに3つの引数を指定すると、「〜以上」や「〜以下」という絞り込みを行うことができます。
where(フィールド名, 演算記号, 値);例文
DemoController.php
<?php
namespace App\Http\Controllers;
use Illuminate\Support\Facades\DB;
use Illuminate\Http\Request;
class DemoController extends Controller
{
/**
* 一覧画面
*/
public function index(Request $request) {
$users = DB::table('employee');
if ($request->has('search_id')) {
$users->where('id', '>=', $request->search_id);
}
$result = $users->get();
return view('demo.index', [
'users' => $result,
'search_id' => $request->search_id
]);
}
/**
* 登録画面への遷移
*/
public function add() {
return view('demo.add');
}
/**
* 登録処理
*/
public function create(Request $request) {
$param = [
'name' => $request->name,
'age' => $request->age,
];
DB::insert('INSERT INTO employee (name, age) VALUES (:name, :age)', $param);
return redirect('/index');
}
/**
* 編集画面への遷移
*/
public function edit(Request $request) {
$id = $request->id;
$user = DB::table('employee')->where('id', $id)->first();
return view('demo.edit', ['user' => $user]);
}
/**
* 更新処理
*/
public function update(Request $request, $id) {
$param = [
'id' => $id,
'name' => $request->name,
'age' => $request->age,
];
DB::update('UPDATE employee SET name = :name, age = :age WHERE id = :id', $param);
return redirect('/index');
}
/**
* 削除処理
*/
public function delete($id) {
DB::delete('DELETE FROM employee WHERE id = :id', ['id' => $id]);
return redirect('/index');
}
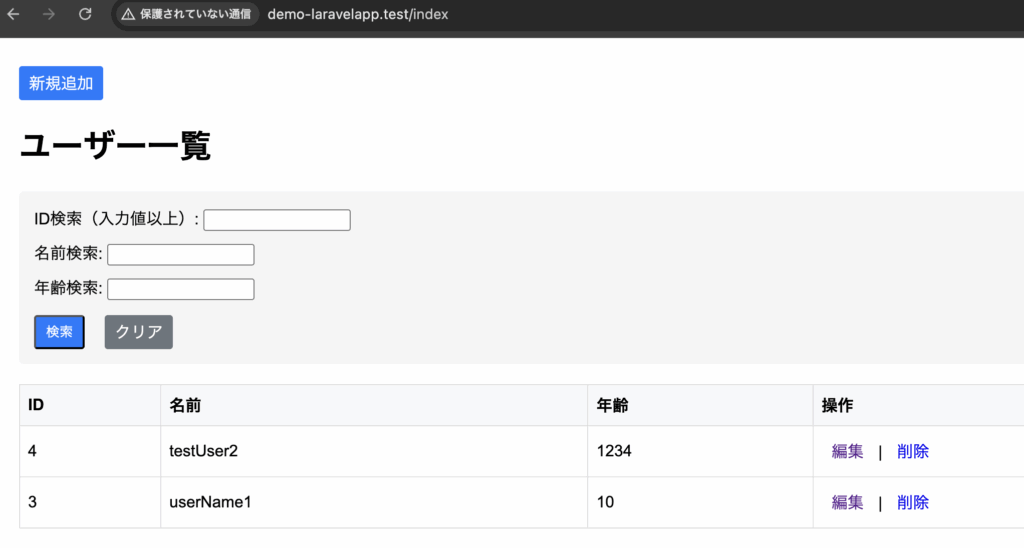
}index.blade.php
<!DOCTYPE html>
<html>
<head>
<title>ユーザー一覧</title>
</head>
<body>
<a href="{{ route('demo.add') }}">新規追加</a>
<h1>ユーザー一覧</h1>
<form action="{{ route('demo.index') }}" method="get">
<label for="search_id">入力された値以上のIDを表示</label>
<input type="number" name="search_id" id="search_id" value="{{ $search_id }}">
<button type="submit">検索</button>
</form>
<table>
<tr>
<th>id</th>
<th>名前</th>
<th>年齢</th>
<th>操作</th>
</tr>
@foreach ($users as $user)
<tr>
<td>{{ $user->id }}</td>
<td>{{ $user->name }}</td>
<td>{{ $user->age }}</td>
<td>
<a href="{{ route('demo.edit', ['id' => $user->id]) }}">編集</a>
|
<a href="{{ route('delete', ['id' => $user->id]) }}" onclick="return confirm('本当に削除してもよろしいですか?')">
削除
</a>
</td>
</tr>
@endforeach
</table>
</body>
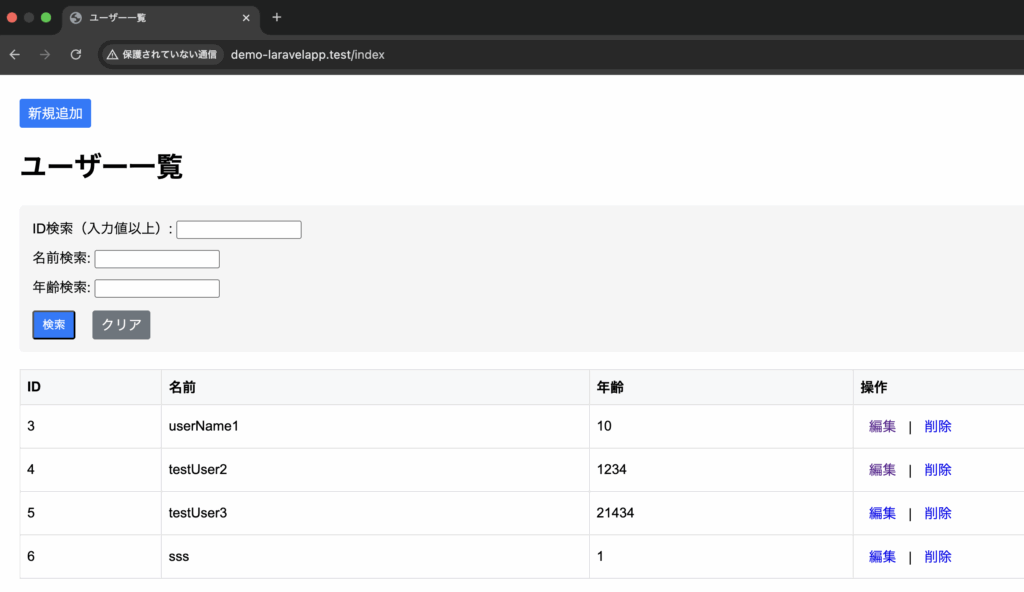
</html>初期画面
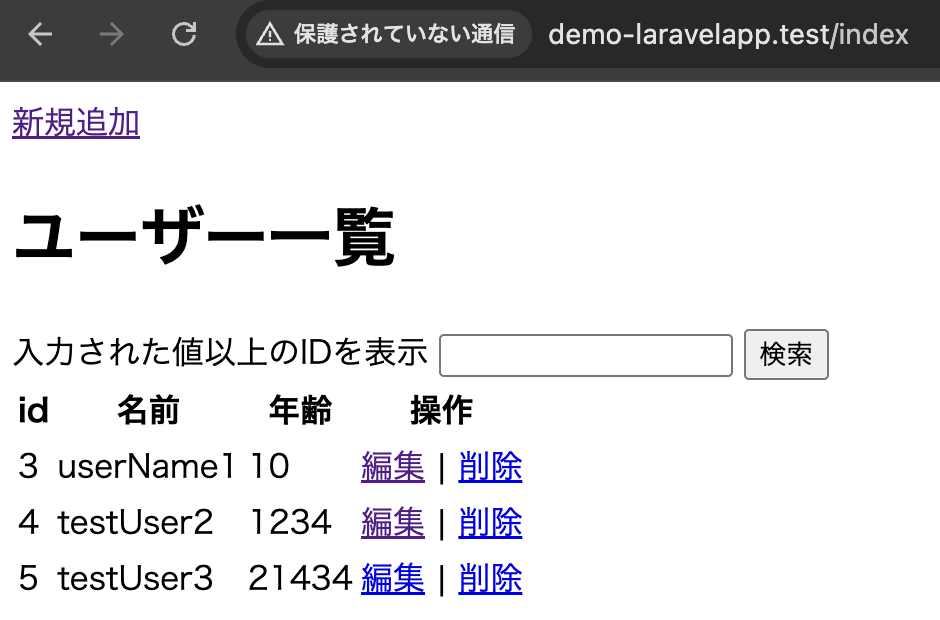
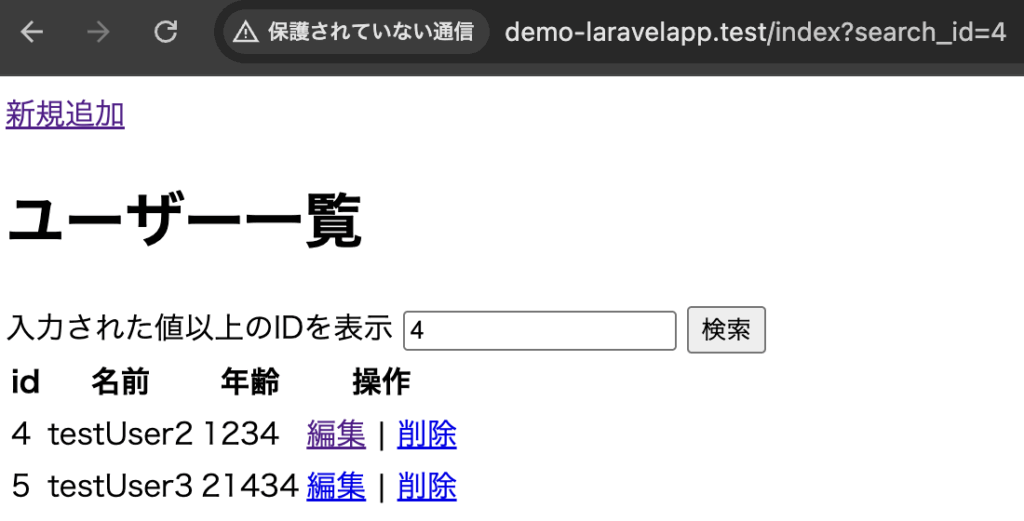
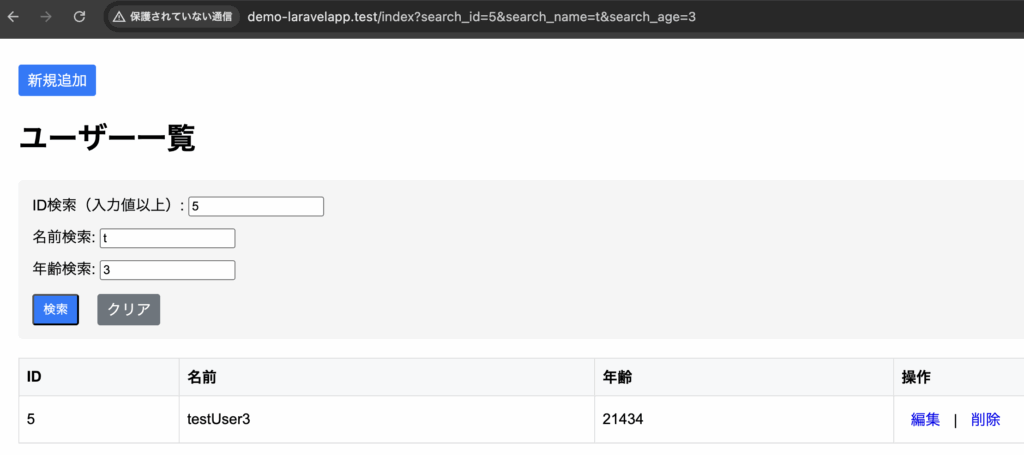
TextBoxに4を入力し、検索ボタンを押下where('id', '>=', $request->search_id);の>=により指定されたid以上が表示されるようにしています。
3-2-1-3. 複数の条件による絞り込み取得
複数の条件を設定する場合は、whereメソッドとorWhereメソッドを組み合わせることにより利用できます。
「かつ」による絞り込み検索
where(フィールド名, 演算記号, 値)
->where(フィールド名, 演算記号, 値)    前条件 かつ 後条件を意味する
「または」による絞り込み検索
where(フィールド名, 演算記号, 値)
->orWhere(フィールド名, 演算記号, 値)    前条件 または 後条件を意味する
例文
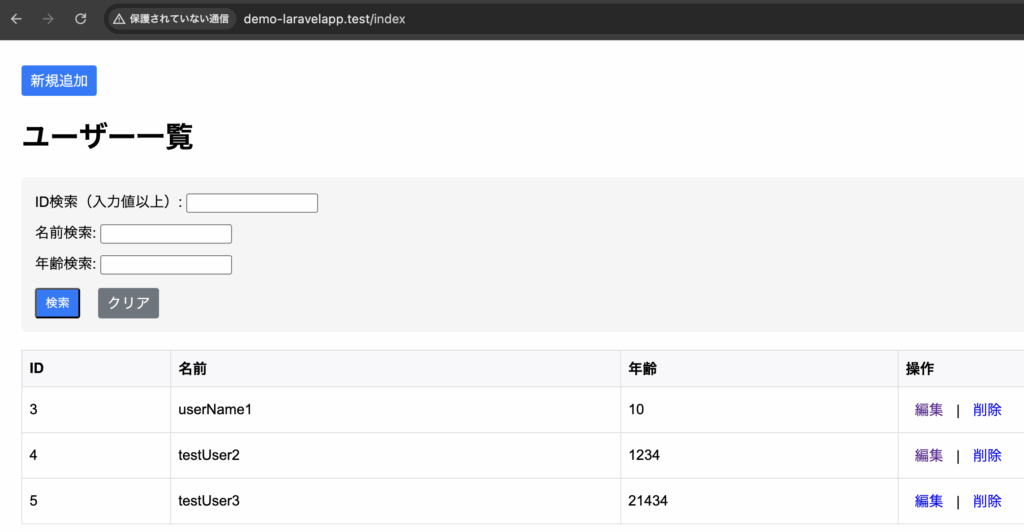
index.blade.php
※一覧画面が見やすいように、styleを追加しています。
<!DOCTYPE html>
<html>
<head>
    <title>ユーザー一覧</title>
    <style>
        body { padding: 20px; font-family: Arial, sans-serif; }
        .search-form {
            background: #f5f5f5;
            padding: 15px;
            border-radius: 5px;
            margin-bottom: 20px;
        }
        .search-form .form-group {
            margin-bottom: 10px;
        }
        table {
            width: 100%;
            border-collapse: collapse;
        }
        th, td {
            padding: 8px;
            border: 1px solid #ddd;
            text-align: left;
        }
        th {
            background-color: #f8f9fa;
        }
        .btn {
            padding: 5px 10px;
            border-radius: 3px;
            text-decoration: none;
            display: inline-block;
        }
        .btn-primary {
            background: #007bff;
            color: white;
        }
        .btn-secondary {
            background: #6c757d;
            color: white;
            border: none;
            margin-left: 10px;
        }
        .button-group {
            margin-top: 15px;
            display: flex;
            gap: 10px;
        }
    </style>
</head>
<body>
    <a href="{{ route('demo.add') }}" class="btn btn-primary">新規追加</a>
    <h1>ユーザー一覧</h1>

    <form action="{{ route('demo.index') }}" method="get" class="search-form">
        <div class="form-group">
            <label for="search_id">ID検索(入力値以上):</label>
            <input type="number" name="search_id" id="search_id" value="{{ $search_id }}">
        </div>

        <div class="form-group">
            <label for="search_name">名前検索:</label>
            <input type="text" name="search_name" id="search_name" value="{{ $search_name }}">
        </div>

        <div class="form-group">
            <label for="search_age">年齢検索:</label>
            <input type="number" name="search_age" id="search_age" value="{{ $search_age }}">
        </div>

        <div class="button-group">
            <button type="submit" class="btn btn-primary">検索</button>
            <a href="{{ route('demo.index') }}" class="btn btn-secondary">クリア</a>
        </div>
    </form>

    <table>
        <tr>
            <th>ID</th>
            <th>名前</th>
            <th>年齢</th>
            <th>操作</th>
        </tr>
        @foreach ($users as $user)
            <tr>
                <td>{{ $user->id }}</td>
                <td>{{ $user->name }}</td>
                <td>{{ $user->age }}</td>
                <td>
                    <a href="{{ route('demo.edit', ['id' => $user->id]) }}" class="btn">編集</a>
                    |
                    <a href="{{ route('delete', ['id' => $user->id]) }}"
                       onclick="return confirm('本当に削除してもよろしいですか?')"
                       class="btn">削除</a>
                </td>
            </tr>
        @endforeach
    </table>
</body>
</html>
DemoController.php
<?php
namespace App\Http\Controllers;

use Illuminate\Support\Facades\DB;
use Illuminate\Http\Request;

class DemoController extends Controller
{

    /**
     * 一覧画面
     */
    public function index(Request $request) {
        $users = DB::table('employee')
            ->when($request->filled('search_id'), function($query) use ($request) {
                $query->where('id', '=', $request->search_id);
            })
            ->when($request->filled('search_name'), function($query) use ($request) {
                $query->where('name', 'LIKE', '%' . $request->search_name . '%');
            })
            ->when($request->filled('search_age'), function($query) use ($request) {
                $query->where('age', 'LIKE', '%' . $request->search_age . '%');
            });

        $result = $users->get();
        return view('demo.index', [
            'users' => $result,
            'search_id' => $request->search_id,
            'search_name' => $request->search_name,
            'search_age' => $request->search_age
        ]);
    }

    /**
     * 登録画面への遷移
     */
    public function add() {
        return view('demo.add');
    }

    /**
     * 登録処理
     */
    public function create(Request $request) {
        $param = [
            'name' => $request->name,
            'age' => $request->age,
        ];
        DB::insert('INSERT INTO employee (name, age) VALUES (:name, :age)', $param);
        return redirect('/index');
    }

    /**
     * 編集画面への遷移
     */
    public function edit(Request $request) {
        $id = $request->id;
        $user = DB::table('employee')->where('id', $id)->first();
        return view('demo.edit', ['user' => $user]);
    }
    /**
     * 更新処理
     */
    public function update(Request $request, $id) {
        $param = [
            'id' => $id,
            'name' => $request->name,
            'age' => $request->age,
        ];
        DB::update('UPDATE employee SET name = :name, age = :age WHERE id = :id', $param);
        return redirect('/index');
    }

    /**
     * 削除処理
     */
    public function delete($id) {
        DB::delete('DELETE FROM employee WHERE id = :id', ['id' => $id]);
        return redirect('/index');
    }

}
3-2-1-4. 複数の条件による絞り込み取得
whereRawメソッドを使用しても条件検索できます。
これは、より複雑なSQL条件を実装できます。
whereRaw(条件式, パラメータ配列)例文
〜省略〜
$min = $request->min;
$max = $request->max;
$item = DB::table('tableName')
->whereRaw('age >= ? and age <= ?',[$min, $max])
->get();
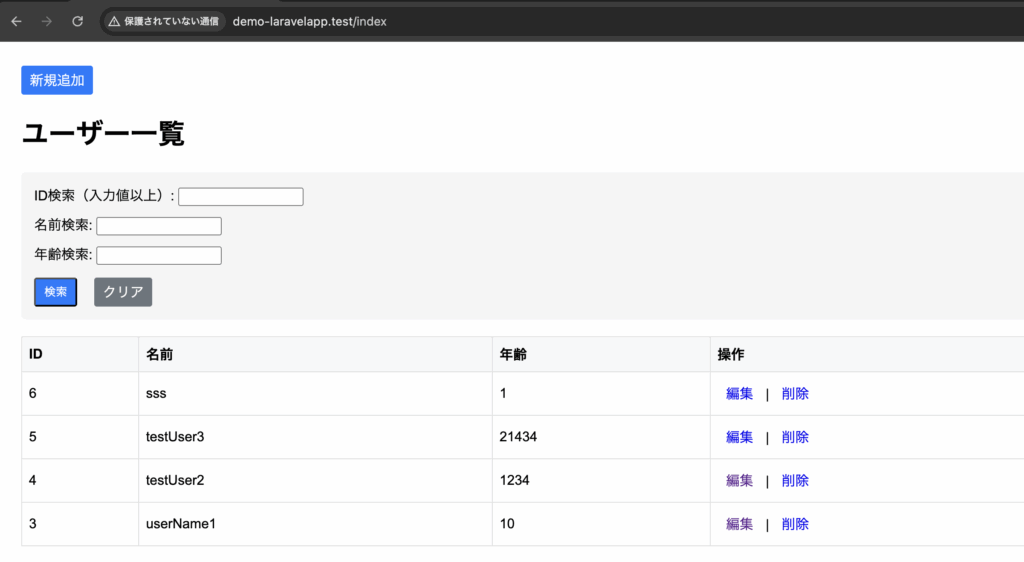
〜省略〜3-2-1-5. 並び替え
レコードを検索し取得した際に、並び順を変更する際にorderByメソッドを使用します。
昇順の構文
orderBy('並び順の基準となるカラム名', 'asc')降順の構文
orderBy('並び順の基準となるカラム名', 'desc')例文(IDを降順に並び替える)
DemoController.php
<?php
namespace App\Http\Controllers;

use Illuminate\Support\Facades\DB;
use Illuminate\Http\Request;

class DemoController extends Controller
{

    /**
     * 一覧画面
     */
    public function index(Request $request) {
        $users = DB::table('employee')
            ->when($request->filled('search_id'), function($query) use ($request) {
                $query->whereRaw('id = ?', [$request->search_id]);
            })
            ->when($request->filled('search_name'), function($query) use ($request) {
                $query->whereRaw('name LIKE ?', ['%' . $request->search_name . '%']);
            })
            ->when($request->filled('search_age'), function($query) use ($request) {
                $query->whereRaw('age LIKE ?', ['%' . $request->search_age . '%']);
            })
            ->orderBy('id', 'desc');

        $result = $users->get();
        return view('demo.index', [
            'users' => $result,
            'search_id' => $request->search_id,
            'search_name' => $request->search_name,
            'search_age' => $request->search_age
        ]);
    }

    /**
     * 登録画面への遷移
     */
    public function add() {
        return view('demo.add');
    }

    /**
     * 登録処理
     */
    public function create(Request $request) {
        $param = [
            'name' => $request->name,
            'age' => $request->age,
        ];
        DB::insert('INSERT INTO employee (name, age) VALUES (:name, :age)', $param);
        return redirect('/index');
    }

    /**
     * 編集画面への遷移
     */
    public function edit(Request $request) {
        $id = $request->id;
        $user = DB::table('employee')->where('id', $id)->first();
        return view('demo.edit', ['user' => $user]);
    }
    /**
     * 更新処理
     */
    public function update(Request $request, $id) {
        $param = [
            'id' => $id,
            'name' => $request->name,
            'age' => $request->age,
        ];
        DB::update('UPDATE employee SET name = :name, age = :age WHERE id = :id', $param);
        return redirect('/index');
    }

    /**
     * 削除処理
     */
    public function delete($id) {
        DB::delete('DELETE FROM employee WHERE id = :id', ['id' => $id]);
        return redirect('/index');
    }

}
orderBy実装前の一覧画面
orderBy実装後の一覧画面
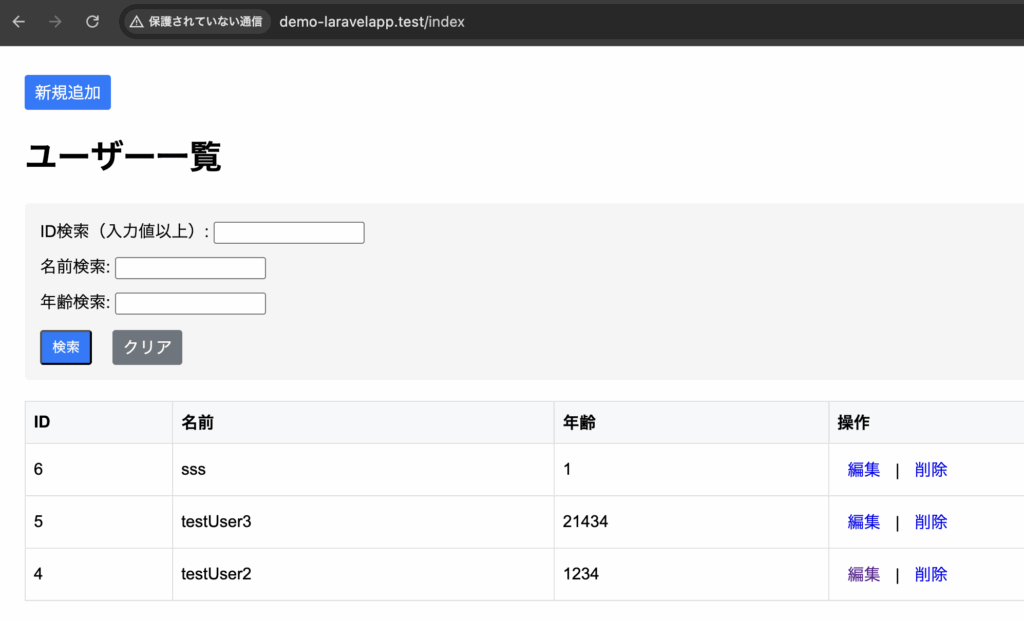
3-2-1-6. 指定した数だけレコードを取得
指定した数だけレコードを取得するには、limitメソッドを使用します。
limit( 整数 )例文
DemoController.php
<?php
namespace App\Http\Controllers;

use Illuminate\Support\Facades\DB;
use Illuminate\Http\Request;

class DemoController extends Controller
{

    /**
     * 一覧画面
     */
    public function index(Request $request) {
        $users = DB::table('employee')
            ->when($request->filled('search_id'), function($query) use ($request) {
                $query->whereRaw('id = ?', [$request->search_id]);
            })
            ->when($request->filled('search_name'), function($query) use ($request) {
                $query->whereRaw('name LIKE ?', ['%' . $request->search_name . '%']);
            })
            ->when($request->filled('search_age'), function($query) use ($request) {
                $query->whereRaw('age LIKE ?', ['%' . $request->search_age . '%']);
            })
            ->orderBy('id', 'desc')
            ->limit(3);

        $result = $users->get();
        return view('demo.index', [
            'users' => $result,
            'search_id' => $request->search_id,
            'search_name' => $request->search_name,
            'search_age' => $request->search_age
        ]);
    }

    /**
     * 登録画面への遷移
     */
    public function add() {
        return view('demo.add');
    }

    /**
     * 登録処理
     */
    public function create(Request $request) {
        $param = [
            'name' => $request->name,
            'age' => $request->age,
        ];
        DB::insert('INSERT INTO employee (name, age) VALUES (:name, :age)', $param);
        return redirect('/index');
    }

    /**
     * 編集画面への遷移
     */
    public function edit(Request $request) {
        $id = $request->id;
        $user = DB::table('employee')->where('id', $id)->first();
        return view('demo.edit', ['user' => $user]);
    }
    /**
     * 更新処理
     */
    public function update(Request $request, $id) {
        $param = [
            'id' => $id,
            'name' => $request->name,
            'age' => $request->age,
        ];
        DB::update('UPDATE employee SET name = :name, age = :age WHERE id = :id', $param);
        return redirect('/index');
    }

    /**
     * 削除処理
     */
    public function delete($id) {
        DB::delete('DELETE FROM employee WHERE id = :id', ['id' => $id]);
        return redirect('/index');
    }

}
一覧画面
3-2-1-7. 指定した位置からレコードを取得
指定した位置からレコードを取得するには、offsetメソッドを使用します。
offsetメソッドは、指定した位置からレコードを取得するためのものです。
offset( 整数 )例文(3番目から取得する)
DemoController.php
<?php
namespace App\Http\Controllers;

use Illuminate\Support\Facades\DB;
use Illuminate\Http\Request;

class DemoController extends Controller
{

    /**
     * 一覧画面
     */
    public function index(Request $request) {
        $users = DB::table('employee')
            ->when($request->filled('search_id'), function($query) use ($request) {
                $query->whereRaw('id = ?', [$request->search_id]);
            })
            ->when($request->filled('search_name'), function($query) use ($request) {
                $query->whereRaw('name LIKE ?', ['%' . $request->search_name . '%']);
            })
            ->when($request->filled('search_age'), function($query) use ($request) {
                $query->whereRaw('age LIKE ?', ['%' . $request->search_age . '%']);
            })
            ->orderBy('id', 'desc')
            ->limit(3)
            ->offset(2);

        $result = $users->get();
        return view('demo.index', [
            'users' => $result,
            'search_id' => $request->search_id,
            'search_name' => $request->search_name,
            'search_age' => $request->search_age
        ]);
    }

    /**
     * 登録画面への遷移
     */
    public function add() {
        return view('demo.add');
    }

    /**
     * 登録処理
     */
    public function create(Request $request) {
        $param = [
            'name' => $request->name,
            'age' => $request->age,
        ];
        DB::insert('INSERT INTO employee (name, age) VALUES (:name, :age)', $param);
        return redirect('/index');
    }

    /**
     * 編集画面への遷移
     */
    public function edit(Request $request) {
        $id = $request->id;
        $user = DB::table('employee')->where('id', $id)->first();
        return view('demo.edit', ['user' => $user]);
    }
    /**
     * 更新処理
     */
    public function update(Request $request, $id) {
        $param = [
            'id' => $id,
            'name' => $request->name,
            'age' => $request->age,
        ];
        DB::update('UPDATE employee SET name = :name, age = :age WHERE id = :id', $param);
        return redirect('/index');
    }

    /**
     * 削除処理
     */
    public function delete($id) {
        DB::delete('DELETE FROM employee WHERE id = :id', ['id' => $id]);
        return redirect('/index');
    }

}
一覧画面
3-2-2. INSERT
レコードを追加するには、insertメソッドを使用します。
DB::insertメソッドのように、SQL文は必要ありません。
DB::table('テーブル名')->insert(データをまとめた連想配列);例文
DemoController.php
<?php
namespace App\Http\Controllers;
use Illuminate\Support\Facades\DB;
use Illuminate\Http\Request;
class DemoController extends Controller
{
/**
* 一覧画面
*/
public function index(Request $request) {
$users = DB::table('employee')
->when($request->filled('search_id'), function($query) use ($request) {
$query->whereRaw('id = ?', [$request->search_id]);
})
->when($request->filled('search_name'), function($query) use ($request) {
$query->whereRaw('name LIKE ?', ['%' . $request->search_name . '%']);
})
->when($request->filled('search_age'), function($query) use ($request) {
$query->whereRaw('age LIKE ?', ['%' . $request->search_age . '%']);
})
->orderBy('id', 'desc'); // 追加
->limit(3) // 削除
->offset(2); // 削除
$result = $users->get();
return view('demo.index', [
'users' => $result,
'search_id' => $request->search_id,
'search_name' => $request->search_name,
'search_age' => $request->search_age
]);
}
/**
* 登録画面への遷移
*/
public function add() {
return view('demo.add');
}
/**
* 登録処理
*/
public function create(Request $request) {
$param = [
'name' => $request->name,
'age' => $request->age,
];
// DB::insert('INSERT INTO employee (name, age) VALUES (:name, :age)', $param);
DB::table('employee')->insert($param);
return redirect('/index');
}
/**
* 編集画面への遷移
*/
public function edit(Request $request) {
$id = $request->id;
$user = DB::table('employee')->where('id', $id)->first();
return view('demo.edit', ['user' => $user]);
}
/**
* 更新処理
*/
public function update(Request $request, $id) {
$param = [
'id' => $id,
'name' => $request->name,
'age' => $request->age,
];
DB::update('UPDATE employee SET name = :name, age = :age WHERE id = :id', $param);
return redirect('/index');
}
/**
* 削除処理
*/
public function delete($id) {
DB::delete('DELETE FROM employee WHERE id = :id', ['id' => $id]);
return redirect('/index');
}
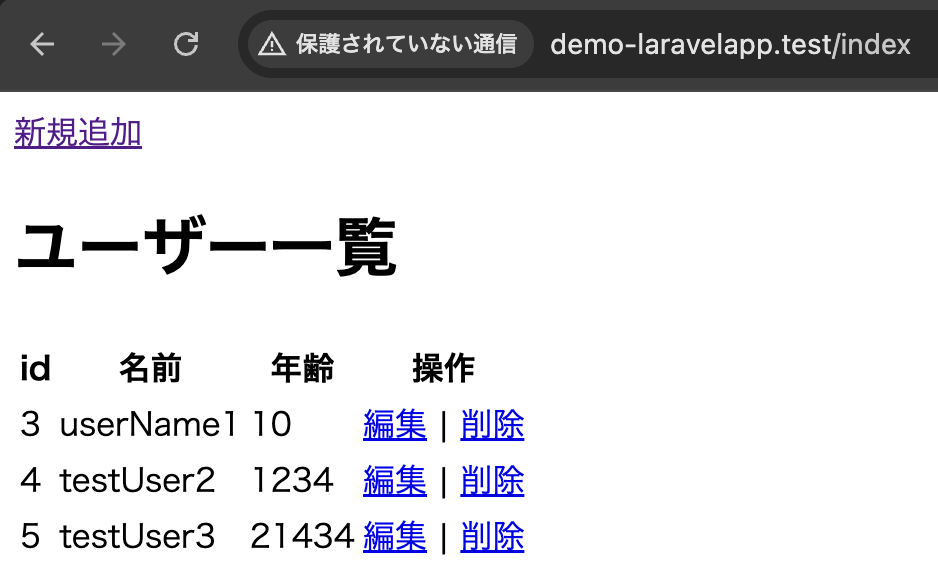
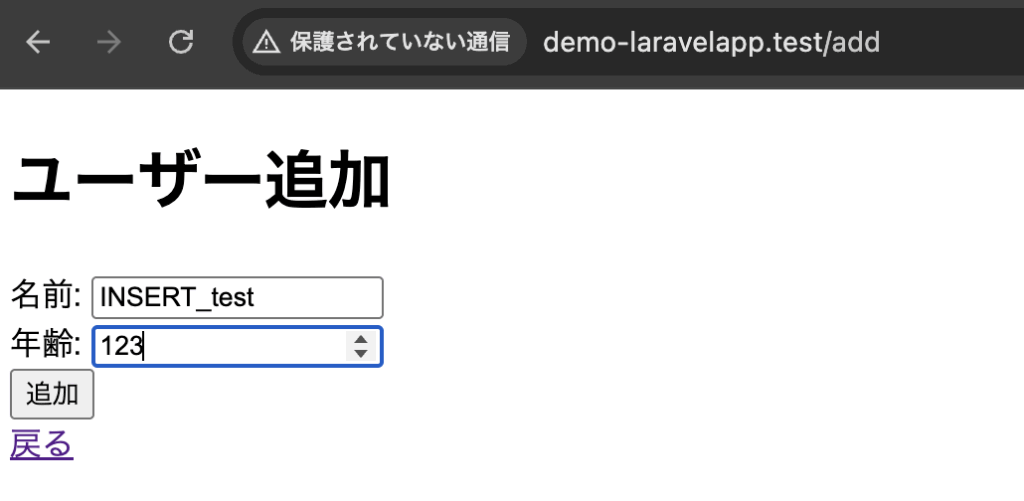
}一覧画面(新規追加ボタンを押下)

新規追加画面
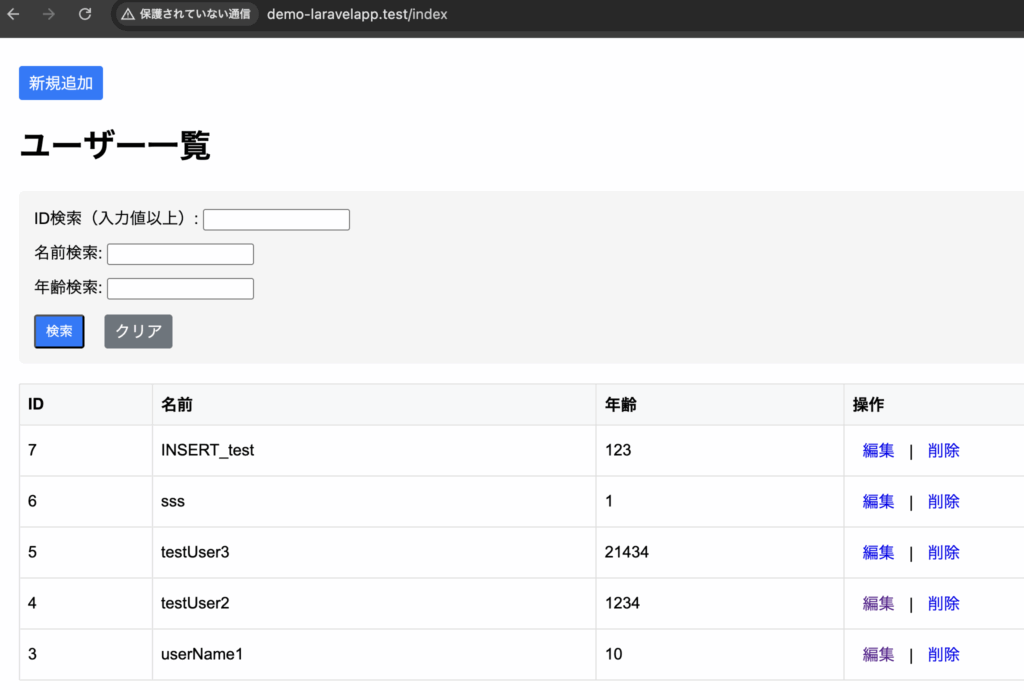
一覧画面
3-2-3. UPDATE
レコードを更新するには、updateメソッドを使用します。
また、更新対象を指定するため、whereメソッドも使用します。
DB::updateメソッドのように、SQL文は必要ありません。
DB::table('テーブル名')->where(更新対象の指定)->update(連想配列);例文
DemoController.php
<?php
namespace App\Http\Controllers;
use Illuminate\Support\Facades\DB;
use Illuminate\Http\Request;
class DemoController extends Controller
{
/**
* 一覧画面
*/
public function index(Request $request) {
$users = DB::table('employee')
->when($request->filled('search_id'), function($query) use ($request) {
$query->whereRaw('id = ?', [$request->search_id]);
})
->when($request->filled('search_name'), function($query) use ($request) {
$query->whereRaw('name LIKE ?', ['%' . $request->search_name . '%']);
})
->when($request->filled('search_age'), function($query) use ($request) {
$query->whereRaw('age LIKE ?', ['%' . $request->search_age . '%']);
})
->orderBy('id', 'desc');
$result = $users->get();
return view('demo.index', [
'users' => $result,
'search_id' => $request->search_id,
'search_name' => $request->search_name,
'search_age' => $request->search_age
]);
}
/**
* 登録画面への遷移
*/
public function add() {
return view('demo.add');
}
/**
* 登録処理
*/
public function create(Request $request) {
$param = [
'name' => $request->name,
'age' => $request->age,
];
// DB::insert('INSERT INTO employee (name, age) VALUES (:name, :age)', $param);
DB::table('employee')->insert($param);
return redirect('/index');
}
/**
* 編集画面への遷移
*/
public function edit(Request $request) {
$id = $request->id;
$user = DB::table('employee')->where('id', $id)->first();
return view('demo.edit', ['user' => $user]);
}
/**
* 更新処理
*/
public function update(Request $request, $id) {
$param = [
'id' => $id,
'name' => $request->name,
'age' => $request->age,
];
//DB::update('UPDATE employee SET name = :name, age = :age WHERE id = :id', $param);
DB::table('employee')->where('id', $id)->update($param);
return redirect('/index');
}
/**
* 削除処理
*/
public function delete($id) {
DB::delete('DELETE FROM employee WHERE id = :id', ['id' => $id]);
return redirect('/index');
}
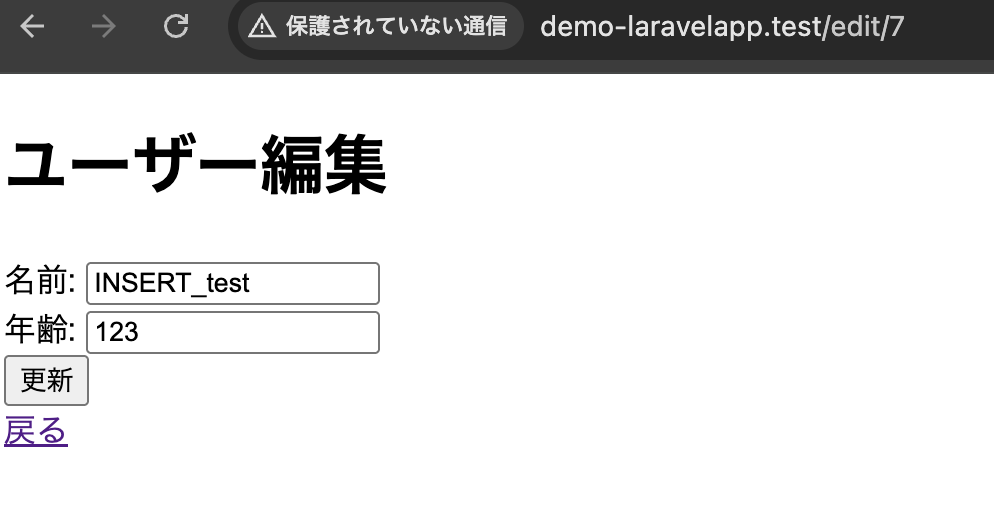
}一覧画面(IDが7の編集を押下)
編集画面
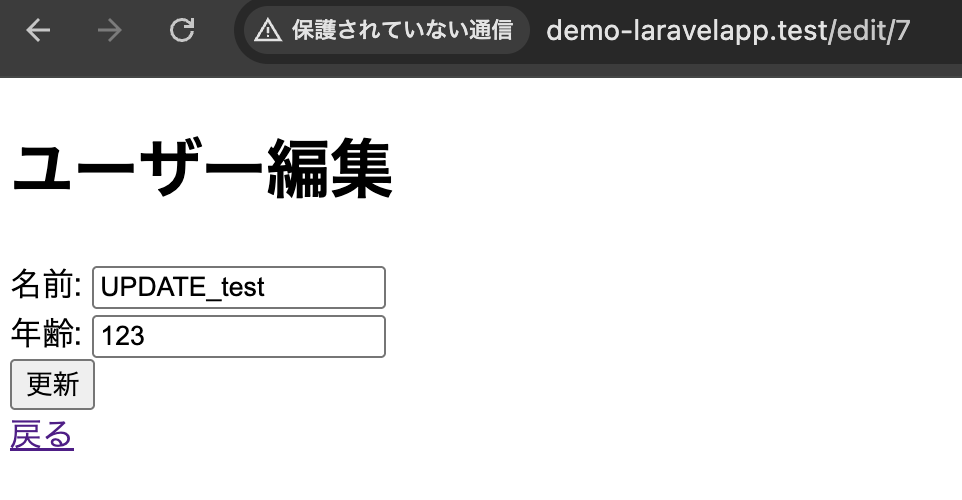
一覧画面

3-2-4. DELETE
レコードを削除するには、deleteメソッドを使用します。
また、削除対象を指定するため、whereメソッドも使用します。
DB::deleteメソッドのように、SQL文は必要ありません。
DB::table('テーブル名')->where(更新対象の指定)->delete();例文
DemoController.php
<?php
namespace App\Http\Controllers;
use Illuminate\Support\Facades\DB;
use Illuminate\Http\Request;
class DemoController extends Controller
{
/**
* 一覧画面
*/
public function index(Request $request) {
$users = DB::table('employee')
->when($request->filled('search_id'), function($query) use ($request) {
$query->whereRaw('id = ?', [$request->search_id]);
})
->when($request->filled('search_name'), function($query) use ($request) {
$query->whereRaw('name LIKE ?', ['%' . $request->search_name . '%']);
})
->when($request->filled('search_age'), function($query) use ($request) {
$query->whereRaw('age LIKE ?', ['%' . $request->search_age . '%']);
})
->orderBy('id', 'desc');
$result = $users->get();
return view('demo.index', [
'users' => $result,
'search_id' => $request->search_id,
'search_name' => $request->search_name,
'search_age' => $request->search_age
]);
}
/**
* 登録画面への遷移
*/
public function add() {
return view('demo.add');
}
/**
* 登録処理
*/
public function create(Request $request) {
$param = [
'name' => $request->name,
'age' => $request->age,
];
// DB::insert('INSERT INTO employee (name, age) VALUES (:name, :age)', $param);
DB::table('employee')->insert($param);
return redirect('/index');
}
/**
* 編集画面への遷移
*/
public function edit(Request $request) {
$id = $request->id;
$user = DB::table('employee')->where('id', $id)->first();
return view('demo.edit', ['user' => $user]);
}
/**
* 更新処理
*/
public function update(Request $request, $id) {
$param = [
'id' => $id,
'name' => $request->name,
'age' => $request->age,
];
//DB::update('UPDATE employee SET name = :name, age = :age WHERE id = :id', $param);
DB::table('employee')->where('id', $id)->update($param);
return redirect('/index');
}
/**
* 削除処理
*/
public function delete($id) {
//DB::delete('DELETE FROM employee WHERE id = :id', ['id' => $id]);
DB::table('employee')->where('id', $id)->delete();
return redirect('/index');
}
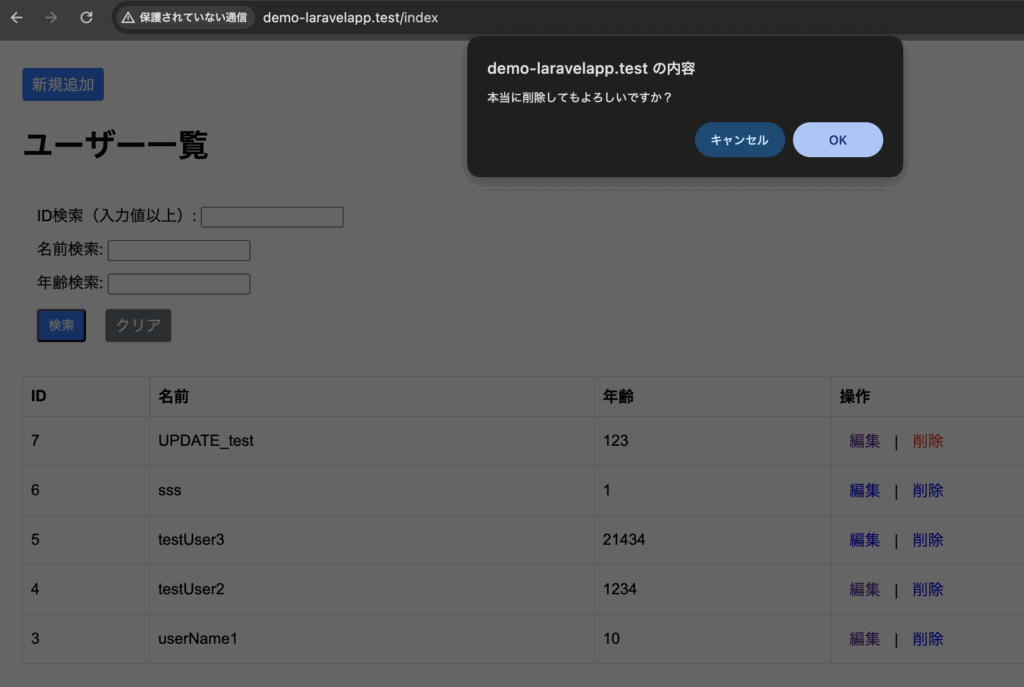
}一覧画面(IDが7の削除を押下)
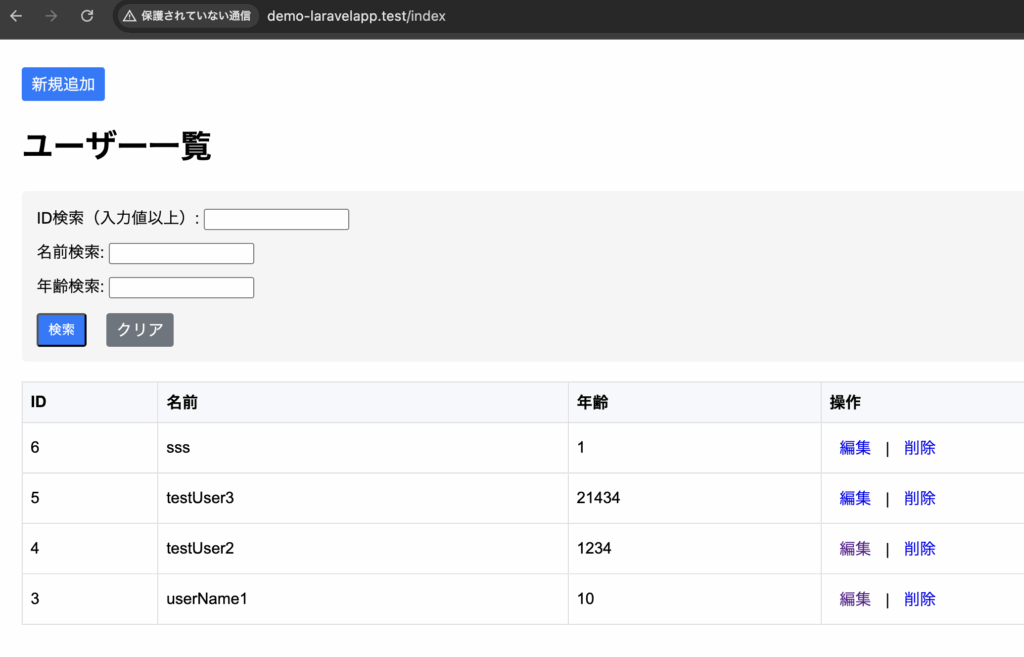
OKを押下
4. Eloquent ORM
4-1. Eloquent ORM
4-1-1. Eloquent ORMとは
ORMとは、データベースとPHPのオブジェクトの間の橋渡しを行う仕組みであり、テーブルをPHPのクラスのように定義してレコードをクラスのインスタンスのように扱うことができます。
Laravelには、EloquentというORMが用意されており、これはモデルというクラスを定義し、これを利用してデータベース操作を行うように設計します。
モデルは、そのテーブル内にあるフィールドをプロパティとして持たせ、テーブルとフィールドをモデルクラスとインスタンスを扱う感覚で操作できます。
4-1-2. 各ファイルの事前準備
artisanコマンドを使用します。
4-1-2-1. モデルクラスの用意
モデルを作成するには、以下のとおりです。
php artisan make:model モデルのクラス名VSCodeのターミナルを起動し、以下のコマンドを叩きます。
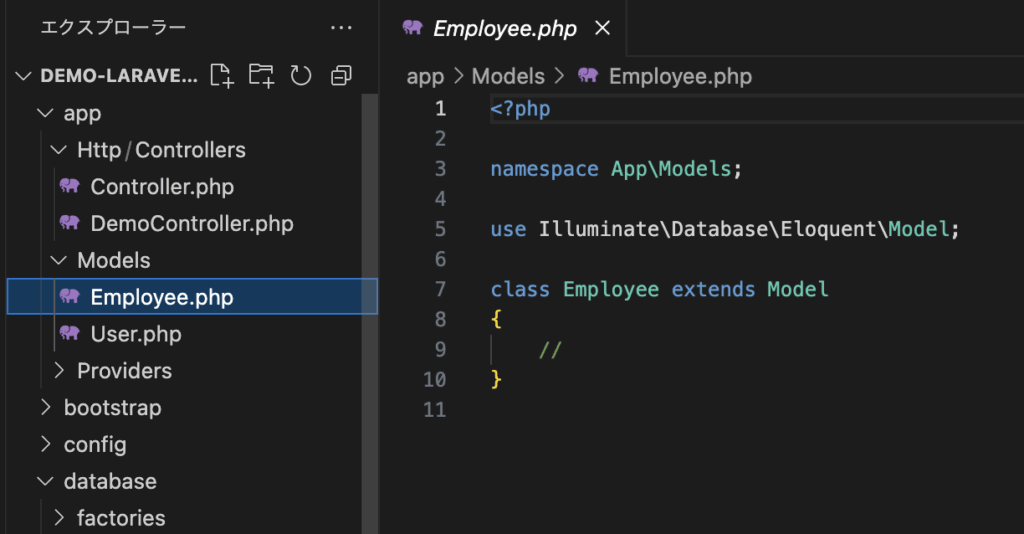
php artisan make:model Employeeemployee.phpが生成されました。
生成されたモデルクラスを解説していきます。
<?php

namespace App\Models;

use Illuminate\Database\Eloquent\Model;

class Employee extends Model
{
    //
}
App\Models という名前空間に配置されています。
namespace App\Models;Illuminate\Database\Eloquent\Model 名前空間にある Model を継承(extends)したクラスとして作成されており、これがモデルクラスの基底クラスとなります。
use Illuminate\Database\Eloquent\Model;

class Employee extends Model
4-1-2-2. コントローラークラスの用意
コントローラーを作成するには、以下のとおりです。
php artisan make:controller コントローラークラス名VSCodeのターミナルを起動し、以下のコマンドを叩きます。
php artisan make:controller EmployeeControllerEmployeeController.phpが生成されました。
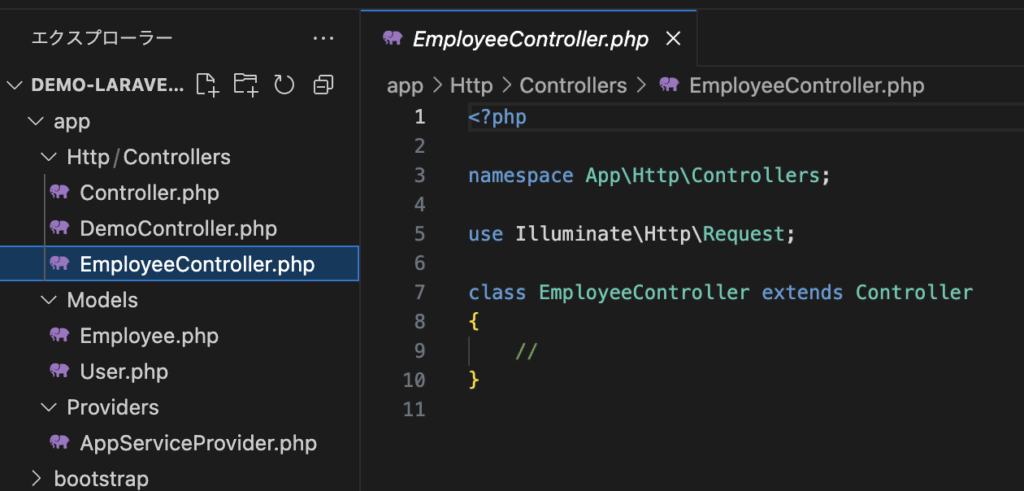
生成されたコントローラークラスを解説していきます。
<?php

namespace App\Http\Controllers;

use Illuminate\Http\Request;

class EmployeeController extends Controller
{
    //
}
App\Http\Controllers という名前空間に配置されています。
namespace App\Http\Controllers;Illuminate\Http\Request 名前空間にある Controller を継承(extends)したクラスとして作成されており、これがコントローラークラスの基底クラスとなります。
use Illuminate\Http\Request;

class EmployeeController extends Controller
4-2. マイグレーション
4-2-1. マイグレーションとは
マイグレーションとは、データベースの作成や削除などといった操作をPHPのコードとして記述し実行できるようにしたものです。
マイグレーションは以下の順で実施していきます。
- マイグレーションのスクリプトファイルを作成
- スクリプトの実装
- マイグレーションの実行
4-2-2. マイグレーションのスクリプトファイルを生成
以下のコマンドでファイルを生成します。
php artisan make:migration マイグレーションファイル名ここでは、employeeテーブルをCREATEしたいので、以下のコマンドを叩きます。
php artisan make:migration create_employee_table- php artisan
Laravelのコマンドラインインターフェース(CLI)ツール。
さまざまなLaravelの操作をコマンドで実行できます。 - make:migration
マイグレーションファイルを作成するためのコマンド。
make はファイルやクラスを作成するためのLaravelの機能
migration はマイグレーションファイルを意味します。 - create_employee_table
作成するマイグレーションファイルの名前です。通常、この名前はテーブルの作成や変更を示すために適切な名前をつけます。この場合、「employee」テーブルを作成することを示しています。
| 概要 | マイグレーションファイル名 |
|---|---|
新しいテーブルの作成する | create_新規のテーブル名_table |
既存のテーブルにカラムを追加する | add_追加するカラム名_to_既存のテーブル名_table |
既存のテーブルからカラムを削除する | remove_削除したいカラム名_from_対象のテーブル名_table |
テーブル名の変更 | rename_既存のテーブル名_to_新しいテーブル名 |
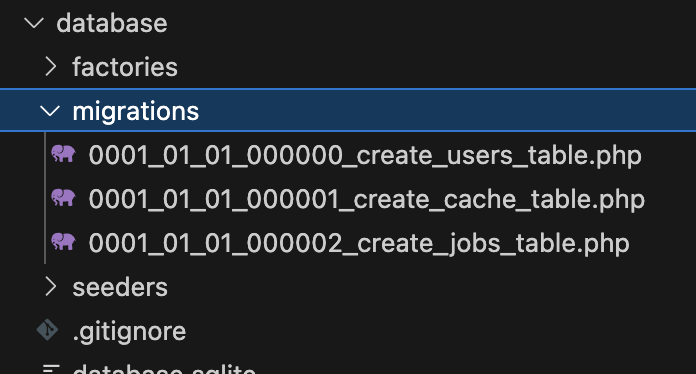
ここで、databaseフォルダのmigrationsフォルダ内を確認してみます。
マイグレーションのスクリプトファイルを生成前のmigrationsフォルダ内
マイグレーションのスクリプトファイルを生成後のmigrationsフォルダ内
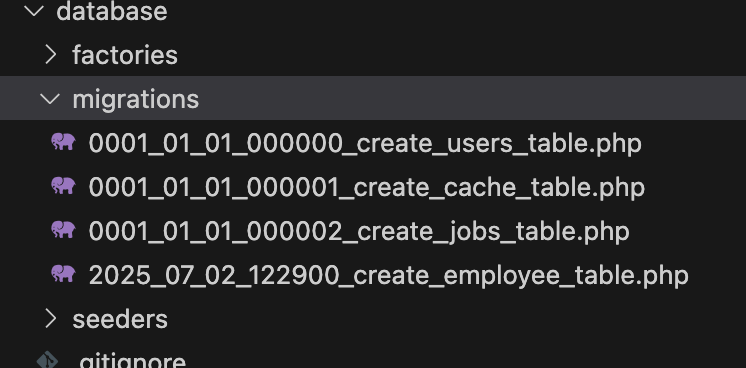
マイグレーションファイルには、ファイルを生成した日付と時間を表す数字がつけられます。
マイグレーションのスクリプトファイルを生成前のmigrationsフォルダ内の画像を見ると、デフォルトで3つのファイルがあり、これは認証情報などの組み込まれている機能に利用されます。
4-2-3. スクリプトの実装
まず、「4-2-2. マイグレーションのスクリプトファイルを生成」で生成したマイグレーションファイルを開き内容を把握してみましょう。
2025_07_02_122900_create_employee_table.php
<?php

use Illuminate\Database\Migrations\Migration;
use Illuminate\Database\Schema\Blueprint;
use Illuminate\Support\Facades\Schema;

return new class extends Migration
{
    /**
     * Run the migrations.
     */
    public function up(): void
    {
        Schema::create('employee', function (Blueprint $table) {
            $table->id();
            $table->timestamps();
        });
    }

    /**
     * Reverse the migrations.
     */
    public function down(): void
    {
        Schema::dropIfExists('employee');
    }
};
マイグレーションは、Illuminate\Database\Migrations\Migration名前空間にある、Migrationクラスを継承するクラスとして定義されています。
use Illuminate\Database\Migrations\Migration;
use Illuminate\Database\Schema\Blueprint;
use Illuminate\Support\Facades\Schema;

return new class extends Migration
upメソッドは、データベースに対して行う変更を定義します。新しいテーブルを作成したり、既存のテーブルにカラムを追加したりする処理を記述します。
public function up(): void
{
    Schema::create('employee', function (Blueprint $table) {
        $table->id();
        $table->timestamps();
    });
}
テーブルの作成にはSchemaクラスのcreateメソッドを使用します。
第1引数にテーブル名、第2引数にはテーブルを作成するための処理をまとめたクロージャが用意されます。
Schema::create('テーブル名', function (Blueprint $table) {

});
フィールドの設定は、クロージャの引数として渡されるBlueprintクラスのメソッドを使用します。
public function up(): void
{
    Schema::create('employee', function (Blueprint $table) {
        $table->id();
        $table->timestamps();
    });
}
メソッドは複数用意されており、以下のものは一部です。
| 概要 | フィールドの設定 |
|---|---|
| increments (オートインクリメントのカラム) | $table->increments(‘フィールド名’); |
| string (文字列のカラム) | $table->string(‘フィールド名’); |
| text (長い文字列を保存できるカラム) | $table->text(‘フィールド名’); |
| integer (整数値を保存できるカラム) | $table->integer(‘フィールド名’); |
| unsignedBigInteger (符号なしの大きな整数のカラム) | $table->unsignedBigInteger(‘フィールド名’); |
| boolean (真偽値を保存できるカラム) | $table->boolean(‘フィールド名’); |
| date (日付を保存できるカラム) | $table->date(‘フィールド名’); |
| timestamp (日付と時間を保存できるカラム) | $table->timestamp(‘フィールド名’); |
| timestamps (created_at と updated_at のカラムを同時に作成) | $table->timestamps(); |
| decimal (小数点を含む数値を保存できるカラム) | $table->decimal(‘フィールド名’, 8, 2); // 例:8桁の数字(小数点以下2桁) |
データベースカラムに制約を追加するためのメソッド
| 概要 | 制約を追加メソッド |
|---|---|
| 指定したカラムのテーブルの 最初のカラムに設定する | string(‘フィールド名’)->first() |
| 指定したカラムの次にカラムを追加する | string(‘フィールド名’)->after(‘追加フィールド名’) |
| 同じ値がデータベーステーブルの 指定したカラムに重複して保存されることを防ぐ | string(‘フィールド名’)->unique() |
| カラムの属性を変更する | string(‘フィールド名’)->nullable()->change() |
| カラムにコメント追加する | text(‘フィールド名’)->comment(‘コメント’) |
| カラムのデフォルト値を設定する | string(‘フィールド名’)->default(‘デフォルト値’) |
| NULL値をデフォルトでカラムに挿入する | string('フィールド名')->nullable() |
| NULL値を許容しない | string(‘フィールド名’)->nullable(false) |
downメソッドは、up() メソッドで行った変更を取り消すための処理を定義します。たとえば、テーブルを削除する処理などを記述します。
public function down(): void
{
    Schema::dropIfExists('employee');
}
フィールドの更新や削除は、クロージャの引数として渡されるBlueprintクラスのメソッドを使用します。
public function down(): void
{
    Schema::dropIfExists('employee');
}
downメソッド内には以下のメソッドを定義します。
| 概要 | フィールドの設定 |
|---|---|
| dropIfExists (テーブルが存在する場合に削除) | Schema::dropIfExists(‘フィールド名’); |
| dropColumn (既存のカラムを削除) | $table->dropColumn(‘フィールド名’); |
| renameColumn (カラムの名前を変更) | $table->renameColumn(‘フィールド名’); |
では、実際にマイグレーションファイルにスクリプトを実装していきます。
以下のテーブル設計書のようにフィールド設定のスクリプトを実装します。
2025_07_02_122900_create_employee_table.php
<?php

use Illuminate\Database\Migrations\Migration;
use Illuminate\Database\Schema\Blueprint;
use Illuminate\Support\Facades\Schema;

return new class extends Migration
{
    /**
     * Run the migrations.
     */
    public function up(): void
    {
        Schema::create('employee', function (Blueprint $table) {
            $table->increments('id');
            $table->text('name')->nullable(false);
            $table->integer('age');
        });
    }

    /**
     * Reverse the migrations.
     */
    public function down(): void
    {
        Schema::dropIfExists('employee');
    }
};
4-2-4. マイグレーションの実行
マイグレーションファイルをデータベースに適用するには、ターミナルで以下のコマンドを実行します。
php artisan migrate※既にemployeeテーブルがある場合は、エラーが生じます。
既にあるemployeeテーブルを削除するか、テーブル名を変更してください。
以下のように出力されたら、成功です。

SQLiteを確認すると、employeeテーブルが作成されていることが確認できました。

4-3. ORMを使用した実装例
4-3-1. 一覧画面の作成
4-1-2. 各ファイルの事前準備 で作成したファイルを用いて実装していきます。
まず、コントローラーからemployeeテーブルが参照されるようにEmployee.phpを修正します。
app/Models/Employee.php
<?php

namespace App\Models;

use Illuminate\Database\Eloquent\Model;

class Employee extends Model
{
    protected $table = 'employee';
}
resources/views/layouts/app.blade.php のレイアウトファイルを作成し、記述します。
<!DOCTYPE html>
<html lang="ja">
<head>
<meta charset="UTF-8">
<meta name="viewport" content="width=device-width, initial-scale=1.0">
<title>従業員管理</title>
@stack('styles')
</head>
<body>
<div class="container">
@yield('content')
</div>
</body>
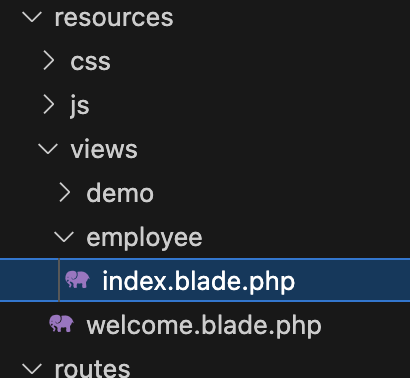
</html>次に、viewsフォルダ内にemployeeフォルダを作成し、index.blade.phpを作成します。
index.blade.php
@extends('layouts.app')

@section('content')
<h1>ユーザー一覧</h1>
<table>
    <tr>
        <th>ID</th>
        <th>名前</th>
        <th>年齢</th>
    </tr>
    @foreach ($employees as $emp)
    <tr>
        <td>{{ $emp->id }}</td>
        <td>{{ $emp->name }}</td>
        <td>{{ $emp->age }}</td>
    </tr>
    @endforeach
</table>
@endsection
@foreachにより、EmployeeController.phpから渡された、全レコードの取得結果を繰り返し処理しています。
@foreach ($employees as $emp)EmployeeController.php
<?php

namespace App\Http\Controllers;

use Illuminate\Http\Request;
use App\Models\Employee;

class EmployeeController extends Controller
{
    public function index(Request $request)
    {
        $employees = Employee::all();
        return view('employee.index', ['employees' => $employees]);
    }
}
ORMは、モデルクラスのインスタンスとして扱われ、対応するメソッドを使用していきます。
変数 = モデルクラス::メソッド();上記の実装例では、モデルクラスのEmployeeに
all()メソッドにより、全レコードを取得しています。
$employees = Employee::all();web.php
<?php

use Illuminate\Support\Facades\Route;
use App\Http\Controllers\DemoController;
use App\Http\Controllers\EmployeeController;

Route::get('/', function () {
    return view('welcome');
});

Route::get('/index', [DemoController::class, 'index'])->name('demo.index');

Route::get('/add', [DemoController::class, 'add'])->name('demo.add');

Route::post('/add', [DemoController::class, 'create'])->name('create');

Route::get('/edit/{id}', [DemoController::class, 'edit'])->name('demo.edit');

Route::post('/edit/{id}', [DemoController::class, 'update'])->name('update');

Route::get('/delete/{id}', [DemoController::class, 'delete'])->name('delete');

Route::get('/employee', [EmployeeController::class, 'index']);
php artisan serve コマンドにより、サーバーを起動します。
php artisan serve起動されたサーバーをブラウザでアクセスすると、以下のように表示されます。
まだレコードがないので、こんな感じになります。
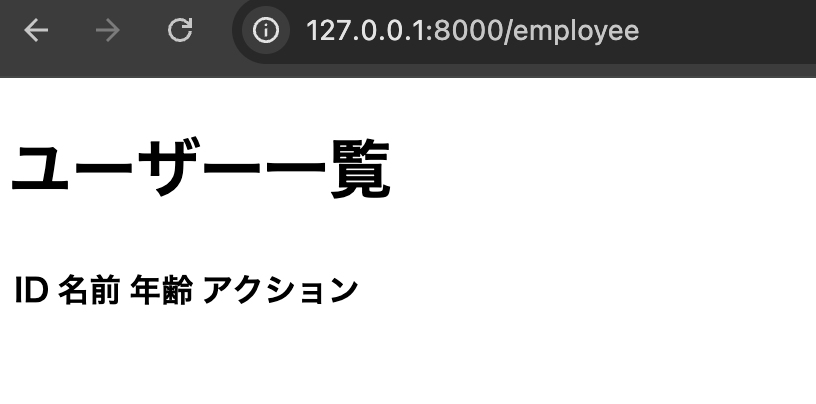
試しにテストデータを入れて表示してみると、こんな感じです。
また、見やすいように style も追加しています。

styleの追加
public/cssフォルダにemployeeList.cssを作成し、このcssファイルにstyleを記述します。
employeeList.css
body {
    font-family: 'Segoe UI', 'Hiragino Kaku Gothic ProN', Meiryo, sans-serif;
    background: #f7f7fa;
    margin: 0;
    padding: 0;
}
h1 {
    text-align: center;
    margin-top: 40px;
    color: #333;
}
table {
    margin: 40px auto;
    border-collapse: collapse;
    width: 80%;
    background: #fff;
    box-shadow: 0 2px 8px rgba(0,0,0,0.07);
    border-radius: 8px;
    overflow: hidden;
}
th, td {
    padding: 16px 20px;
    text-align: left;
}
th {
    background: #4f8cff;
    color: #fff;
    font-weight: 600;
    letter-spacing: 1px;
}
tr:nth-child(even) {
    background: #f2f6ff;
}
tr:hover {
    background: #e6f0ff;
    transition: background 0.2s;
}
resources/views/layouts/app.blade.php
<!DOCTYPE html>
<html lang="ja">
<head>
    <meta charset="UTF-8">
    <meta name="viewport" content="width=device-width, initial-scale=1.0">
    <title>従業員管理</title>
    <link rel="stylesheet" href="/css/employeeList.css">
    @stack('styles')
</head>
<body>
    <div class="container">
        @yield('content')
    </div>
</body>
</html>
4-3-2. 検索機能
4-3-2-1. IDによる検索
IDを使用して特定のレコードを取得する機会が多くあり、その際にIDによるレコード検索を行うfindメソッドが用意されています。
引数には、ID番号を指定します。そのため、idフィールドは PRIMARY KEY である必要があります。
変数 = モデルクラス::find( ID番号 );resources/views/employee/index.blade.php
@extends('layouts.app')

@section('content')
<h1>ユーザー一覧</h1>
<div class="table-header">
    <form action="/employee/search" method="GET" class="search-form">
        <input type="text" name="search" value="{{ isset($serch) ? $serch : '' }}" placeholder="名前で検索" class="search-input">
        <button type="submit" class="search-btn">検索</button>
        <a href="/employee" class="search-btn clear-btn">クリア</a>
    </form>
</div>
<table>
    <tr>
        <th>ID</th>
        <th>名前</th>
        <th>年齢</th>
    </tr>
    @foreach ($employees as $emp)
    <tr>
        <td>{{ $emp->id }}</td>
        <td>{{ $emp->name }}</td>
        <td>{{ $emp->age }}</td>
    </tr>
    @endforeach
</table>
@endsection
app/Http/Controllers/EmployeeController.php
<?php

namespace App\Http\Controllers;

use Illuminate\Http\Request;
use App\Models\Employee;

class EmployeeController extends Controller
{
    public function index(Request $request)
    {
        $search = $request->input('search');
        if ($search) {
            $employees = Employee::find($search) ? collect([Employee::find($search)]) : collect();
        } else {
            $employees = Employee::all();
        }
        return view('employee.index', [
            'employees' => $employees,
            'serch' => $search
        ]);
    }
}
routes/web.php
<?php

use Illuminate\Support\Facades\Route;
use App\Http\Controllers\DemoController;
use App\Http\Controllers\EmployeeController;

Route::get('/', function () {
    return view('welcome');
});

Route::get('/index', [DemoController::class, 'index'])->name('demo.index');

Route::get('/add', [DemoController::class, 'add'])->name('demo.add');

Route::post('/add', [DemoController::class, 'create'])->name('create');

Route::get('/edit/{id}', [DemoController::class, 'edit'])->name('demo.edit');

Route::post('/edit/{id}', [DemoController::class, 'update'])->name('update');

Route::get('/delete/{id}', [DemoController::class, 'delete'])->name('delete');

Route::get('/employee', [EmployeeController::class, 'index']);
Route::get('/employee/search', [EmployeeController::class, 'index']);
public/css/employeeList.css
body {
    font-family: 'Segoe UI', 'Hiragino Kaku Gothic ProN', Meiryo, sans-serif;
    background: #f7f7fa;
    margin: 0;
    padding: 0;
}
h1 {
    text-align: center;
    margin-top: 40px;
    color: #333;
}
table {
    margin: 40px auto;
    border-collapse: collapse;
    width: 80%;
    background: #fff;
    box-shadow: 0 2px 8px rgba(0,0,0,0.07);
    border-radius: 8px;
    overflow: hidden;
}
th, td {
    padding: 16px 20px;
    text-align: left;
}
th {
    background: #4f8cff;
    color: #fff;
    font-weight: 600;
    letter-spacing: 1px;
}
tr:nth-child(even) {
    background: #f2f6ff;
}
tr:hover {
    background: #e6f0ff;
    transition: background 0.2s;
}

/* 検索フォーム */
.table-header {
    width: 80%;
    margin: 0 auto 10px auto;
    display: flex;
    justify-content: flex-start;
    align-items: center;
}
.search-form {
    display: flex;
    justify-content: flex-start;
    align-items: center;
    gap: 8px;
    width: 100%;
}
.search-input {
    padding: 6px 12px;
    border: 1px solid #ccc;
    border-radius: 4px;
    font-size: 16px;
    width: 200px;
    transition: border-color 0.2s;
}
.search-input:focus {
    border-color: #007bff;
    outline: none;
}
.search-btn {
    padding: 6px 18px;
    background: #007bff;
    color: #fff;
    border: none;
    border-radius: 4px;
    font-size: 16px;
    cursor: pointer;
    transition: background 0.2s;
    text-decoration: none;
    display: inline-block;
}
.search-btn:hover {
    background: #0056b3;
}
.clear-btn {
    background: #e53935;
    color: #fff;
    border-radius: 4px;
    padding: 6px 12px;
    text-decoration: none;
    display: inline-block;
    border: none;
    font-size: 16px;
    cursor: pointer;
    transition: background 0.2s;
}
.clear-btn:hover {
    background: #b71c1c;
}
一覧画面
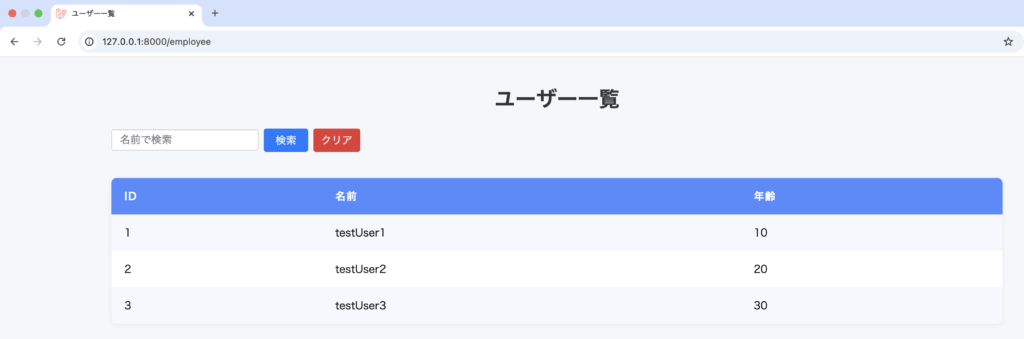
「2」で検索
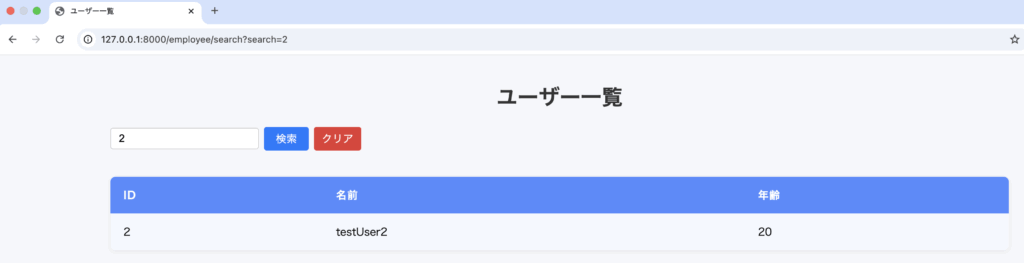
4-3-2-2. whereメソッドによる検索
findメソッドでは、idによる検索を行いましたが、id以外の検索にはwhereメソッドを使用します。
検索結果のレコードを得る
変数 = モデルクラス::where(フィールド名, 値)->get();最初の検索結果のレコードを得る
変数 = モデルクラス::where(フィールド名, 値)->first();app/Http/Controllers/EmployeeController.php
<?php

namespace App\Http\Controllers;

use Illuminate\Http\Request;
use App\Models\Employee;

class EmployeeController extends Controller
{
    public function index(Request $request)
    {
        $search = $request->input('search');
        if ($search) {
            $employees = Employee::where('name', 'like', "%" . $search . "%")->get();
        } else {
            $employees = Employee::all();
        }
        return view('employee.index', [
            'employees' => $employees,
            'serch' => $search
        ]);
    }
}
一覧画面
「testUser2」で検索
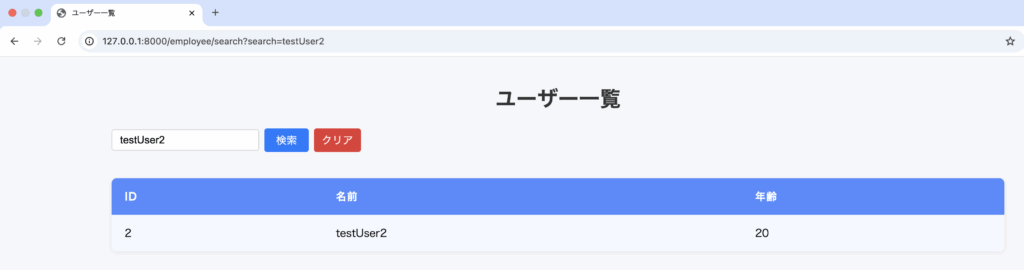
4-3-3. レコード登録
ここでは、新規登録画面を作成しその情報を基にレコード登録を行う処理を実装していきます。
4-3-3-1. 事前準備(カラム追加)
まず、 updated_at と created_at のカラムを追加するためマイグレーションを実行し修正します。
php artisan make:migration add_timestamps_to_employee_table --table=employeedatabase/migrations/2025_07_06_075546_add_timestamps_to_employee_table.php
<?php

use Illuminate\Database\Migrations\Migration;
use Illuminate\Database\Schema\Blueprint;
use Illuminate\Support\Facades\Schema;

return new class extends Migration
{
    /**
     * Run the migrations.
     */
    public function up(): void
    {
        Schema::table('employee', function (Blueprint $table) {
            $table->timestamps();
        });
    }

    /**
     * Reverse the migrations.
     */
    public function down(): void
    {
        Schema::table('employee', function (Blueprint $table) {
            $table->dropColumn(['created_at', 'updated_at']);
        });
    }
};
マイグレーションを実行します。
php artisan migrateemployeeテーブルに「created_at」「updated_at」カラムを追加しました。
4-3-3-2. レコード登録の実装
app/Models/Employee.php
<?php

namespace App\Models;

use Illuminate\Database\Eloquent\Model;

class Employee extends Model
{
    protected $table = 'employee';
    protected $fillable = [
        'name', 'age',
    ];
}
resources/views/employee/add.blade.php を作成し、以下のように記述します。
@extends('layouts.app')

@section('content')
<h2 class="page-title">従業員新規登録</h2>
@if(session('success'))
    <div class="alert-success">
        {{ session('success') }}
    </div>
@endif
<div class="form-container">
    <form action="{{ route('employee.store') }}" method="POST">
        @csrf
        <div class="form-group">
            <label for="name">名前</label>
            <input type="text" id="name" name="name" required>
        </div>
        <div class="form-group">
            <label for="age">年齢</label>
            <input type="number" id="age" name="age" min="0" required>
        </div>
        <div class="form-btns">
            <button type="submit" class="btn btn-primary">登録</button>
            <a href="{{ url('/employee') }}" class="btn btn-secondary">一覧へ戻る</a>
        </div>
    </form>
</div>
@push('styles')
<link rel="stylesheet" href="/css/employeeAdd.css">
@endpush
@endsection
public/css/employeeAdd.css ファイルを作成し、記述します。
.alert-success {
    background: #d4edda;
    color: #155724;
    border: 1px solid #c3e6cb;
    border-radius: 4px;
    padding: 12px 18px;
    margin-bottom: 20px;
    text-align: center;
    font-size: 1.1em;
}

.page-title {
    margin-top: 30px;
    margin-bottom: 20px;
    font-size: 2em;
    text-align: center;
}
.form-container {
    max-width: 500px;
    margin: 0 auto;
    background: #fff;
    border-radius: 8px;
    box-shadow: 0 2px 8px rgba(0,0,0,0.08);
    padding: 30px 40px;
}
.form-group {
    margin-bottom: 20px;
}
.form-group label {
    display: block;
    margin-bottom: 8px;
    font-weight: bold;
}
.form-group input {
    width: 100%;
    padding: 8px 10px;
    border: 1px solid #ccc;
    border-radius: 4px;
    font-size: 1em;
}
.form-btns {
    display: flex;
    justify-content: flex-end;
    gap: 10px;
}
.btn {
    padding: 8px 20px;
    border: none;
    border-radius: 4px;
    font-size: 1em;
    cursor: pointer;
    text-decoration: none;
    display: inline-block;
}
.btn-primary {
    background: #007bff;
    color: #fff;
}
.btn-secondary {
    background: #6c757d;
    color: #fff;
}
app/Http/Controllers/EmployeeController.php
<?php

namespace App\Http\Controllers;

use Illuminate\Http\Request;
use App\Models\Employee;

class EmployeeController extends Controller
{
    public function index(Request $request)
    {
        $search = $request->input('search');
        if ($search) {
            $employees = Employee::where('name', 'like', "%" . $search . "%")->get();
        } else {
            $employees = Employee::all();
        }
        return view('employee.index', [
            'employees' => $employees,
            'serch' => $search
        ]);
    }

    /**
     * 新規登録画面表示
     */
    public function add()
    {
        return view('employee.add');
    }

    /**
     * 新規登録処理
     */
    public function store(Request $request)
    {
        $validated = $request->validate([
            'name' => 'required|string|max:255',
            'age' => 'required|integer|min:0',
        ]);

        Employee::create($validated);

        return redirect()->route('employee.add')->with('success', '登録が完了しました');
    }
}
バリデーションの実行を行います。バリデーションは、$requestから呼び出せば、そこにある値をチェックできます。
$validated = $request->validate([
        'name' => 'required|string|max:255',
        'age' => 'required|integer|min:0',
]);
バリデーションを通過できれば、createメソッドを使用してレコード登録を行います。
モデルクラス::create();以下の部分です。
Employee::create($validated);routes/web.php
<?php

use Illuminate\Support\Facades\Route;
use App\Http\Controllers\DemoController;
use App\Http\Controllers\EmployeeController;

Route::get('/', function () {
    return view('welcome');
});

Route::get('/index', [DemoController::class, 'index'])->name('demo.index');

Route::get('/add', [DemoController::class, 'add'])->name('demo.add');

Route::post('/add', [DemoController::class, 'create'])->name('create');

Route::get('/edit/{id}', [DemoController::class, 'edit'])->name('demo.edit');

Route::post('/edit/{id}', [DemoController::class, 'update'])->name('update');

Route::get('/delete/{id}', [DemoController::class, 'delete'])->name('delete');

Route::get('/employee', [EmployeeController::class, 'index']);
Route::get('/employee/search', [EmployeeController::class, 'index']);
Route::get('/employee/add', [EmployeeController::class, 'add'])->name('employee.add');
Route::post('/employee/store', [EmployeeController::class, 'store'])->name('employee.store');
resources/views/employee/index.blade.php
@extends('layouts.app')

@section('content')
<h1>ユーザー一覧</h1>
<div class="table-header">
    <form action="/employee/search" method="GET" class="search-form">
        <input type="text" name="search" value="{{ isset($serch) ? $serch : '' }}" placeholder="名前で検索" class="search-input">
        <button type="submit" class="search-btn">検索</button>
        <a href="/employee" class="search-btn clear-btn">クリア</a>
    </form>
    <a href="{{ route('employee.add') }}" class="search-btn add-btn">新規登録</a>
</div>
<table>
    <tr>
        <th>ID</th>
        <th>名前</th>
        <th>年齢</th>
    </tr>
    @foreach ($employees as $emp)
    <tr>
        <td>{{ $emp->id }}</td>
        <td>{{ $emp->name }}</td>
        <td>{{ $emp->age }}</td>
    </tr>
    @endforeach
</table>
@endsection
一覧画面
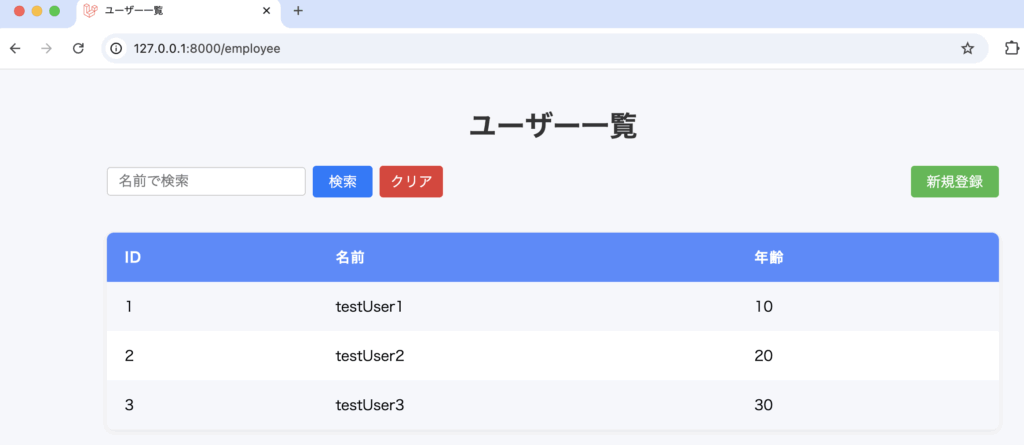
新規登録画面
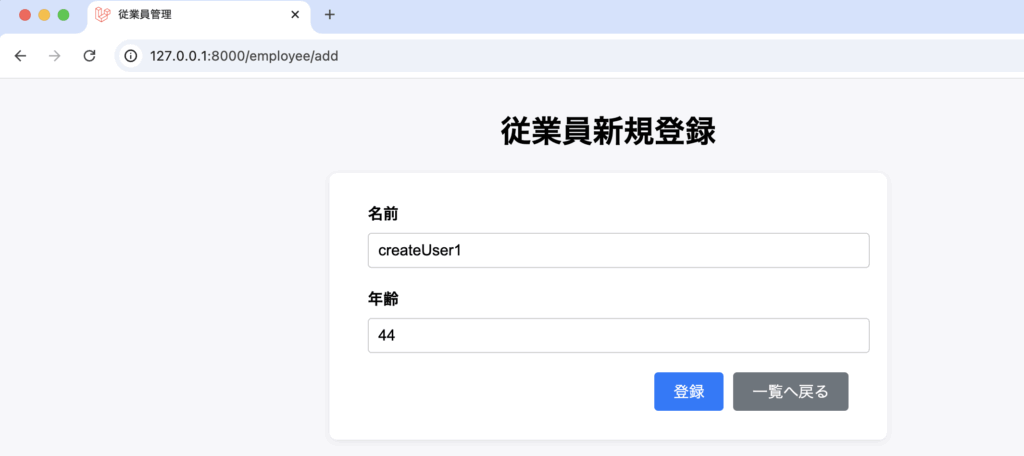
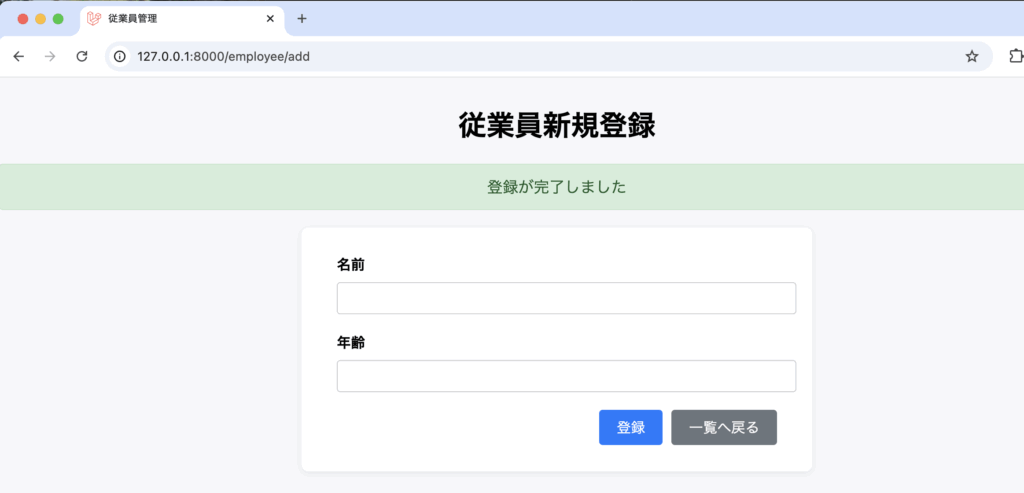
一覧画面
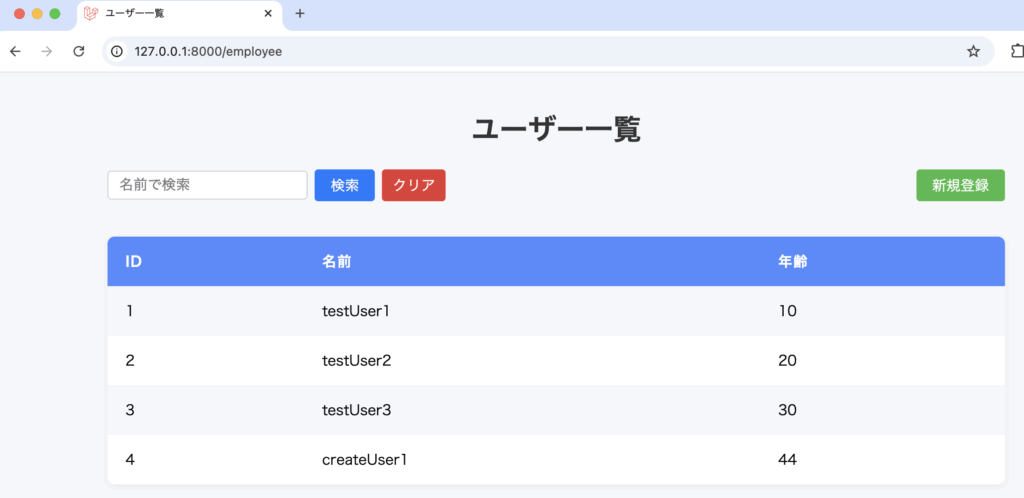
なお、以下の実装でもレコード登録を行う事ができます。
app/Http/Controllers/EmployeeController.php
<?php

namespace App\Http\Controllers;

use Illuminate\Http\Request;
use App\Models\Employee;

class EmployeeController extends Controller
{
    public function index(Request $request)
    {
        $search = $request->input('search');
        if ($search) {
            $employees = Employee::where('name', 'like', "%" . $search . "%")->get();
        } else {
            $employees = Employee::all();
        }
        return view('employee.index', [
            'employees' => $employees,
            'serch' => $search
        ]);
    }

    /**
     * 新規登録画面表示
     */
    public function add()
    {
        return view('employee.add');
    }

    /**
     * 新規登録処理
     */
    public function store(Request $request)
    {
        // バリデーションの実行
        $validated = $request->validate([
            'name' => 'required|string|max:255',
            'age' => 'required|integer|min:0',
        ]);

        // employeeインスタンスの生成
        $employee = new Employee();

        // 値を用意する
        $name = $validated['name'];
        $age = $validated['age'];

        // インスタンスに値を設定して保存する
        $employee->name = $name;
        $employee->age = $age;
        $employee->save();

        return redirect()->route('employee.add')->with('success', '登録が完了しました');
    }
}
4-3-4. レコード更新
resources/views/employee/edit.blade.php を作成し、以下のように記述します。
@extends('layouts.app')

@section('content')
<h2 class="page-title">従業員情報編集</h2>
@if(session('success'))
    <div class="alert-success">
        {{ session('success') }}
    </div>
@endif
<div class="form-container">
    <form action="{{ route('employee.update', ['id' => $employee->id]) }}" method="POST">
        @csrf
        @method('PUT')
        <div class="form-group">
            <label for="name">名前</label>
            <input type="text" id="name" name="name" value="{{ old('name', $employee->name) }}" required>
        </div>
        <div class="form-group">
            <label for="age">年齢</label>
            <input type="number" id="age" name="age" min="0" value="{{ old('age', $employee->age) }}" required>
        </div>
        <div class="form-btns">
            <button type="submit" class="btn btn-primary">更新</button>
            <a href="{{ url('/employee') }}" class="btn btn-secondary">一覧へ戻る</a>
        </div>
    </form>
</div>
@push('styles')
<link rel="stylesheet" href="/css/employeeAdd.css">
@endpush
@endsection
app/Http/Controllers/EmployeeController.php
<?php

namespace App\Http\Controllers;

use Illuminate\Http\Request;
use App\Models\Employee;

class EmployeeController extends Controller
{
    public function index(Request $request)
    {
        $search = $request->input('search');
        if ($search) {
            $employees = Employee::where('name', 'like', "%" . $search . "%")->get();
        } else {
            $employees = Employee::all();
        }
        return view('employee.index', [
            'employees' => $employees,
            'serch' => $search
        ]);
    }

    /**
     * 新規登録画面表示
     */
    public function add()
    {
        return view('employee.add');
    }

    /**
     * 新規登録処理
     */
    public function store(Request $request)
    {
        $validated = $request->validate([
            'name' => 'required|string|max:255',
            'age' => 'required|integer|min:0',
        ]);

        Employee::create($validated);

        return redirect()->route('employee.add')->with('success', '登録が完了しました');
    }
    /**
     * 編集画面表示
     */
    public function edit($id)
    {
        $employee = Employee::findOrFail($id);
        return view('employee.edit', compact('employee'));
    }

    /**
     * 更新処理
     */
    public function update(Request $request, $id)
    {
        $validated = $request->validate([
            'name' => 'required|string|max:255',
            'age' => 'required|integer|min:0',
        ]);
        $employee = Employee::findOrFail($id);
        $employee->update($validated);
        return redirect()->route('employee.edit', ['id' => $id])->with('success', '更新が完了しました');
    }
}
resources/views/employee/index.blade.php
@extends('layouts.app')

@section('content')
<h1>ユーザー一覧</h1>
<div class="table-header">
    <form action="/employee/search" method="GET" class="search-form">
        <input type="text" name="search" value="{{ isset($serch) ? $serch : '' }}" placeholder="名前で検索" class="search-input">
        <button type="submit" class="search-btn">検索</button>
        <a href="/employee" class="search-btn clear-btn">クリア</a>
    </form>
    <a href="{{ route('employee.add') }}" class="search-btn add-btn">新規登録</a>
</div>
<table>
    <tr>
        <th>ID</th>
        <th>名前</th>
        <th>年齢</th>
        <th>操作</th>
    </tr>
    @foreach ($employees as $emp)
    <tr>
        <td>{{ $emp->id }}</td>
        <td>{{ $emp->name }}</td>
        <td>{{ $emp->age }}</td>
        <td>
            <a href="{{ route('employee.edit', ['id' => $emp->id]) }}" class="btn btn-primary">編集</a>
        </td>
    </tr>
    @endforeach
</table>
@endsection
routes/web.php
<?php

use Illuminate\Support\Facades\Route;
use App\Http\Controllers\DemoController;
use App\Http\Controllers\EmployeeController;

Route::get('/', function () {
    return view('welcome');
});

Route::get('/index', [DemoController::class, 'index'])->name('demo.index');

Route::get('/add', [DemoController::class, 'add'])->name('demo.add');

Route::post('/add', [DemoController::class, 'create'])->name('create');

Route::get('/edit/{id}', [DemoController::class, 'edit'])->name('demo.edit');

Route::post('/edit/{id}', [DemoController::class, 'update'])->name('update');

Route::get('/delete/{id}', [DemoController::class, 'delete'])->name('delete');

Route::get('/employee', [EmployeeController::class, 'index']);
Route::get('/employee/search', [EmployeeController::class, 'index']);
Route::get('/employee/add', [EmployeeController::class, 'add'])->name('employee.add');
Route::post('/employee/store', [EmployeeController::class, 'store'])->name('employee.store');
Route::get('/employee/edit/{id}', [EmployeeController::class, 'edit'])->name('employee.edit');
Route::put('/employee/update/{id}', [EmployeeController::class, 'update'])->name('employee.update');
一覧画面
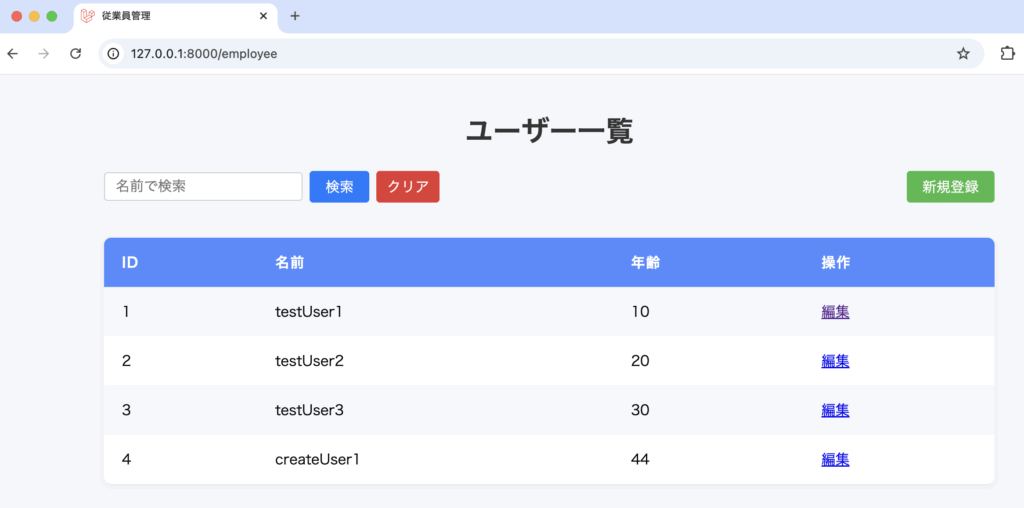
編集画面
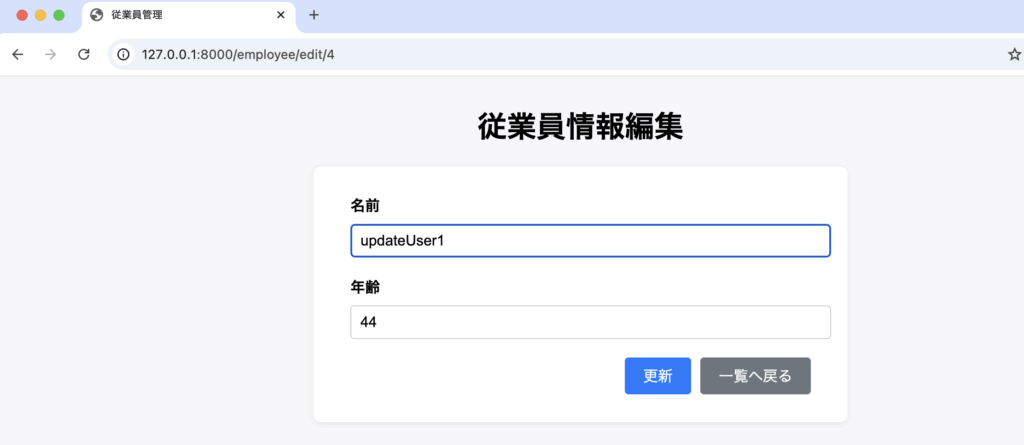
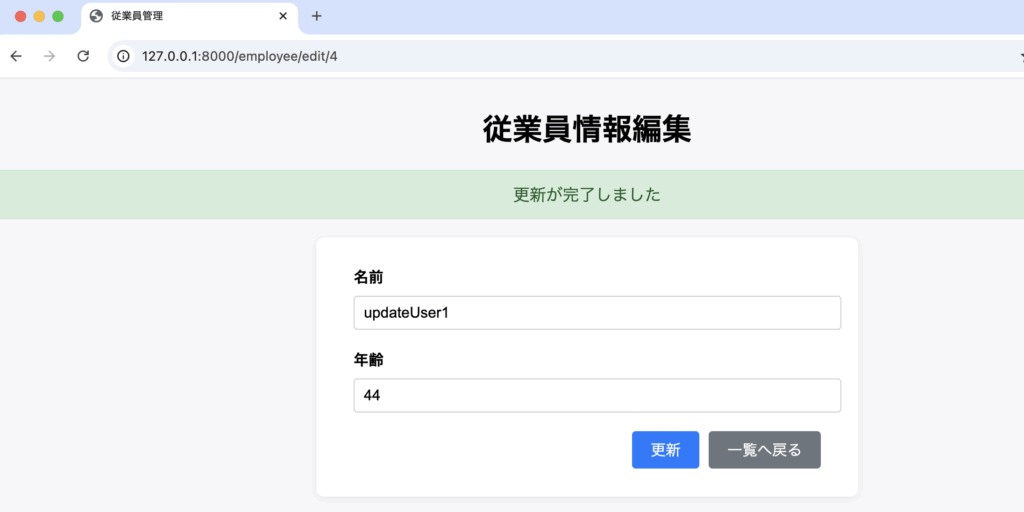
一覧画面
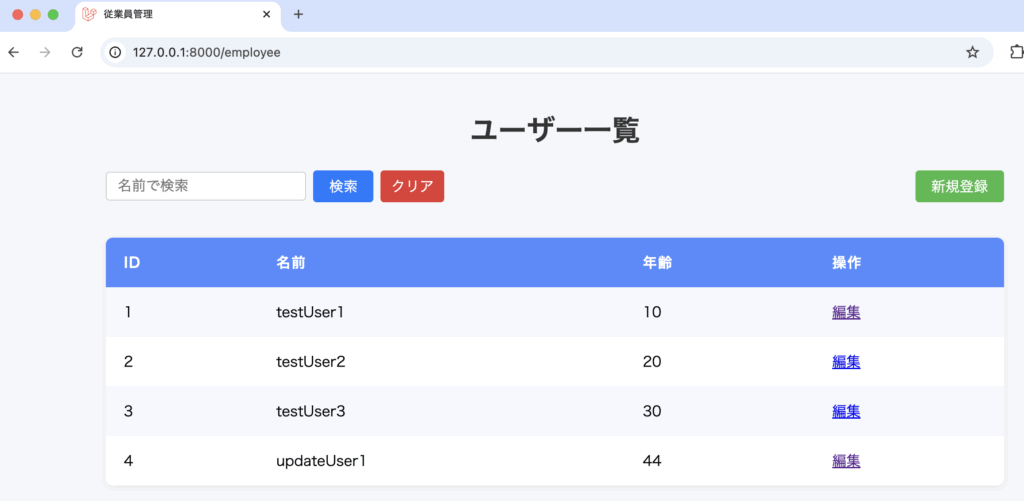
4-3-5. レコード削除
レコードを削除する機能を実装していきます。
レコードを削除するには。モデルのインスタンスからdeleteメソッドを呼び出します。引数は必要ありません。
モデルインスタンス->delete();resources/views/employee/delete.blade.php を作成し、以下のように記述します。
@extends('layouts.app')

@section('content')
<h2 class="page-title">従業員情報削除</h2>
@if(session('success'))
    <div class="alert-success">
        {{ session('success') }}
    </div>
@endif
<div class="form-container">
    <form action="{{ route('employee.destroy', ['id' => $employee->id]) }}" method="POST">
        @csrf
        @method('DELETE')
        <div class="form-group">
            <label>名前</label>
            <input type="text" value="{{ $employee->name }}" disabled>
        </div>
        <div class="form-group">
            <label>年齢</label>
            <input type="number" value="{{ $employee->age }}" disabled>
        </div>
        <p class="delete-confirm">本当にこの従業員のレコードを削除しますか?</p>
        <div class="form-btns">
            <button type="submit" class="btn btn-danger employee-del-btn">削除</button>
            <a href="{{ route('employee.index') }}" class="btn btn-secondary">キャンセル</a>
        </div>
    </form>
</div>
@push('styles')
<link rel="stylesheet" href="/css/employeeAdd.css">
<link rel="stylesheet" href="/css/employeeDel.css">
@endpush
@endsection
public/css/employeeDel.css
.employee-del-btn {
    background-color: #dc3545;
    color: #fff;
    border: none;
}
app/Http/Controllers/EmployeeController.php
<?php
namespace App\Http\Controllers;

use Illuminate\Http\Request;
use App\Models\Employee;


class EmployeeController extends Controller
{
    public function index(Request $request)
    {
        $search = $request->input('search');
        if ($search) {
            $employees = Employee::where('name', 'like', "%" . $search . "%")->get();
        } else {
            $employees = Employee::all();
        }
        return view('employee.index', [
            'employees' => $employees,
            'serch' => $search
        ]);
    }

    /**
     * 新規登録画面表示
     */
    public function add()
    {
        return view('employee.add');
    }

    /**
     * 新規登録処理
     */
    public function store(Request $request)
    {
        $validated = $request->validate([
            'name' => 'required|string|max:255',
            'email' => 'required|email|max:255',
            'position' => 'nullable|string|max:255',
        ]);

        Employee::create($validated);

        return redirect()->route('employee.add')->with('success', '登録が完了しました');
    }

    /**
     * 編集画面表示
     */
    public function edit($id)
    {
        $employee = Employee::findOrFail($id);
        return view('employee.edit', compact('employee'));
    }

    /**
     * 更新処理
     */
    public function update(Request $request, $id)
    {
        $validated = $request->validate([
            'name' => 'required|string|max:255',
            'age' => 'required|integer|min:0',
        ]);
        $employee = Employee::findOrFail($id);
        $employee->update($validated);
        return redirect()->route('employee.edit', ['id' => $id])->with('success', '更新が完了しました');
    }

    /**
     * 削除画面表示
     */
    public function delete($id)
    {
        $employee = Employee::findOrFail($id);
        return view('employee.delete', compact('employee'));
    }

    /**
     * 削除処理
     */
    public function destroy($id)
    {
        $employee = Employee::findOrFail($id);
        $employee->delete();
        return redirect()->route('employee.index')->with('success', '削除が完了しました');
    }

}
モデルインスタンスのdeleteメソッドを呼び出しレコードを削除しています。
$employee->delete();resources/views/employee/index.blade.php
@extends('layouts.app')

@section('content')
<h1>ユーザー一覧</h1>
<div class="table-header">
    <form action="/employee/search" method="GET" class="search-form">
        <input type="text" name="search" value="{{ isset($serch) ? $serch : '' }}" placeholder="名前で検索" class="search-input">
        <button type="submit" class="search-btn">検索</button>
        <a href="/employee" class="search-btn clear-btn">クリア</a>
    </form>
    <a href="{{ route('employee.add') }}" class="search-btn add-btn">新規登録</a>
</div>
<table>
    <tr>
        <th>ID</th>
        <th>名前</th>
        <th>年齢</th>
        <th>操作</th>
    </tr>
    @foreach ($employees as $emp)
    <tr>
        <td>{{ $emp->id }}</td>
        <td>{{ $emp->name }}</td>
        <td>{{ $emp->age }}</td>
        <td>
            <a href="{{ route('employee.edit', ['id' => $emp->id]) }}" class="btn btn-primary">編集</a>
            <a href="{{ route('employee.delete', ['id' => $emp->id]) }}" class="btn btn-danger" style="margin-left: 8px;">削除</a>
        </td>
    </tr>
    @endforeach
</table>
@endsection
routes/web.php
<?php

use Illuminate\Support\Facades\Route;
use App\Http\Controllers\DemoController;
use App\Http\Controllers\EmployeeController;

Route::get('/', function () {
    return view('welcome');
});

Route::get('/index', [DemoController::class, 'index'])->name('demo.index');

Route::get('/add', [DemoController::class, 'add'])->name('demo.add');

Route::post('/add', [DemoController::class, 'create'])->name('create');

Route::get('/edit/{id}', [DemoController::class, 'edit'])->name('demo.edit');

Route::post('/edit/{id}', [DemoController::class, 'update'])->name('update');

Route::get('/delete/{id}', [DemoController::class, 'delete'])->name('delete');

Route::get('/employee', [EmployeeController::class, 'index'])->name('employee.index');
Route::get('/employee/search', [EmployeeController::class, 'index']);
// 登録画面表示
Route::get('/employee/add', [EmployeeController::class, 'add'])->name('employee.add');
// 登録処理
Route::post('/employee/store', [EmployeeController::class, 'store'])->name('employee.store');
// 編集画面表示
Route::get('/employee/edit/{id}', [EmployeeController::class, 'edit'])->name('employee.edit');
// 更新処理
Route::put('/employee/update/{id}', [EmployeeController::class, 'update'])->name('employee.update');
// 削除画面表示
Route::get('/employee/delete/{id}', [EmployeeController::class, 'delete'])->name('employee.delete');
// 削除処理
Route::delete('/employee/destroy/{id}', [EmployeeController::class, 'destroy'])->name('employee.destroy');
一覧画面

削除画面
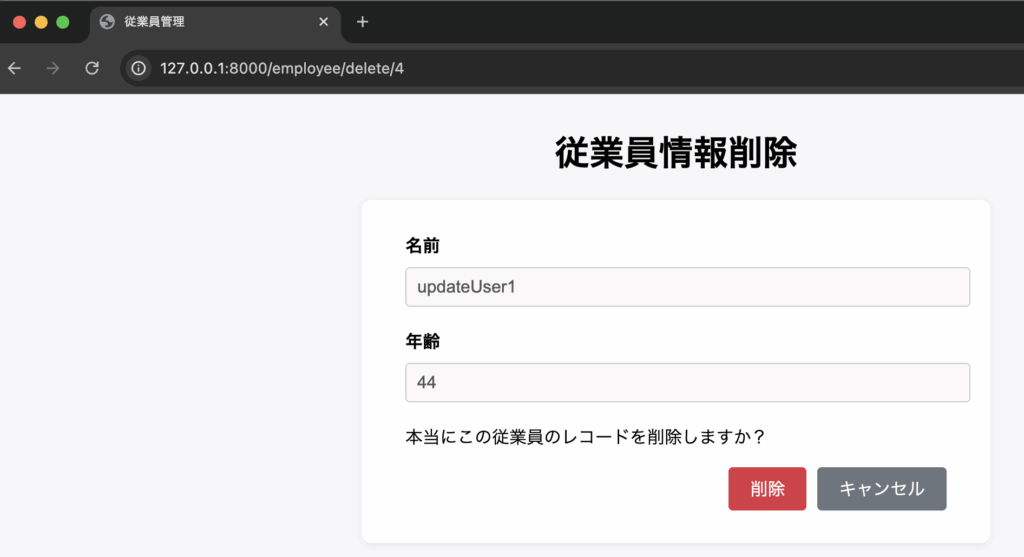
一覧画面

その他の機能
1. セッション
2. ページネーション
3. ユーザー認証
調整中(302〜340)
=======余白=======
=======余白=======
=======余白=======
=======余白=======
=======余白=======
=======余白=======
=======余白=======
=======余白=======
=======余白=======
=======余白=======
=======余白=======
=======余白=======
=======余白=======
=======余白=======
=======余白=======
=======余白=======
=======余白=======
=======余白=======
=======余白=======
=======余白=======
=======余白=======
自動テスト
調整中(341)
Laravel Cloud
調整中(362〜381)
Livewire
1. Livewireとは
2. プロジェクトの作成
3. コンポーネントの作成
1. Livewireとは
Livewireは、PHPで使用できるフロントエンドのフレームワークで、Laravel専用のフレームワークとして提供されています。
2. プロジェクトの作成
既存プロジェクトにLivewireをインストールします。
VSCodeのターミナルに以下のコマンドをたたき、インストールを行います。
composer require livewire/livewire
3. コンポーネントの作成
調整中(97)